PSA Interface Device Setup for wiTECH
How-To setup the PSA Interface Vehicle Communication Interface (VCI) device for wiTECH 2
For video instructions, please see: Video - PSA Interface Device Setup for wiTECH
NOTE: A PSA Interface is required for DS N°8 vehicle diagnostics.
- Download the VCI Setup Utility from Service Box.
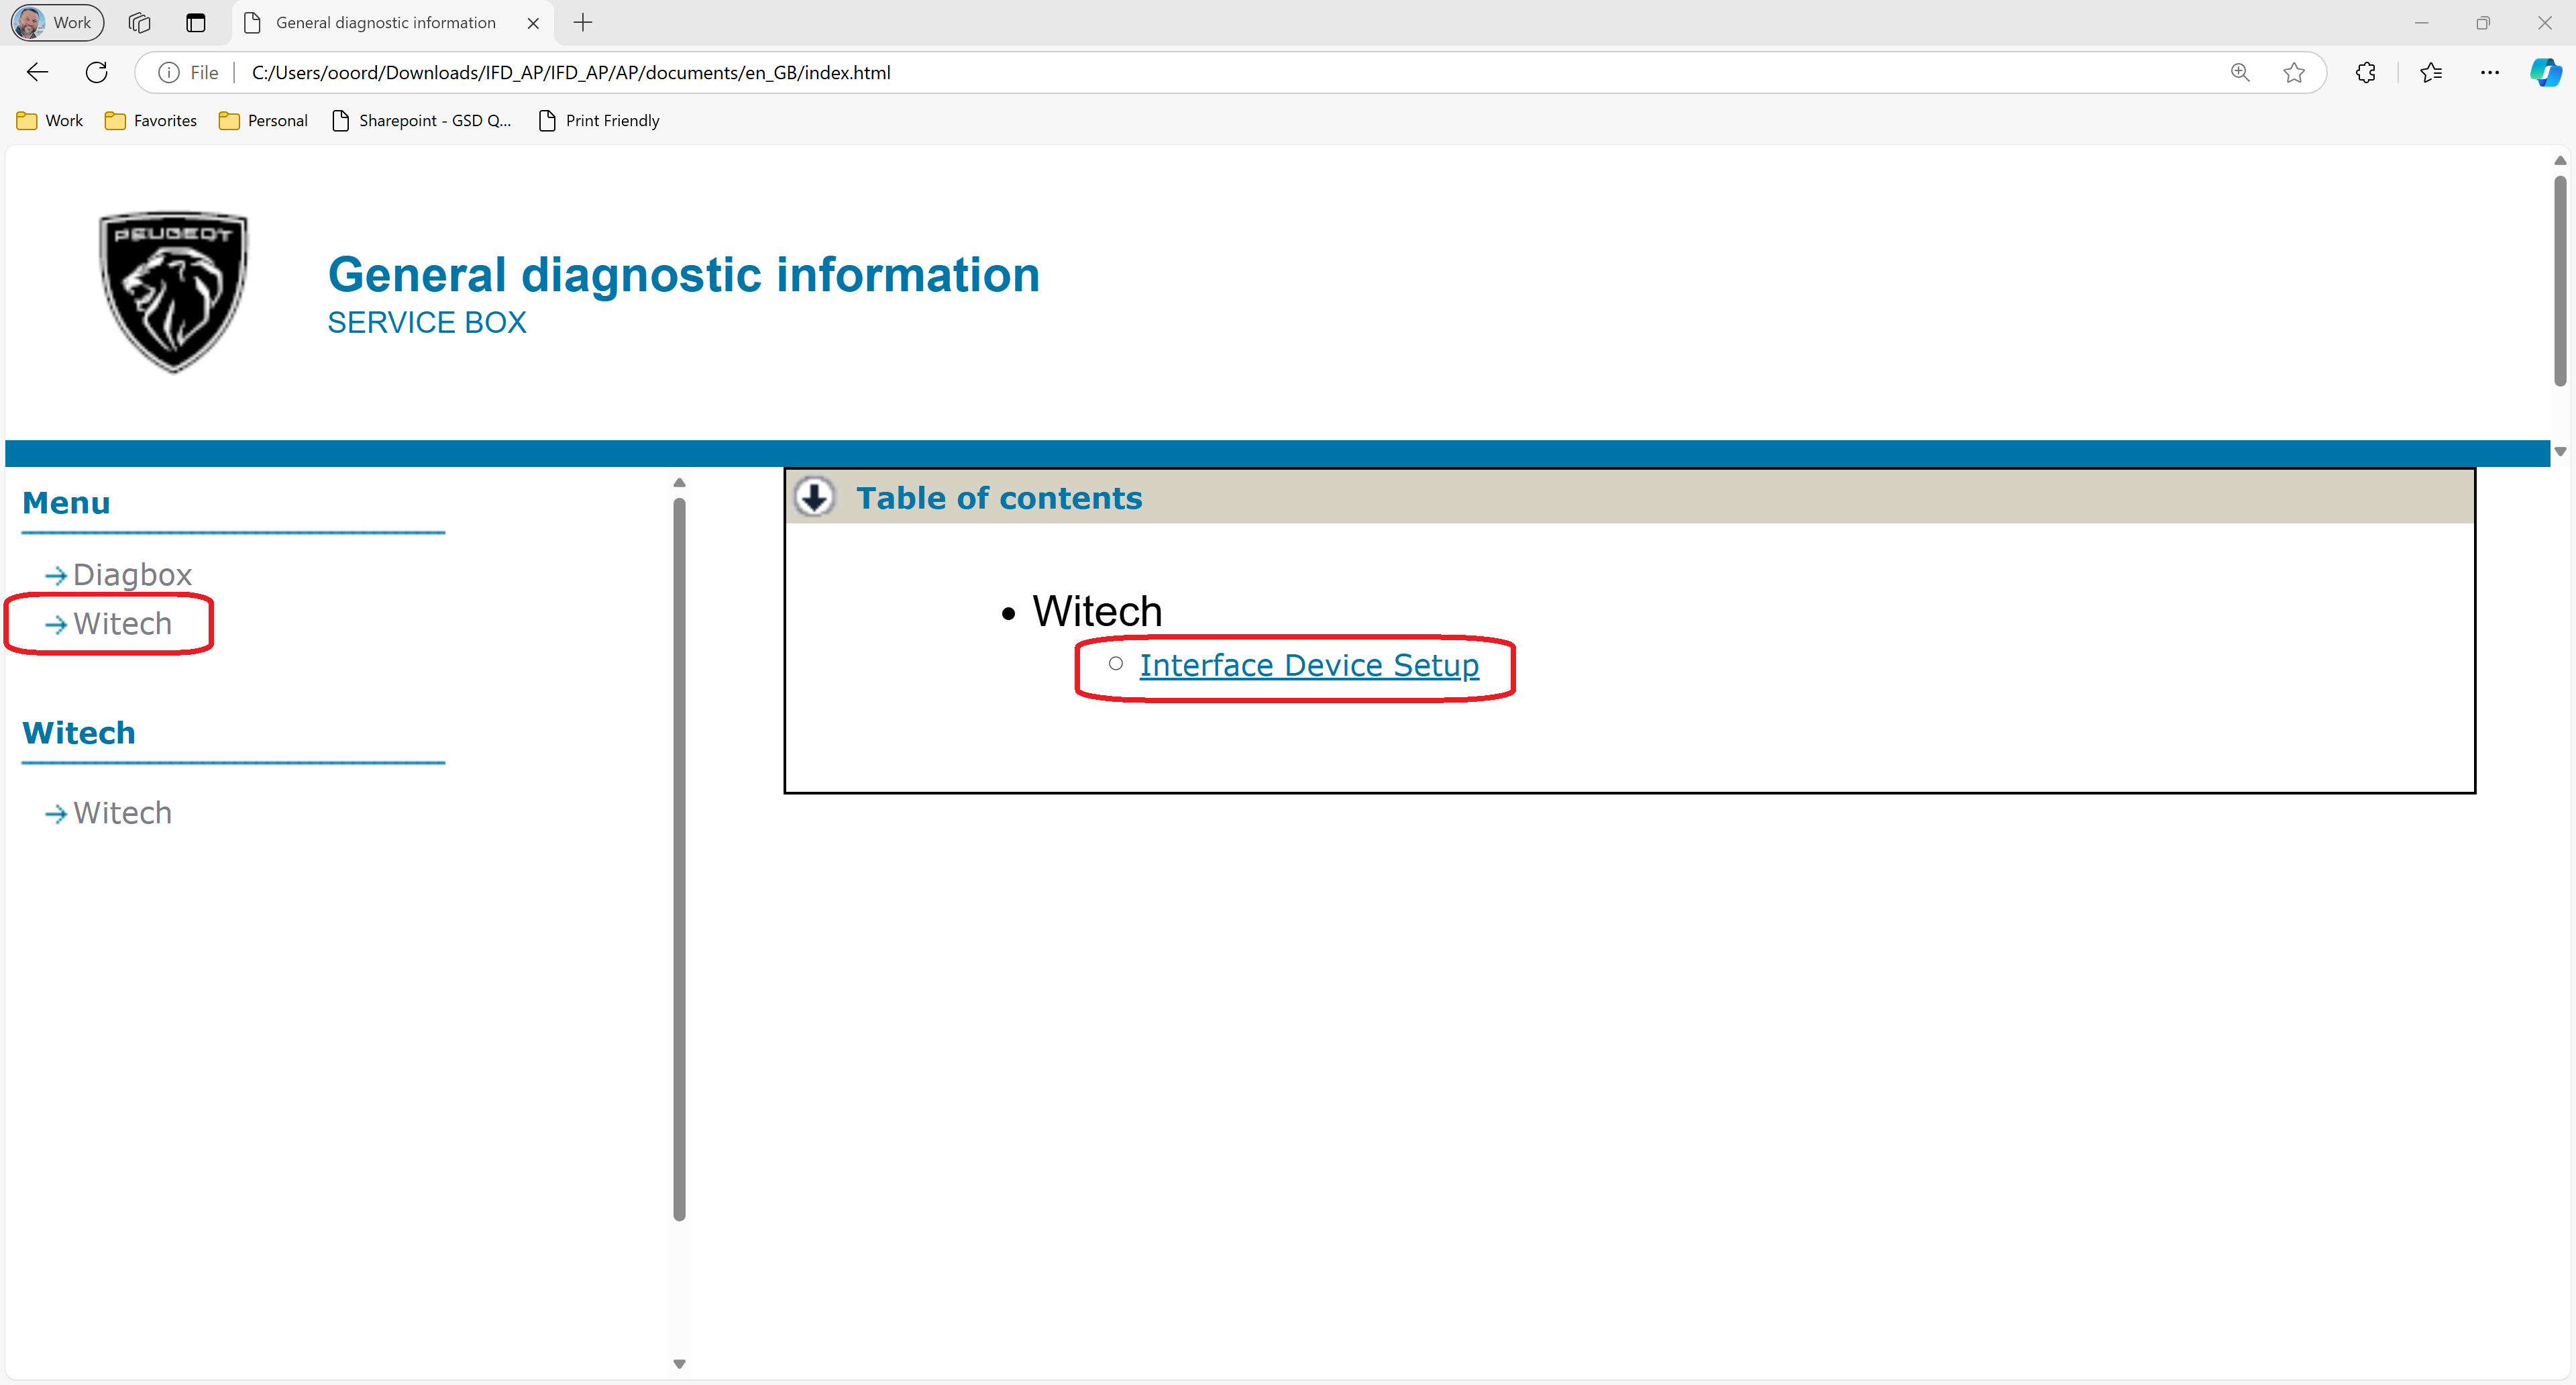
- Launch and complete the VCI Setup Utility installation on a Windows PC.
- NOTE: The VCI Setup Utility installer will install the latest drivers for the VCI devices if required.
- Launch the VCI Setup Utility from the Desktop.

- Select the PSA Interface device in the VCI Setup Utility
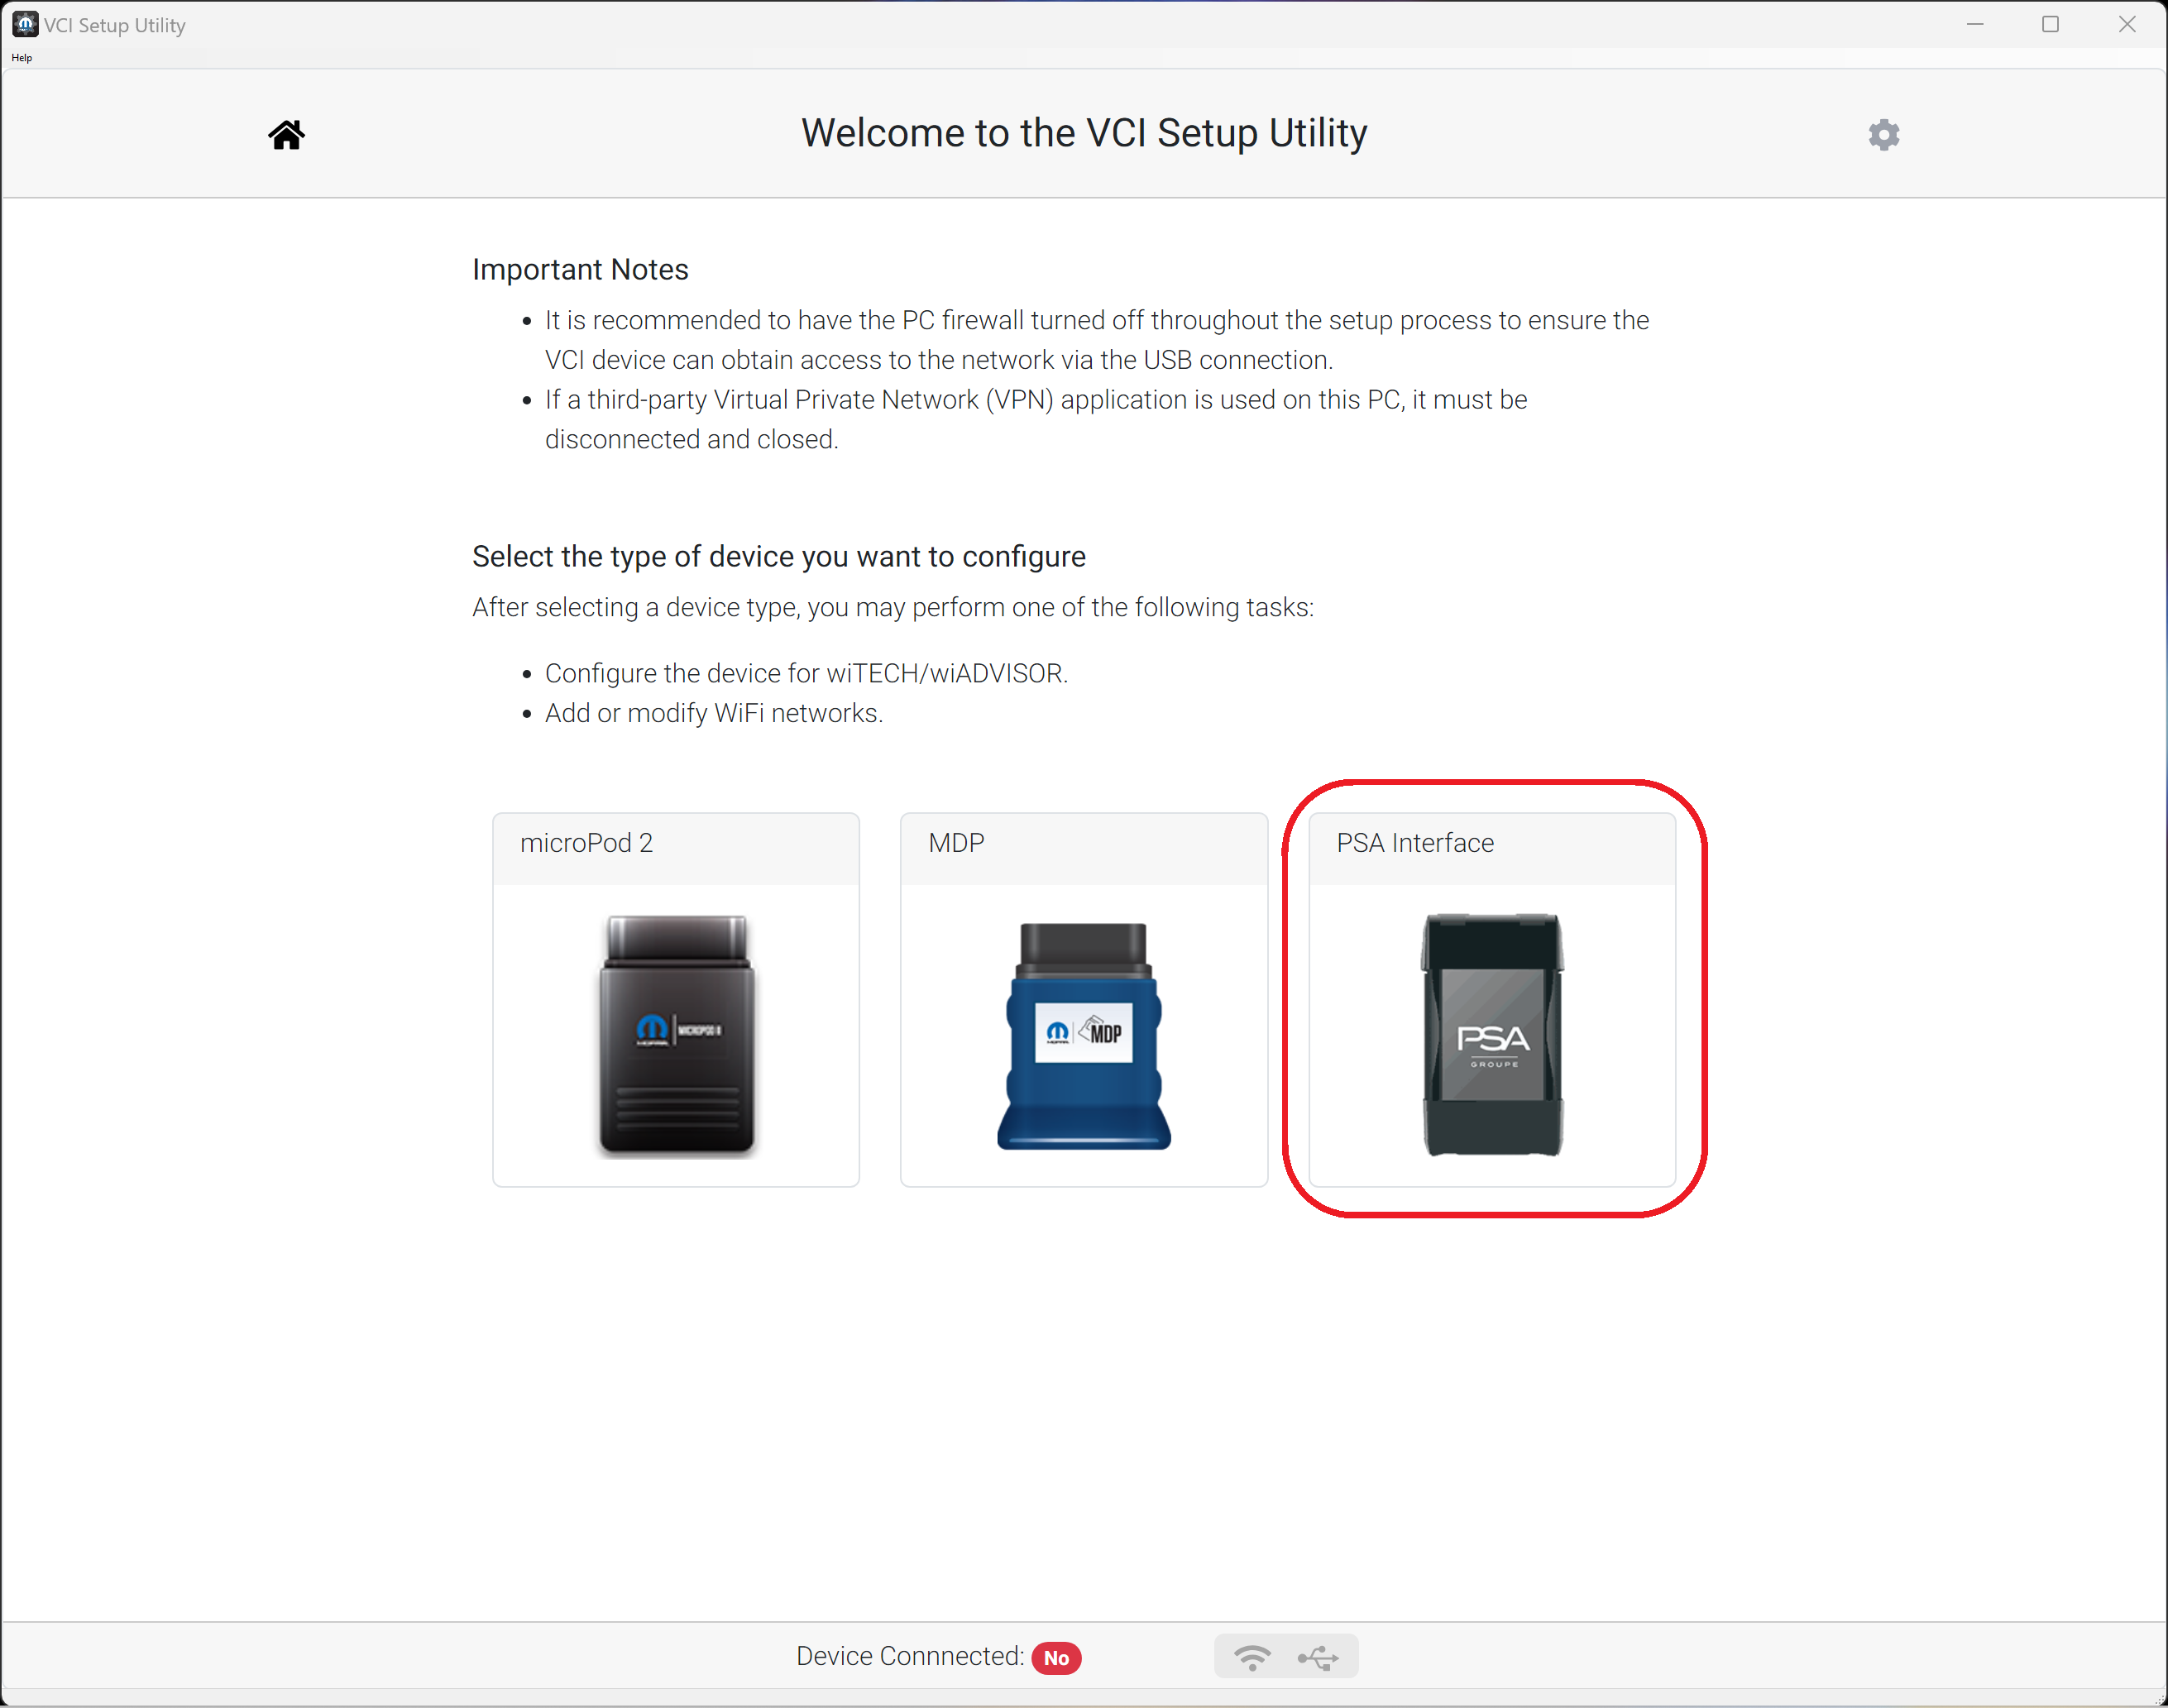
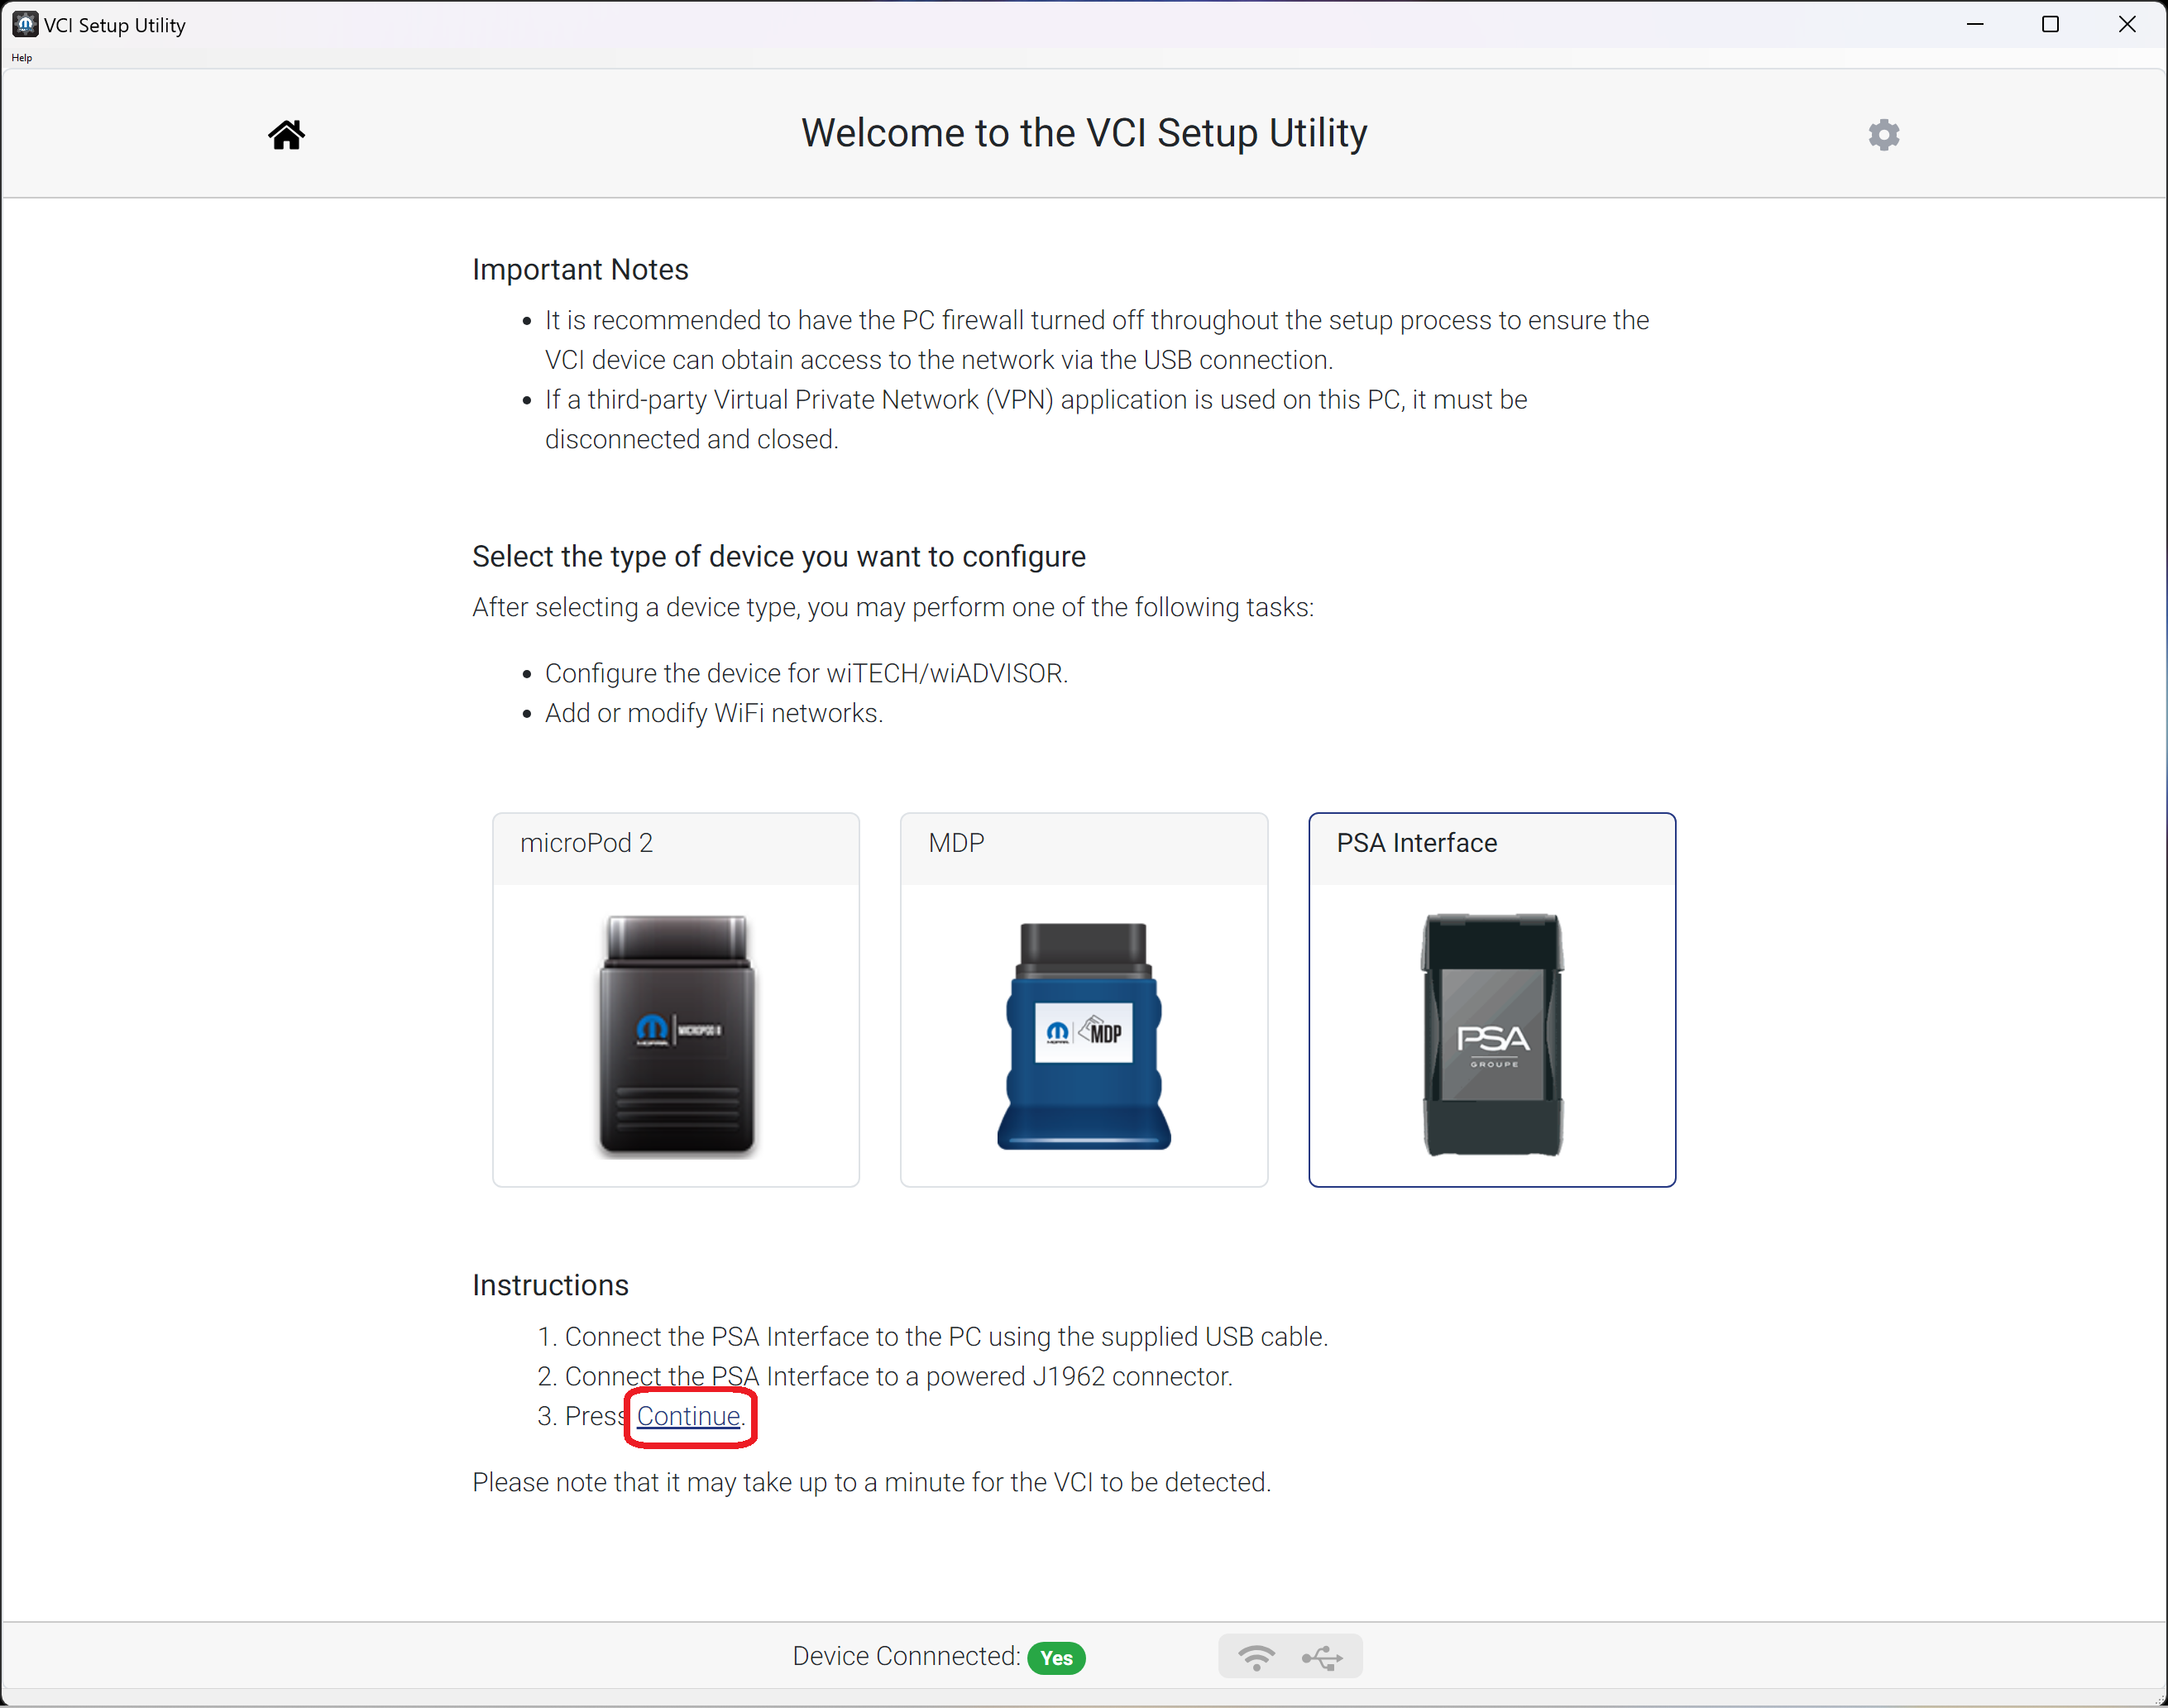
- Connect the PSA Interface to the PC via USB.
- Connect the PSA Interface to the vehicle J1962 connector.
- Select "Continue" in the VCI Setup Utility
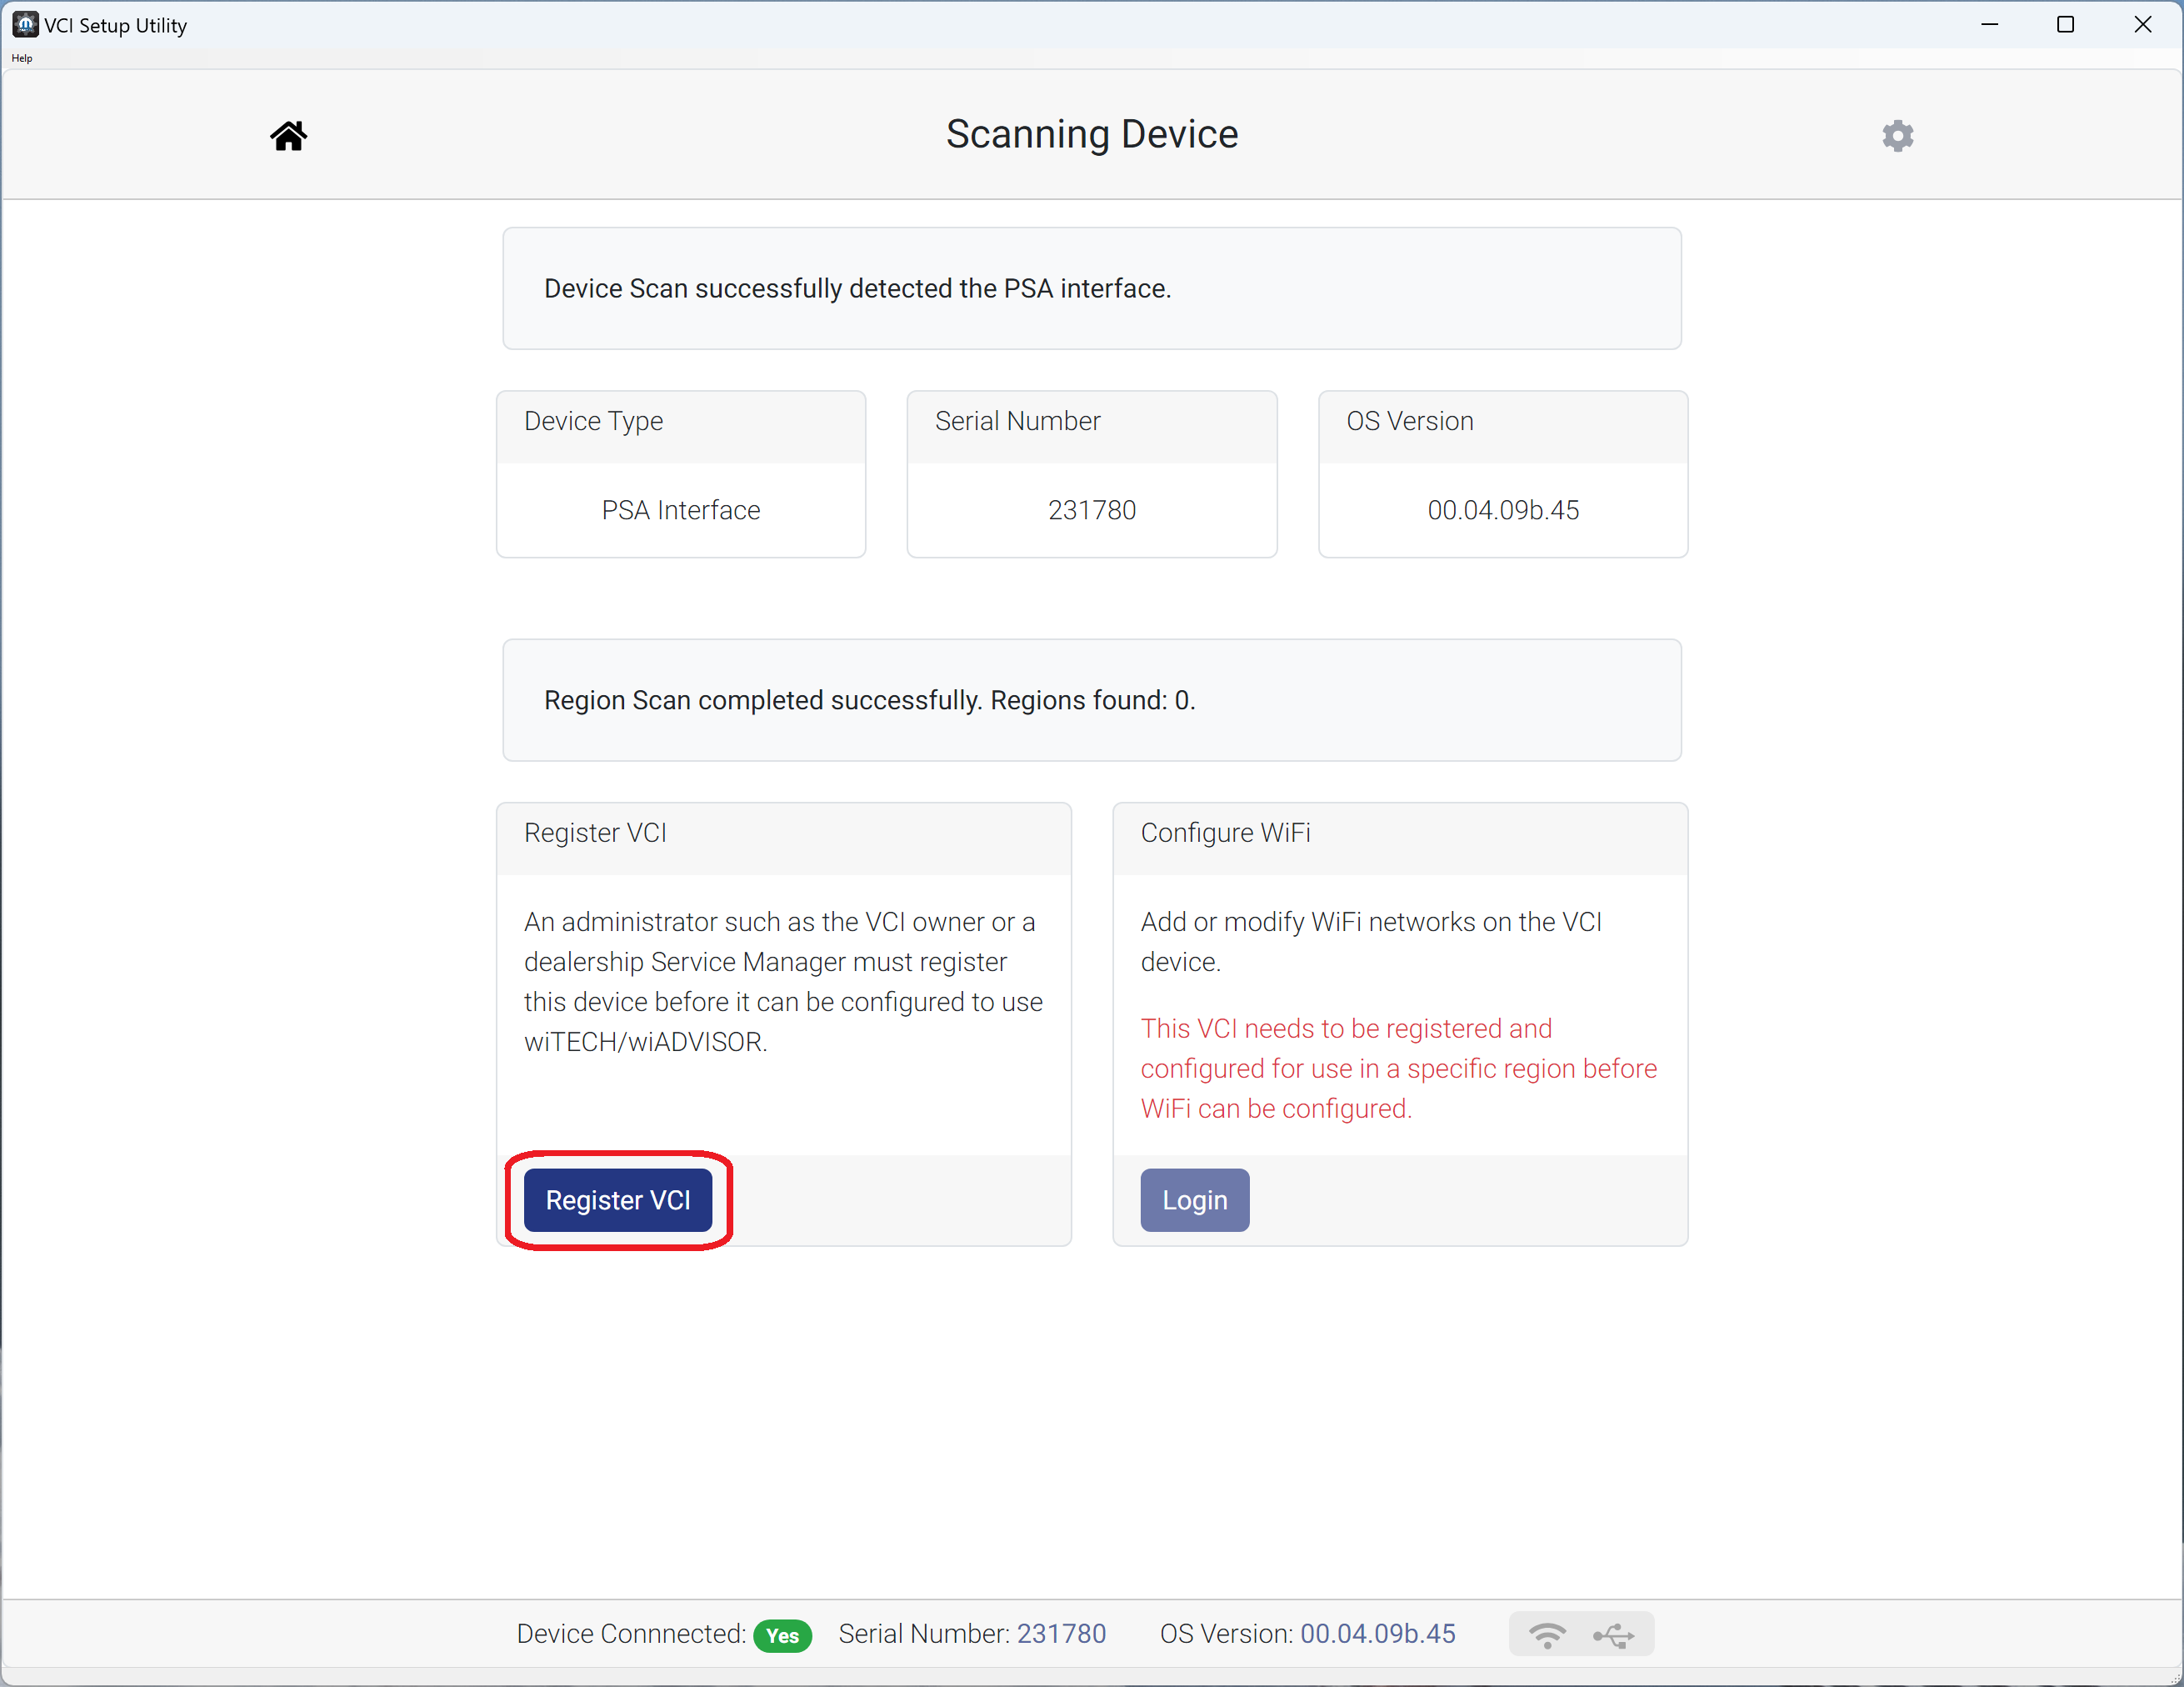
- The VCI Setup Utility successfully detects the PSA Interface device, then checks if the device is registered to any regions.
- If a region is detected and this PSA Interface device has previously been used with wiTECH, select "Configure VCI" and continue to Step 9.
- If no regions are detected and this PSA Interface device has NOT been used with wiTECH previously, the Service Manager will need to complete the following:
- Select "Register VCI".
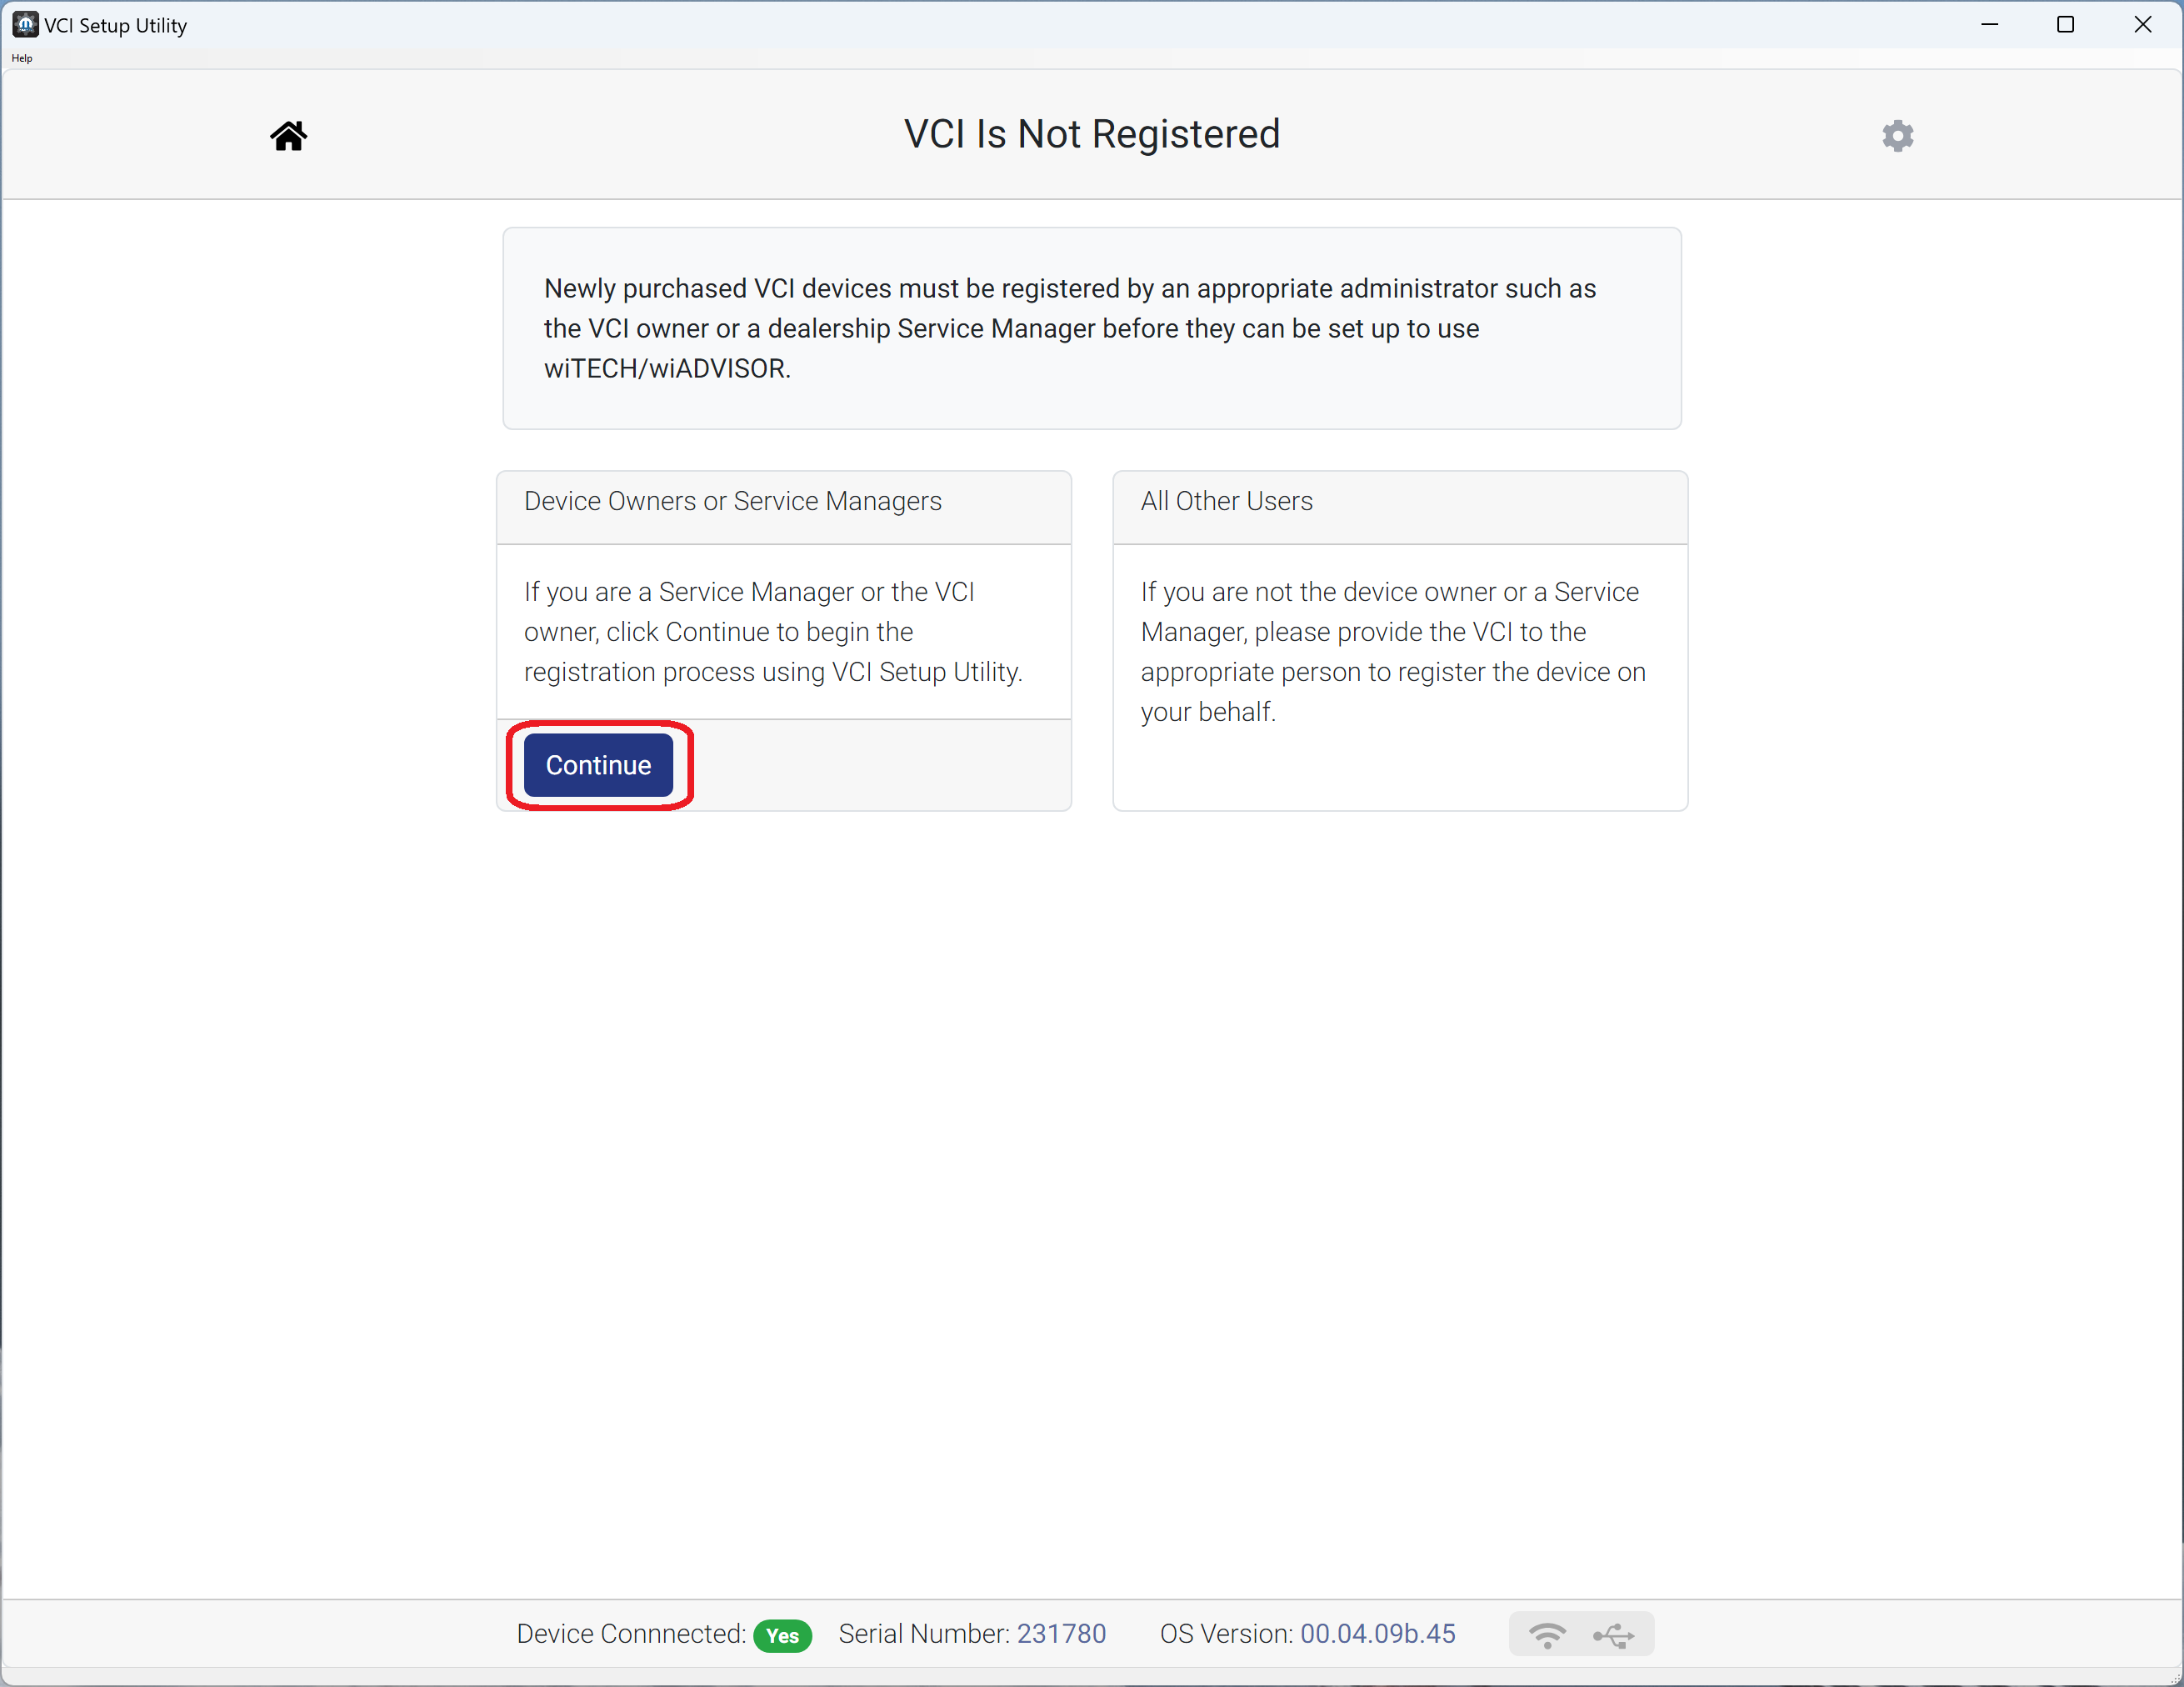
- The VCI Setup Utility prompts the user that the Service Manager must complete the following steps. The Service Manager selects "Continue".
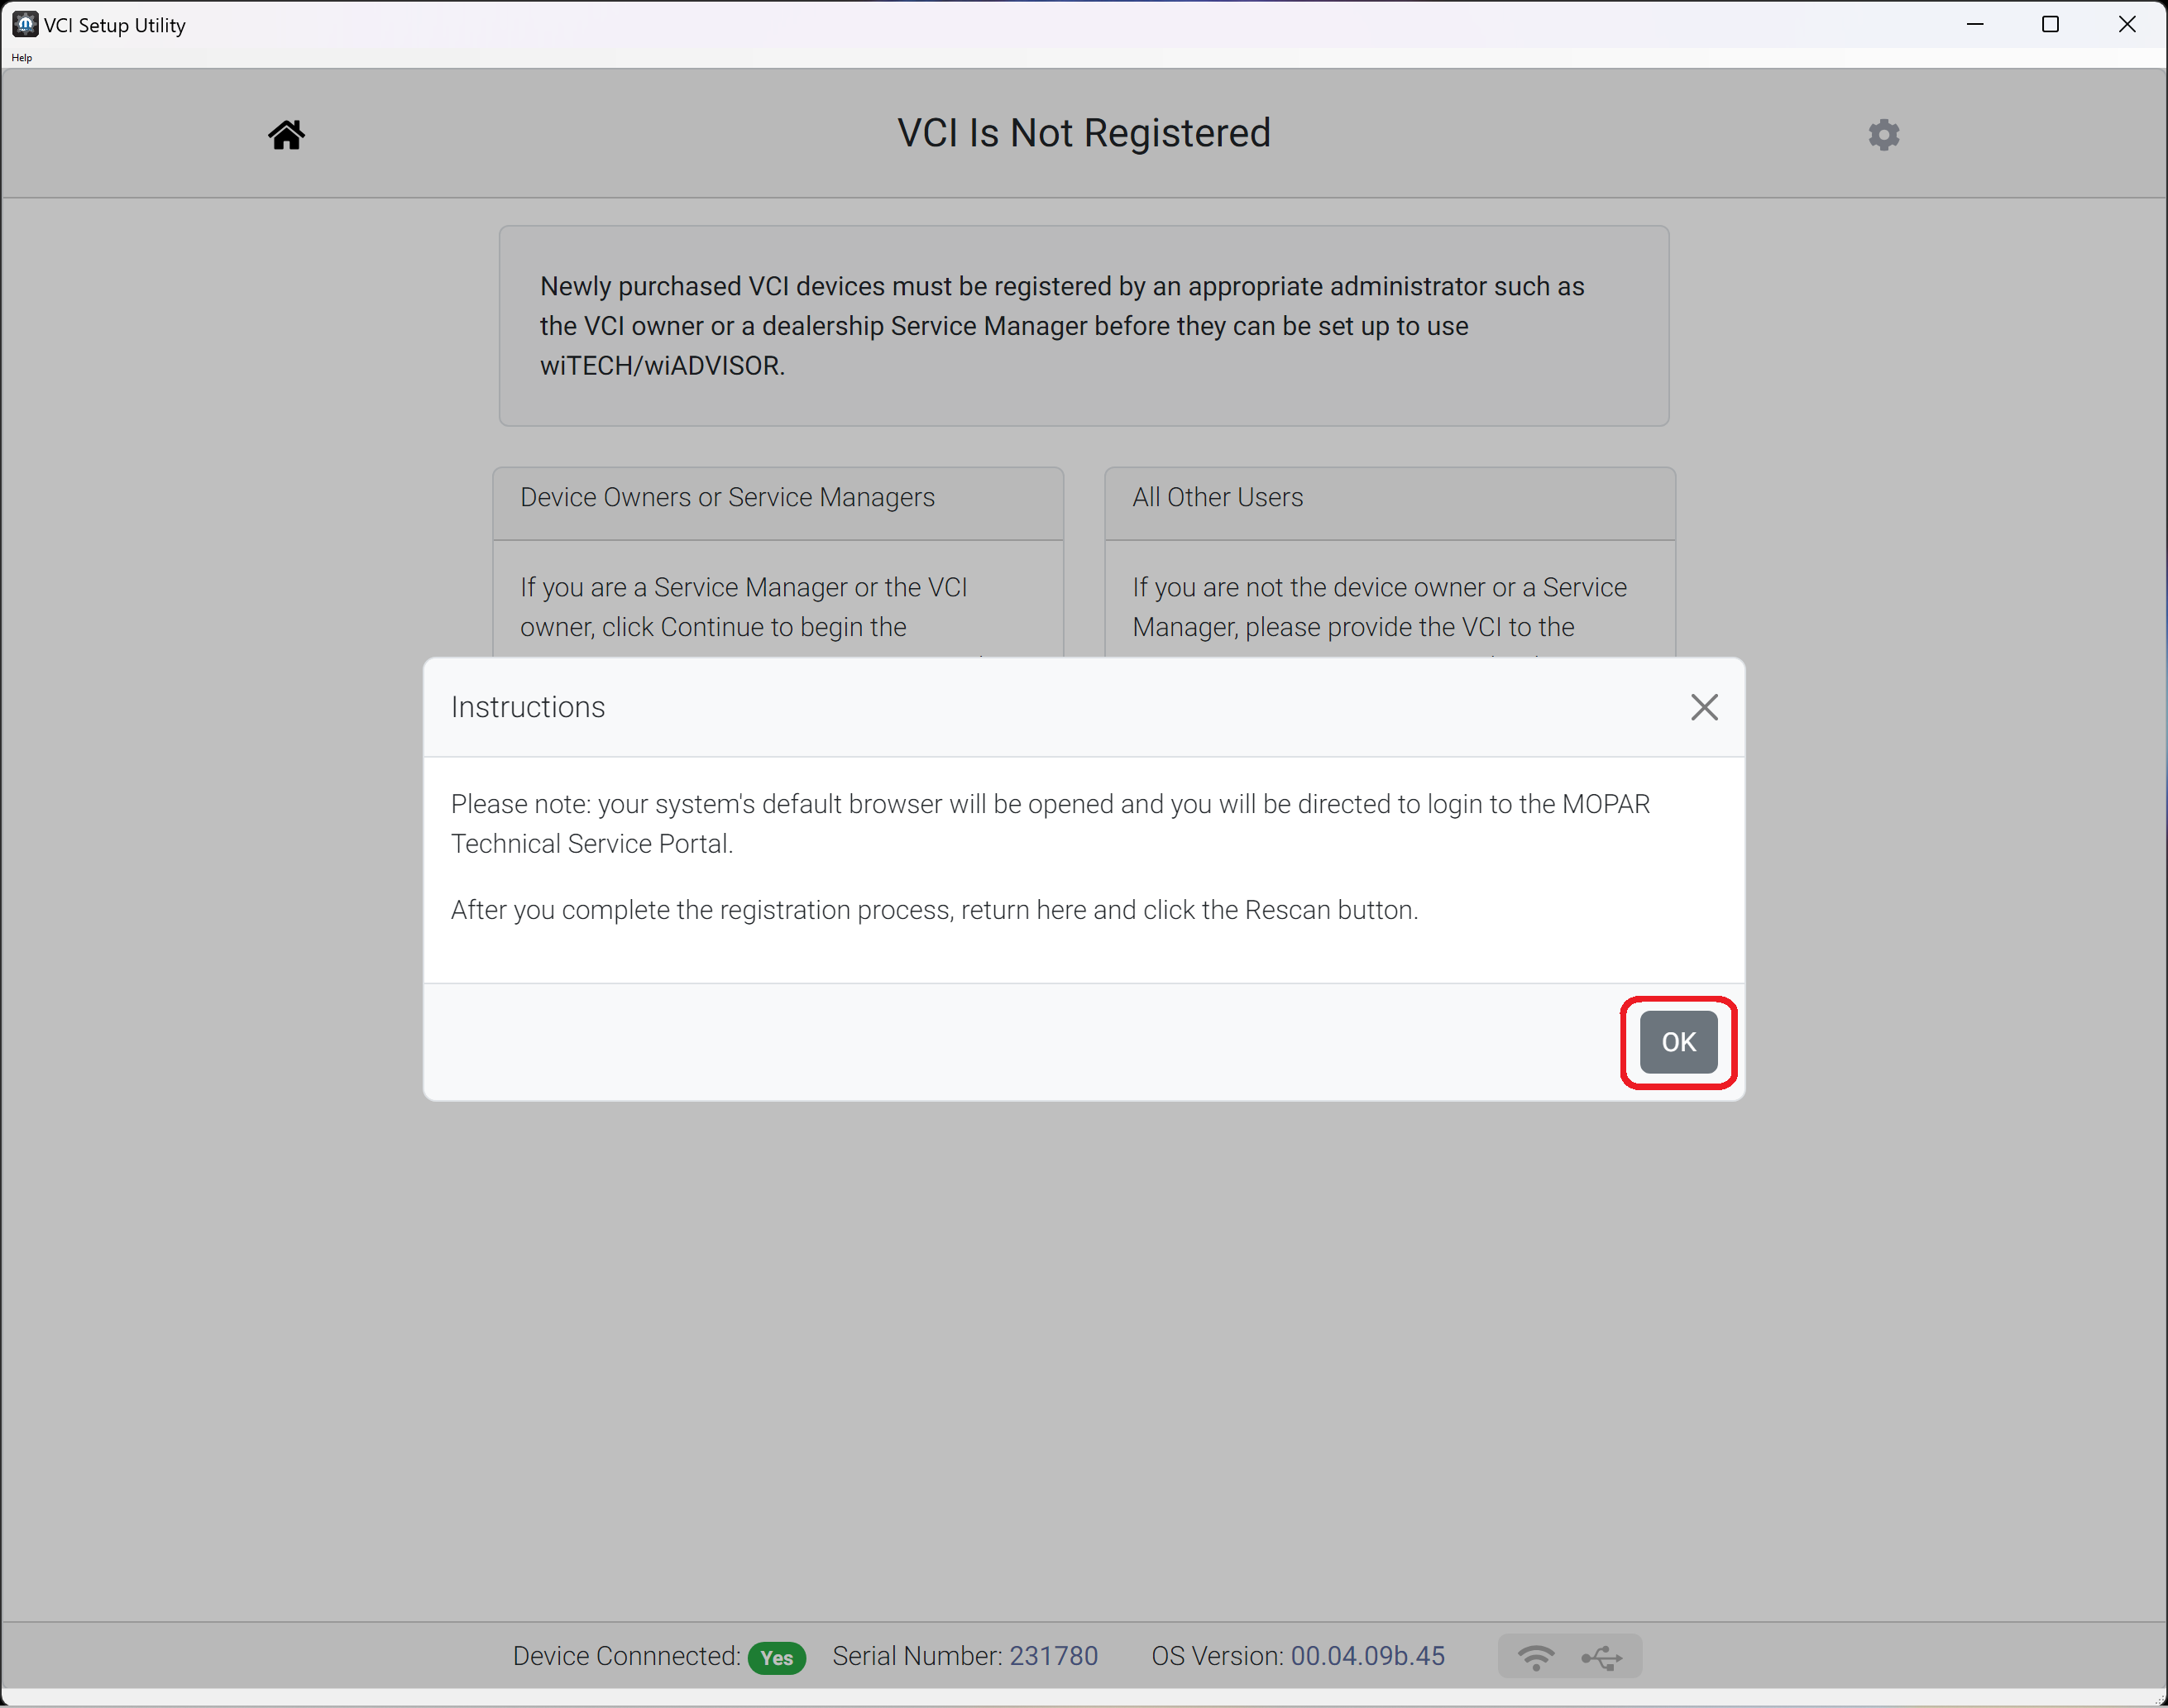
- Further instructions appear, read them, and select "OK"
- The Mopar Technical Service Portal (MTSP) opens in the default browser. Log into the MTSP with valid credentials.
NOTE: Upon first login, MTSP will request the dealer’s address. When prompted, enter the requested information and proceed.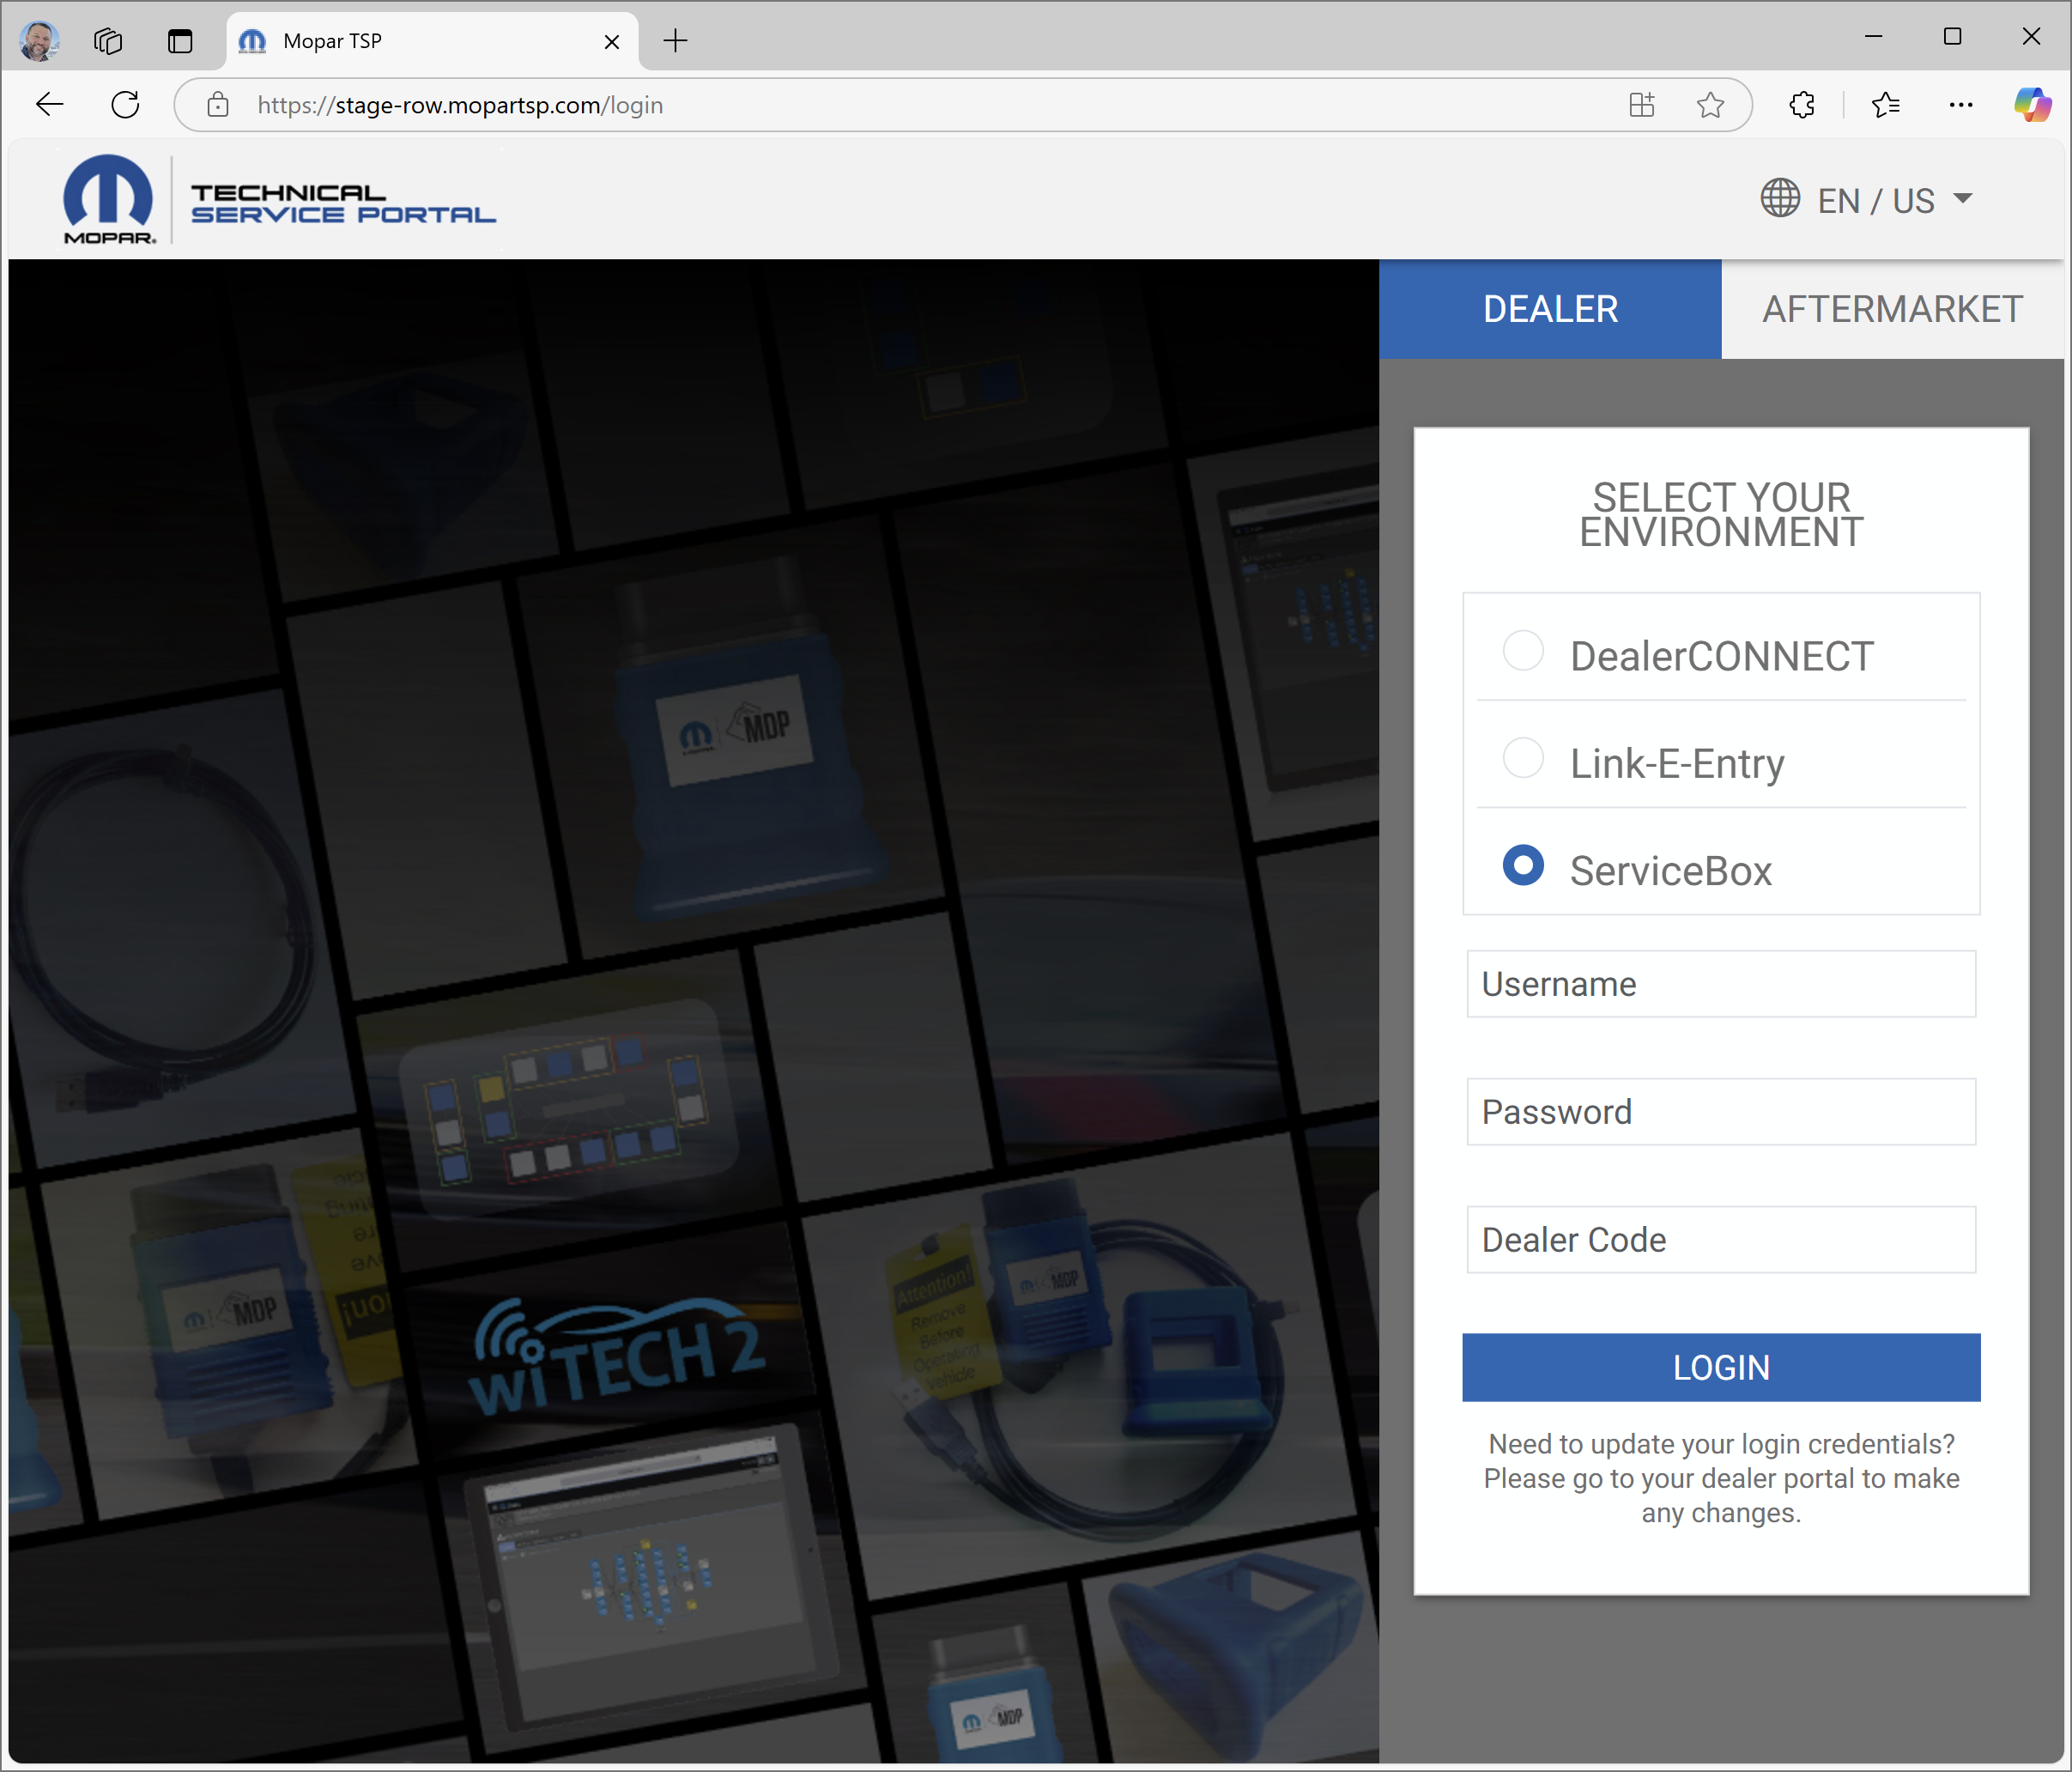
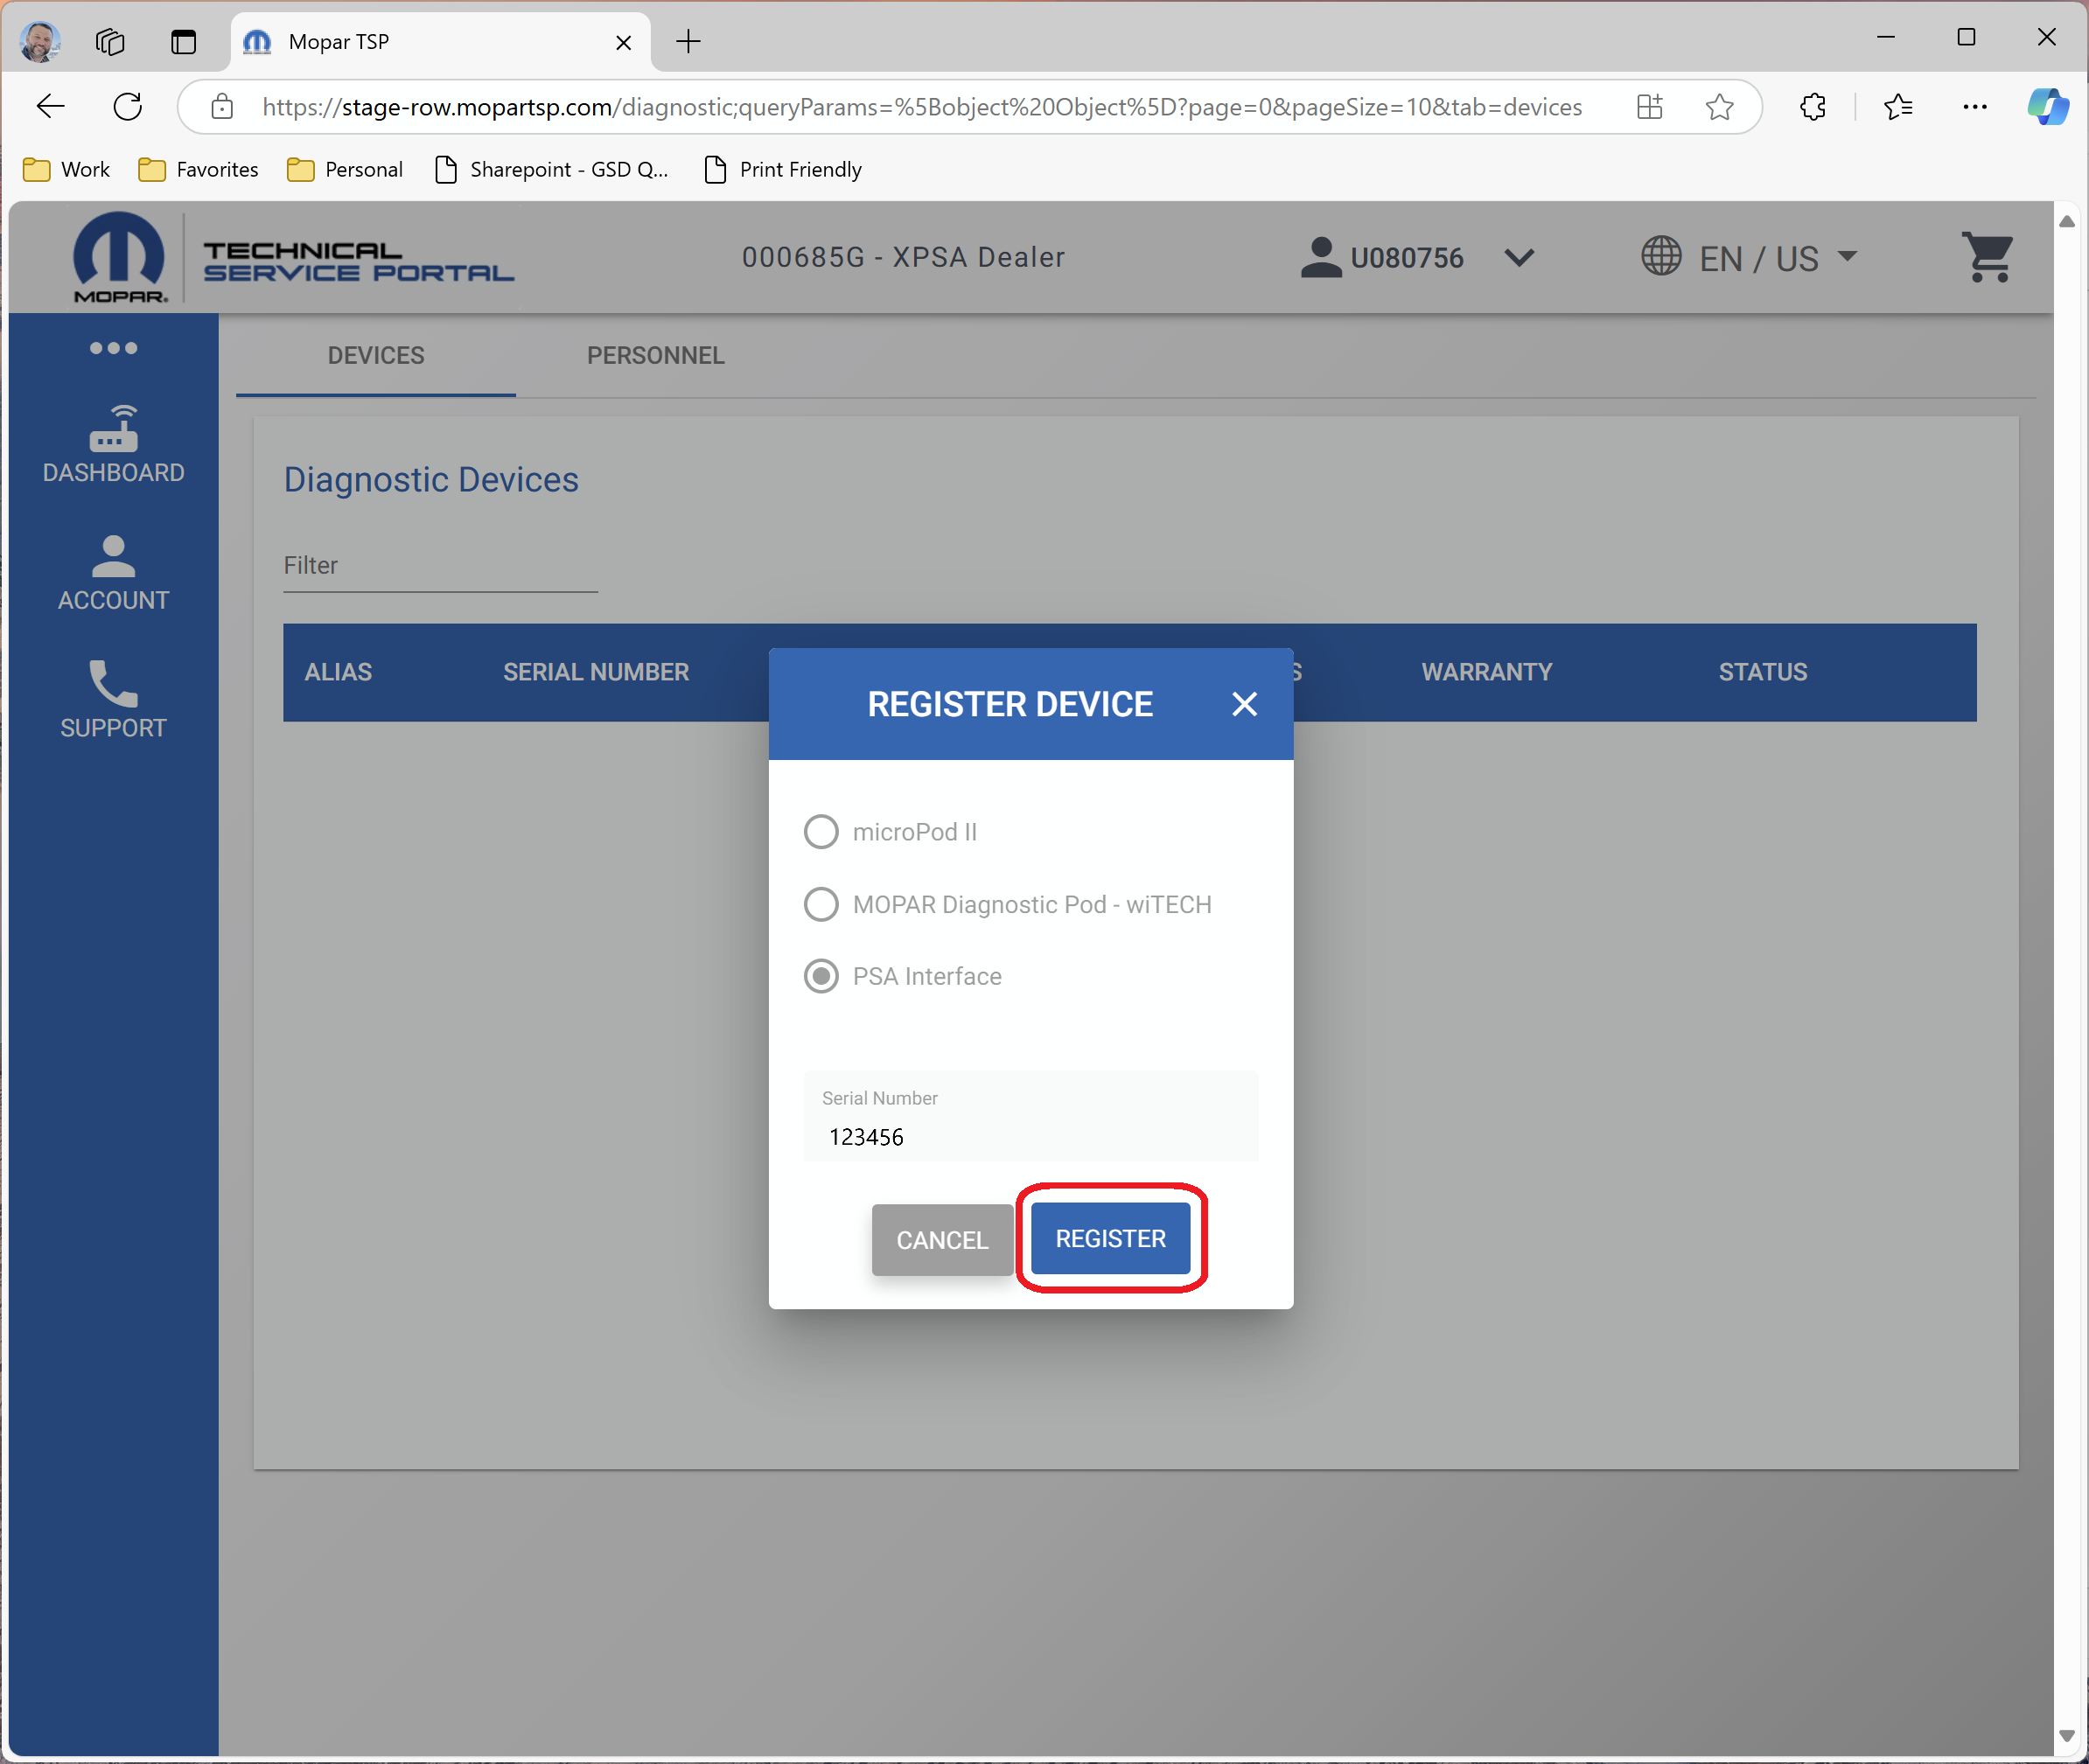
- MTSP loads to the Register Device page and automatically populates the PSA Interface Serial Number. Select "Register".
- MTSP registers the PSA Interface Device to the user’s account.
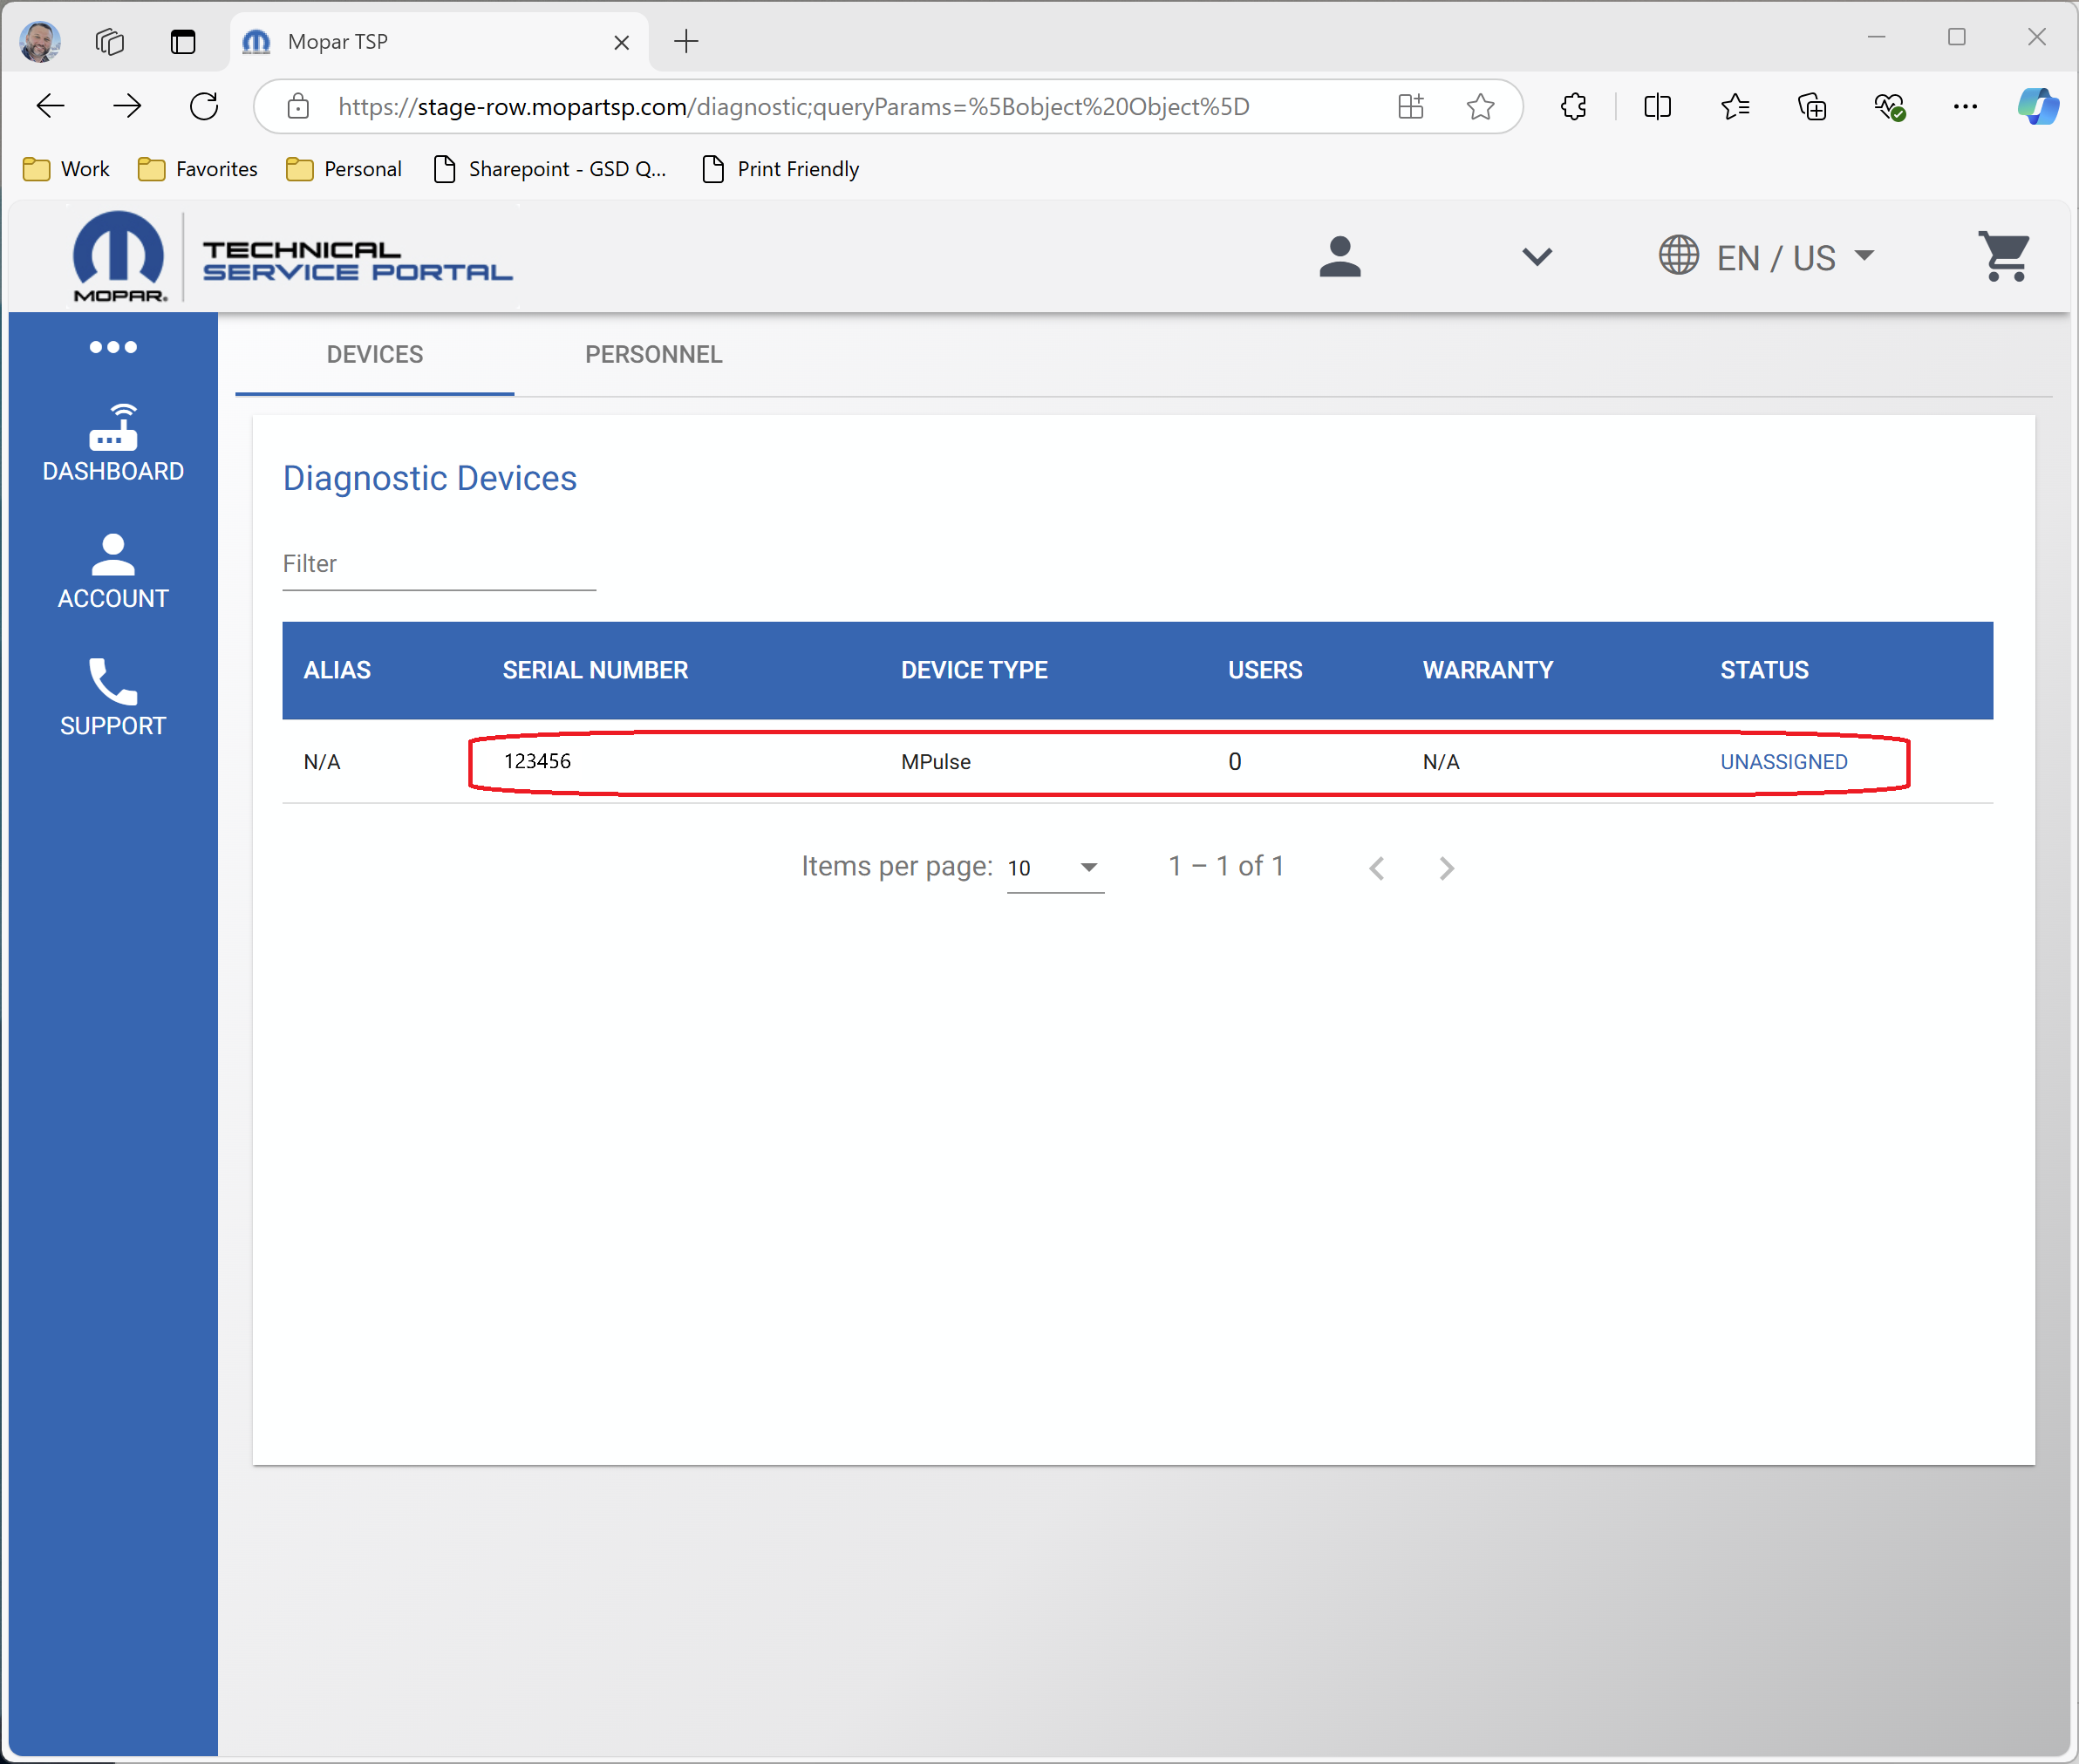
- Select the desired VCI device to add wiTECH users.
- Select the green " " button next to each user who will use the particular PSA Interface VCI device with wiTECH. When the green " " button is selected, that user moves to the Associated Users list.
NOTE: Add the Service Manager’s ID to each device to allow the Service Manager to complete setup with the VCI Setup Utility.
NOTE: It may take up to 20 minutes for users to be able to access the newly added PSA Interface VCI in wiTECH.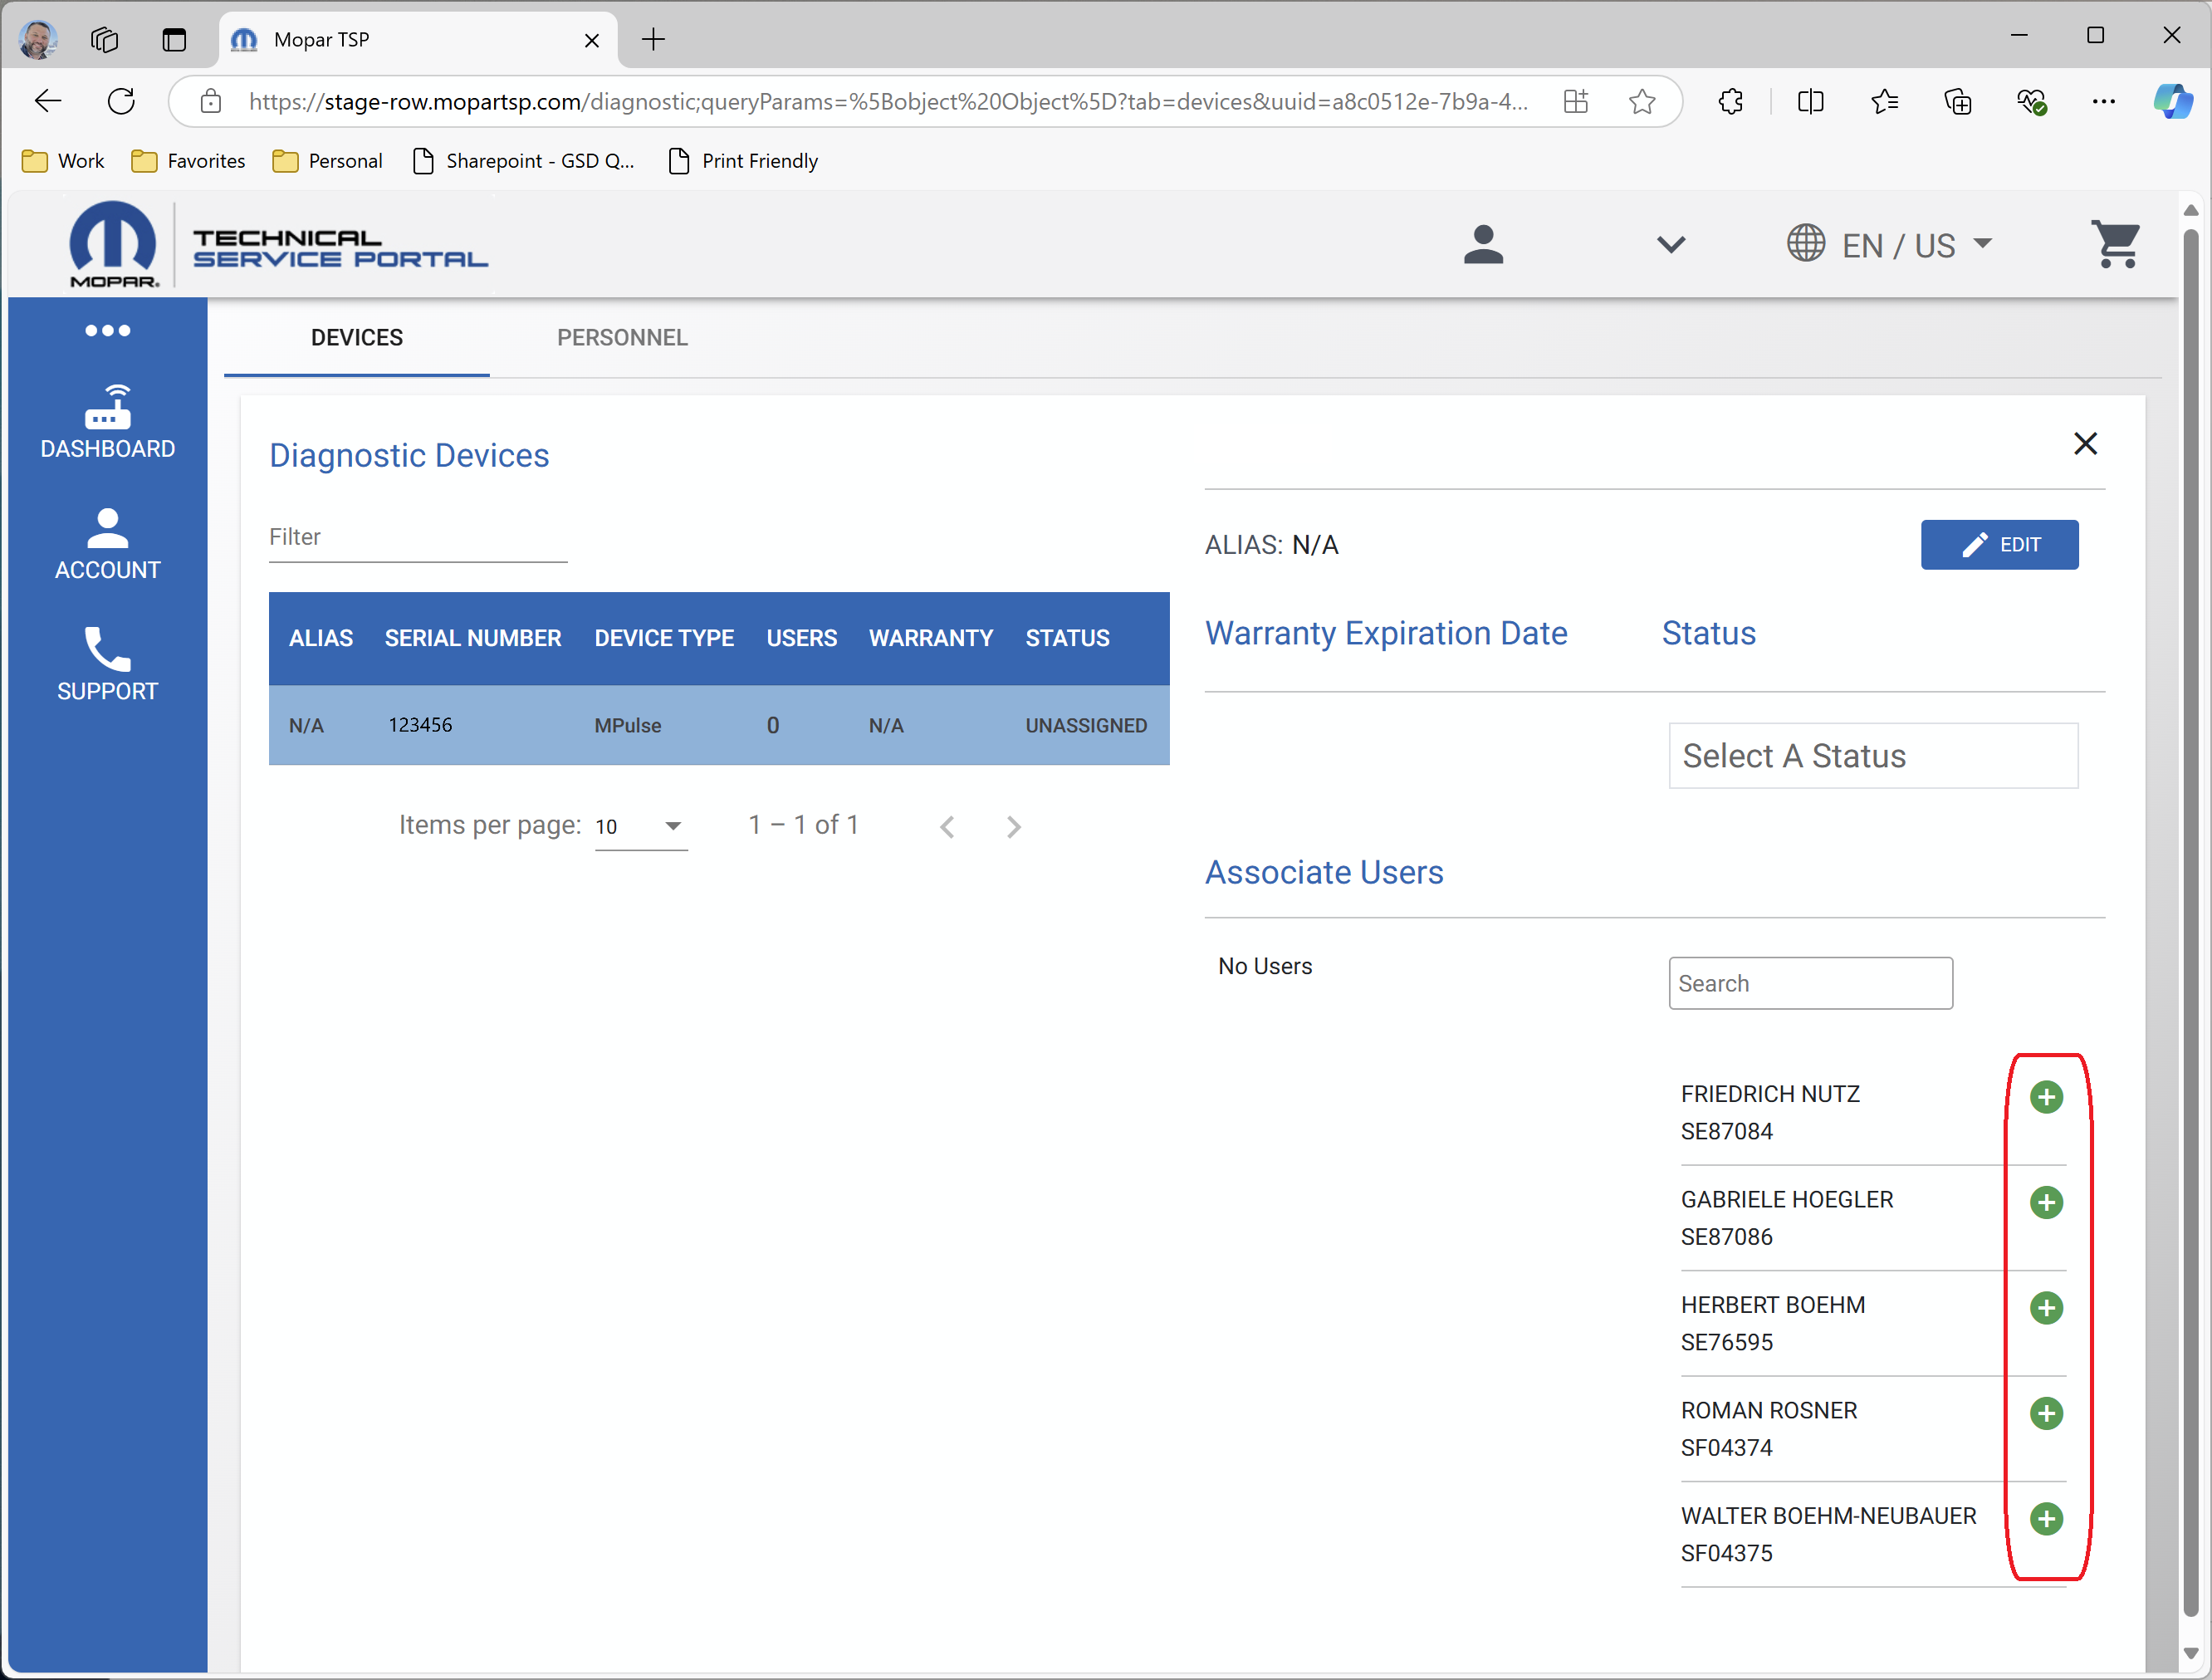
- Close MTSP.
- Return to the VCI Setup Utility and select "Rescan".
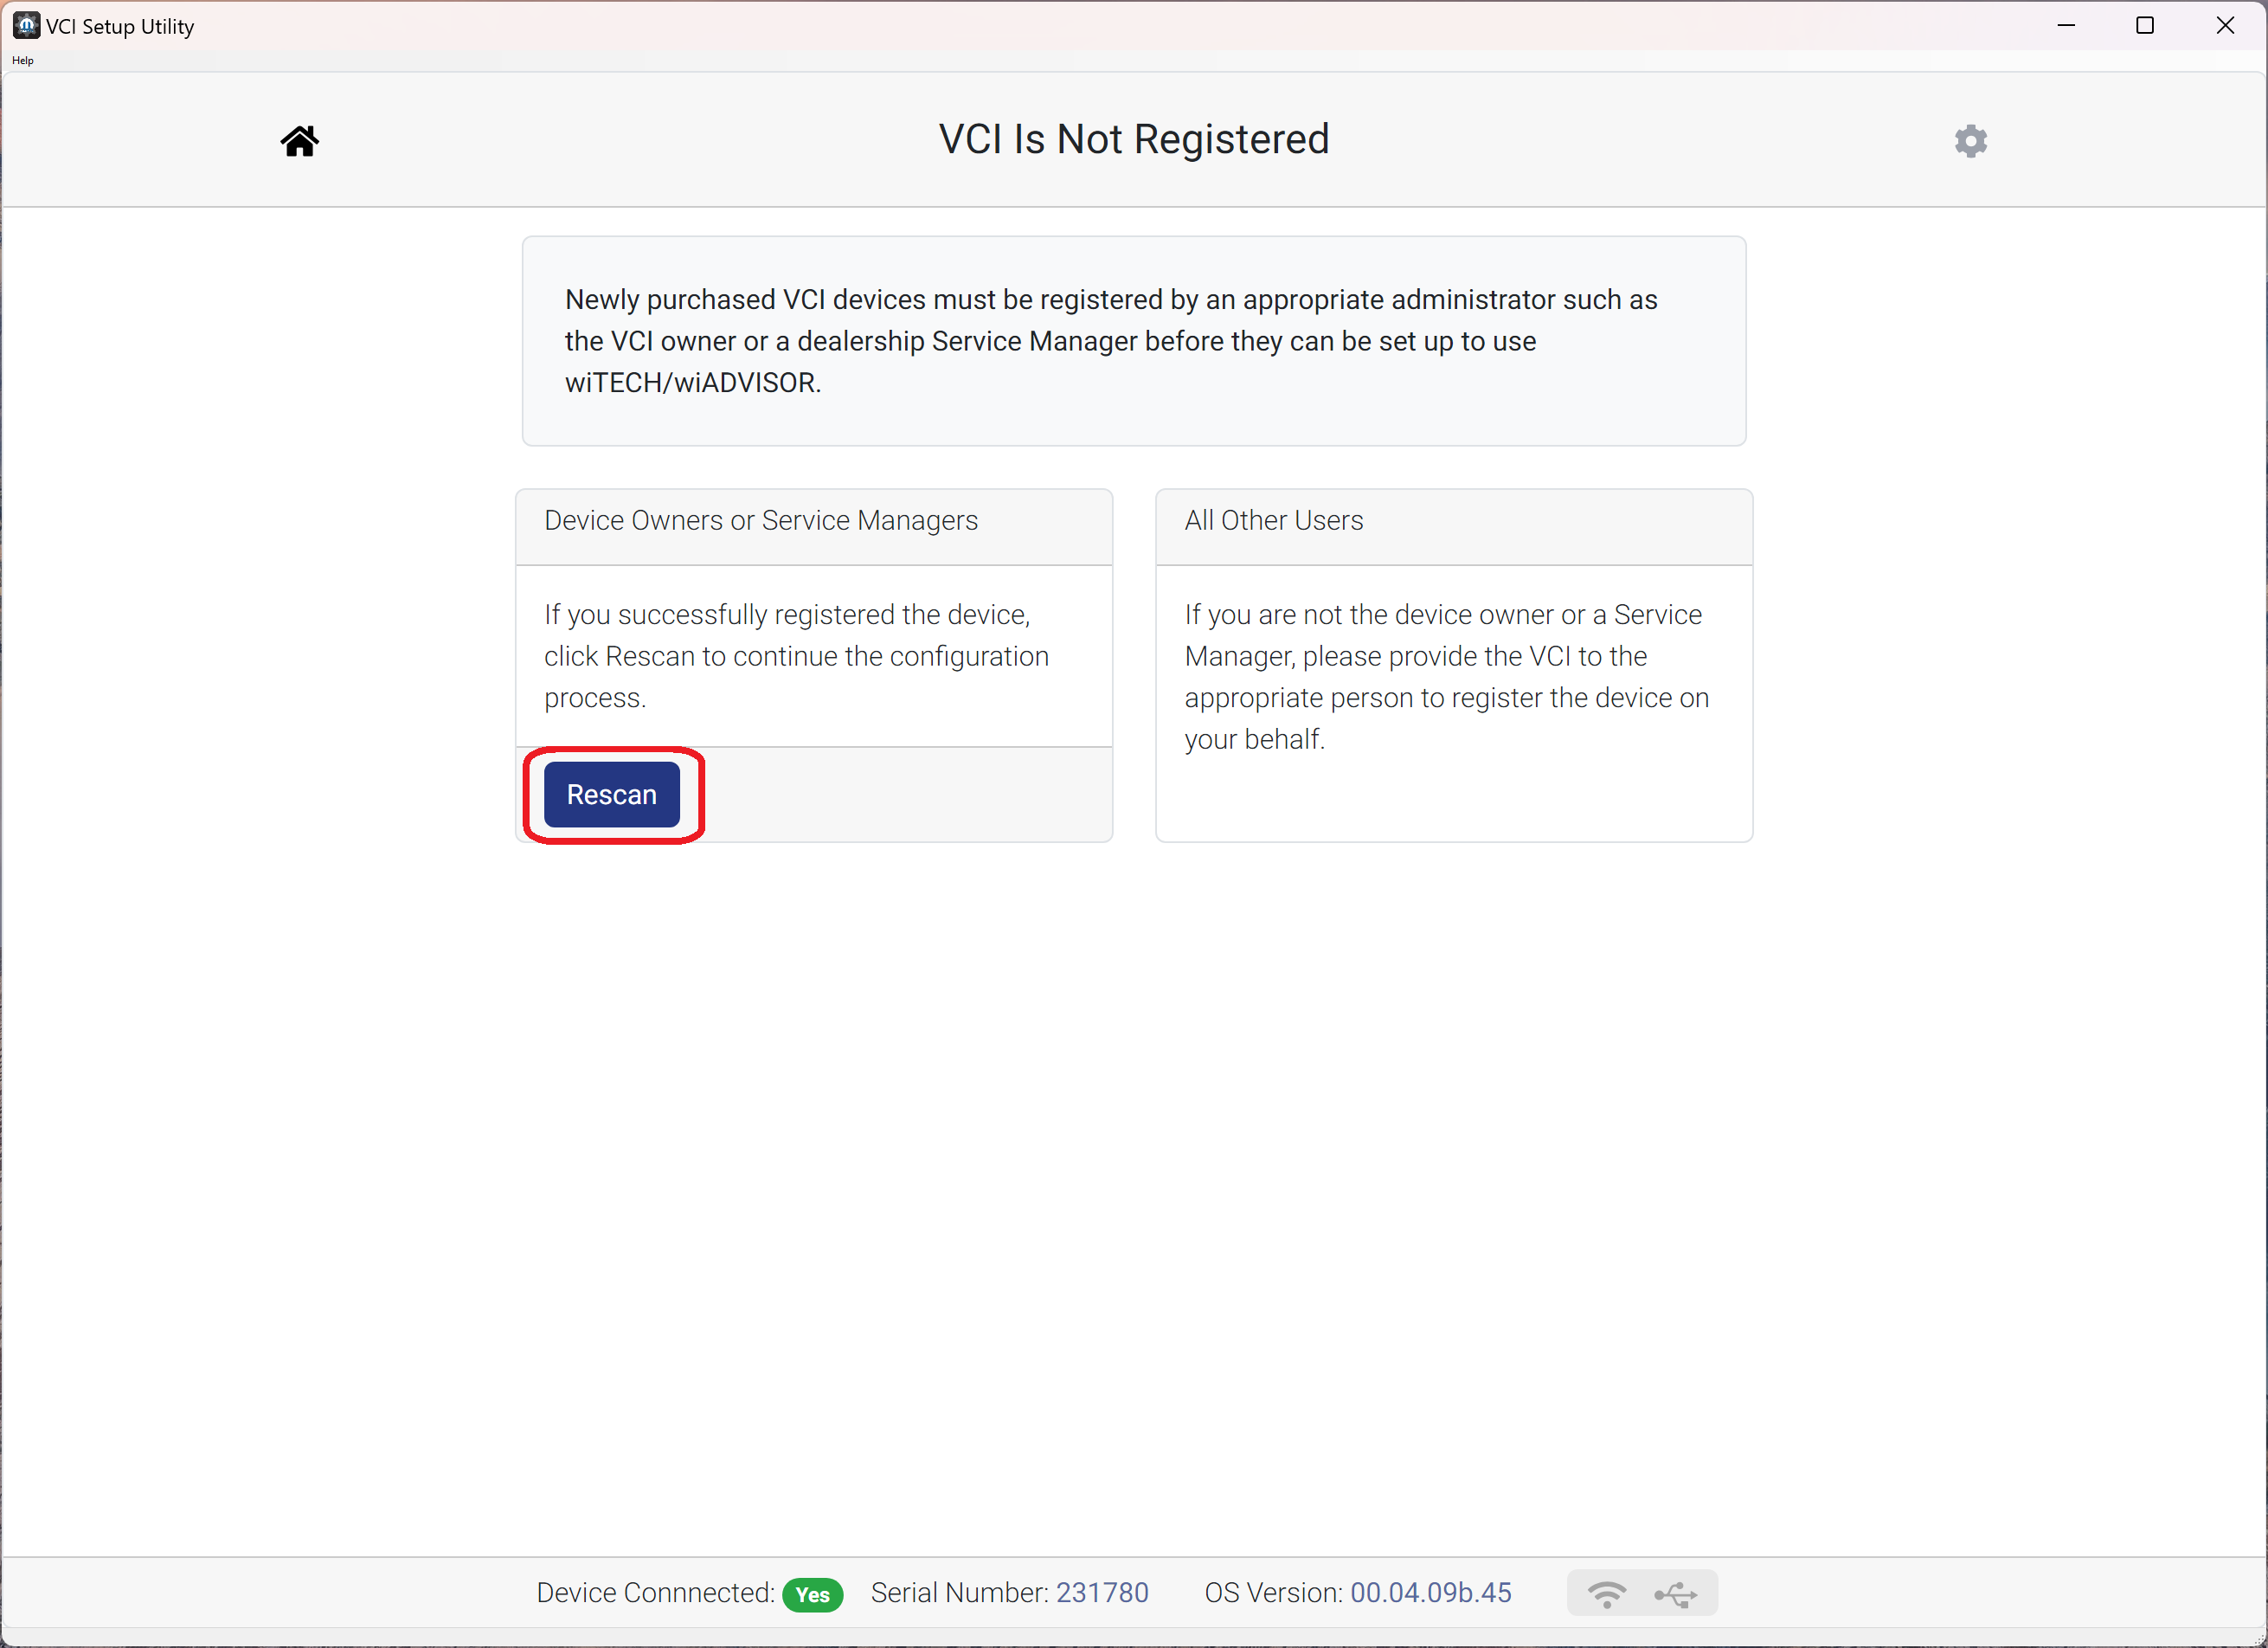
- Select "Register VCI".
- The VCI Setup Utility detects and lists the PSA Interface device associated region/s. Select "Login" for the desired region.
NOTE: Ensure 20 minutes has passed since completing Step H.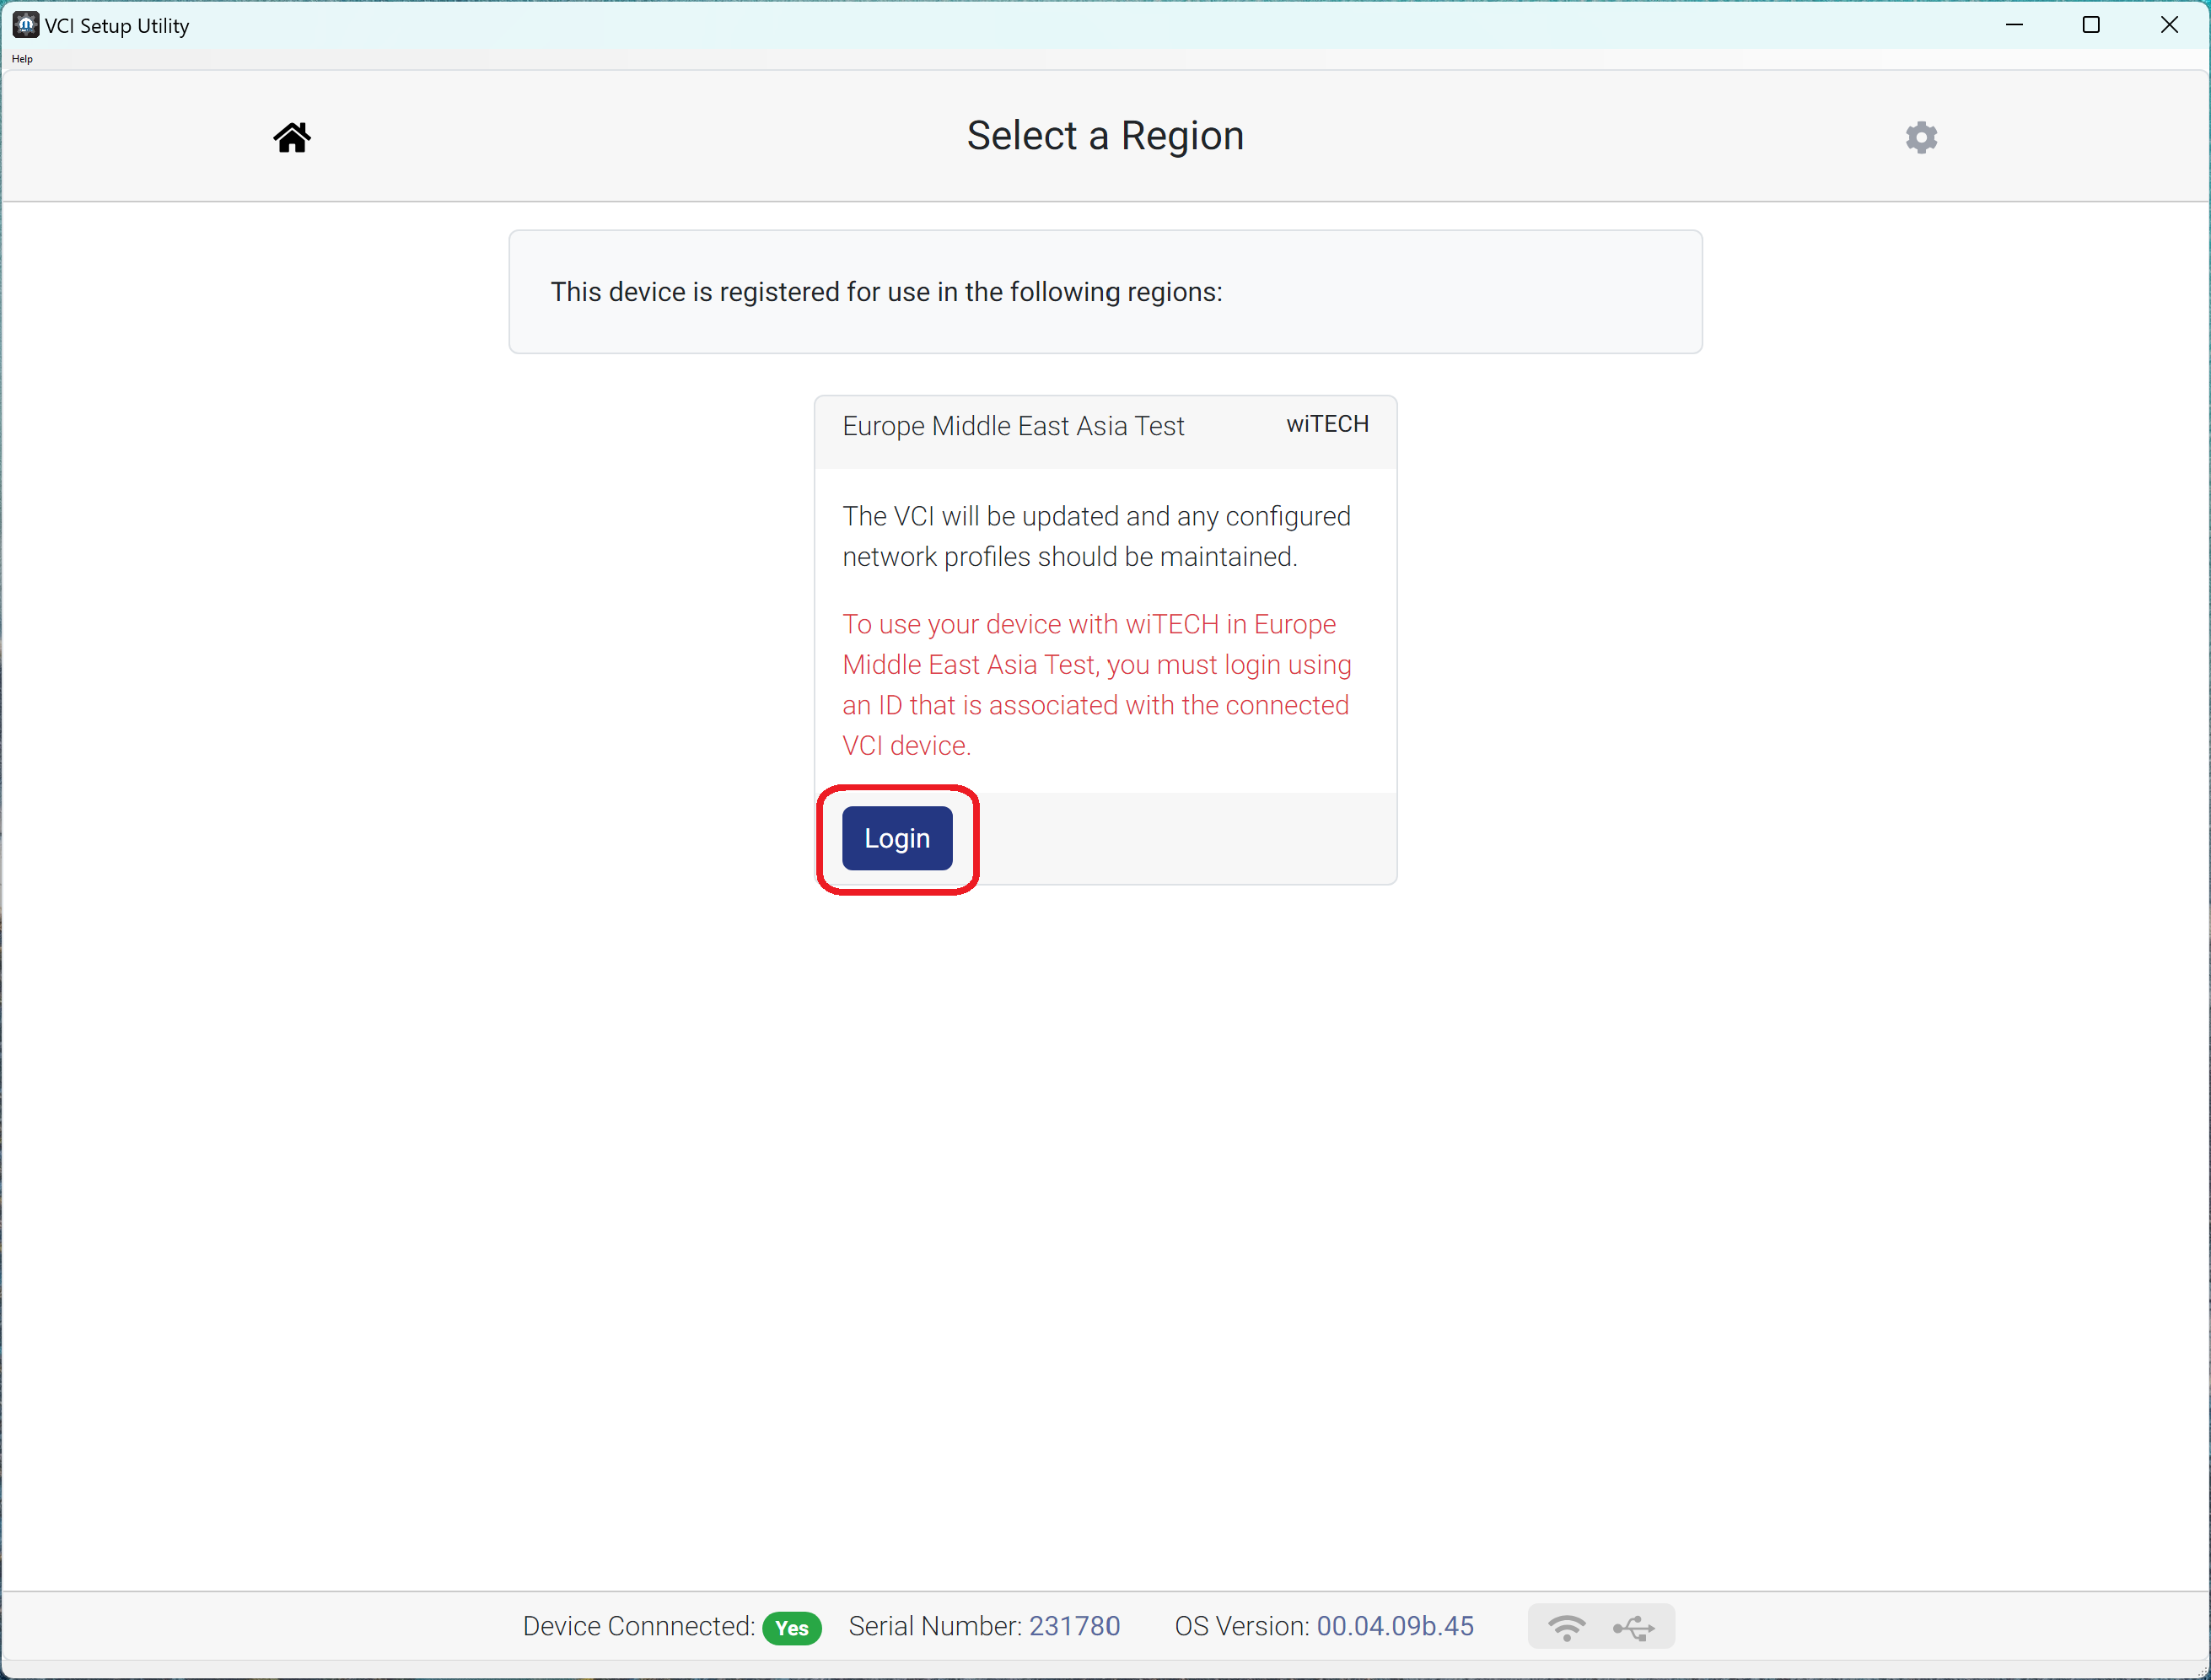
- Enter the credentials of a user ID associated to the connected PSA Interface device and select "Sign In".
NOTE: It is REQUIRED to login using an ID associated to the PSA Interface device in MTSP (Step H).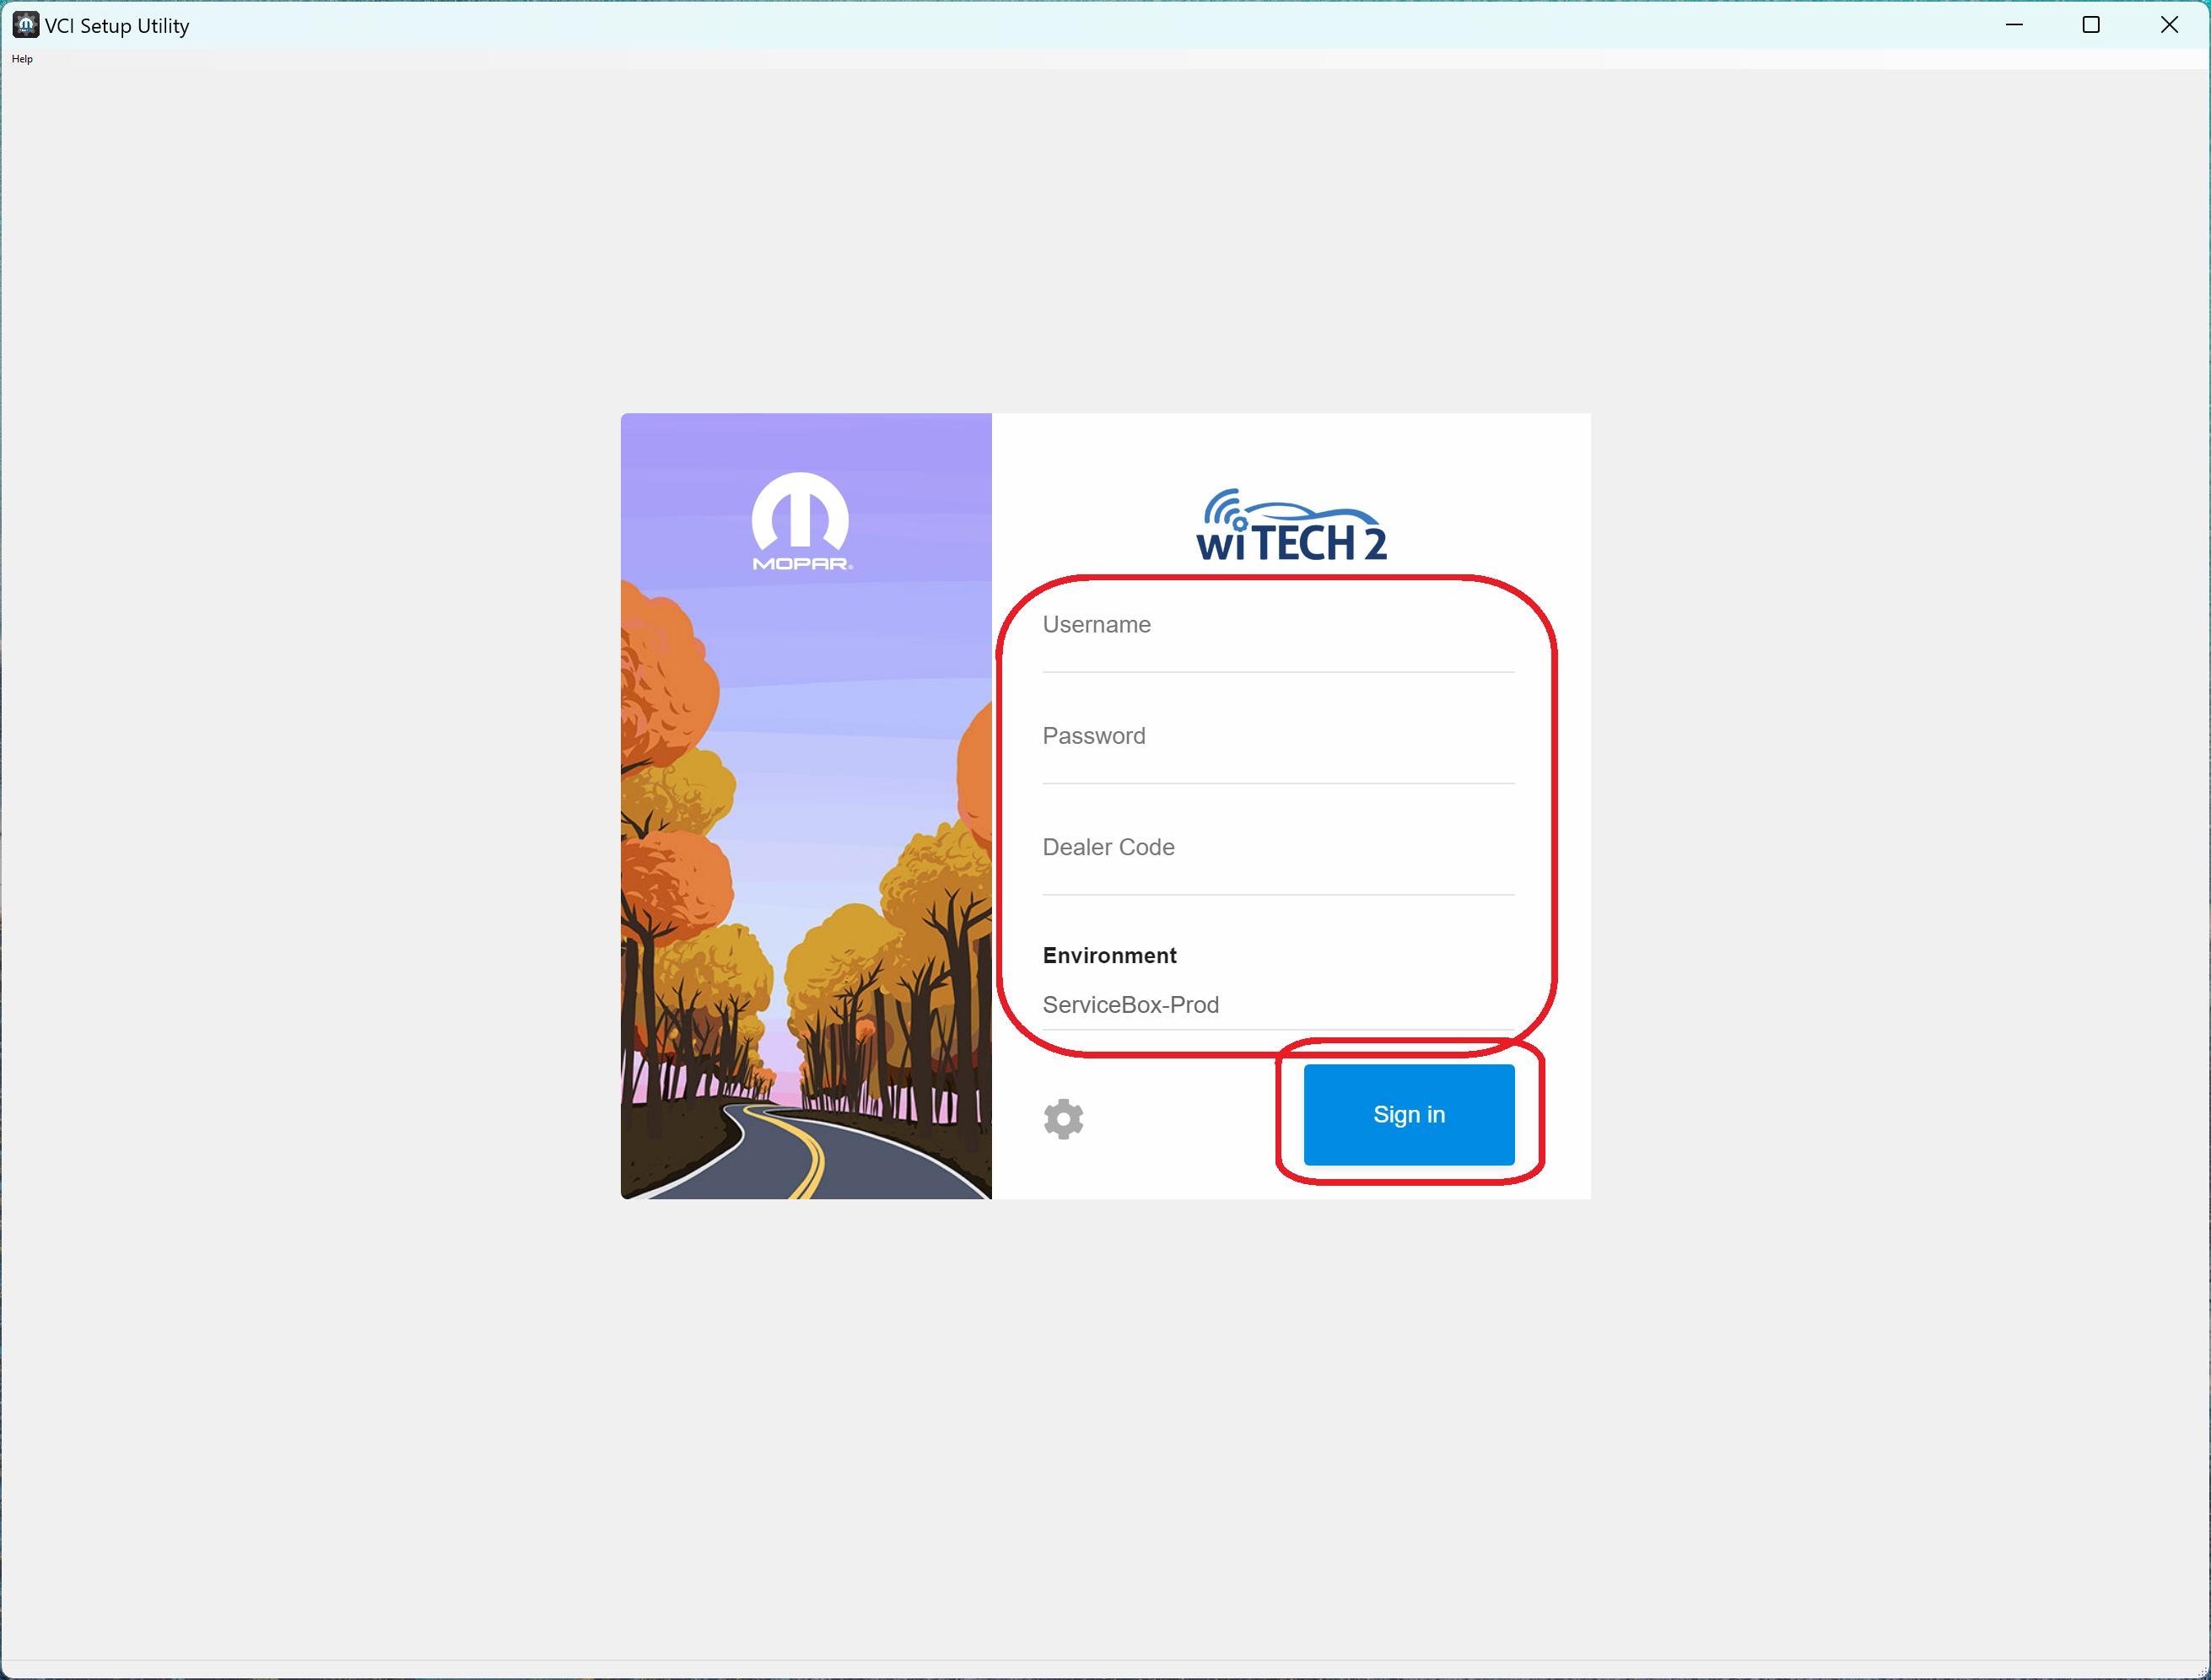
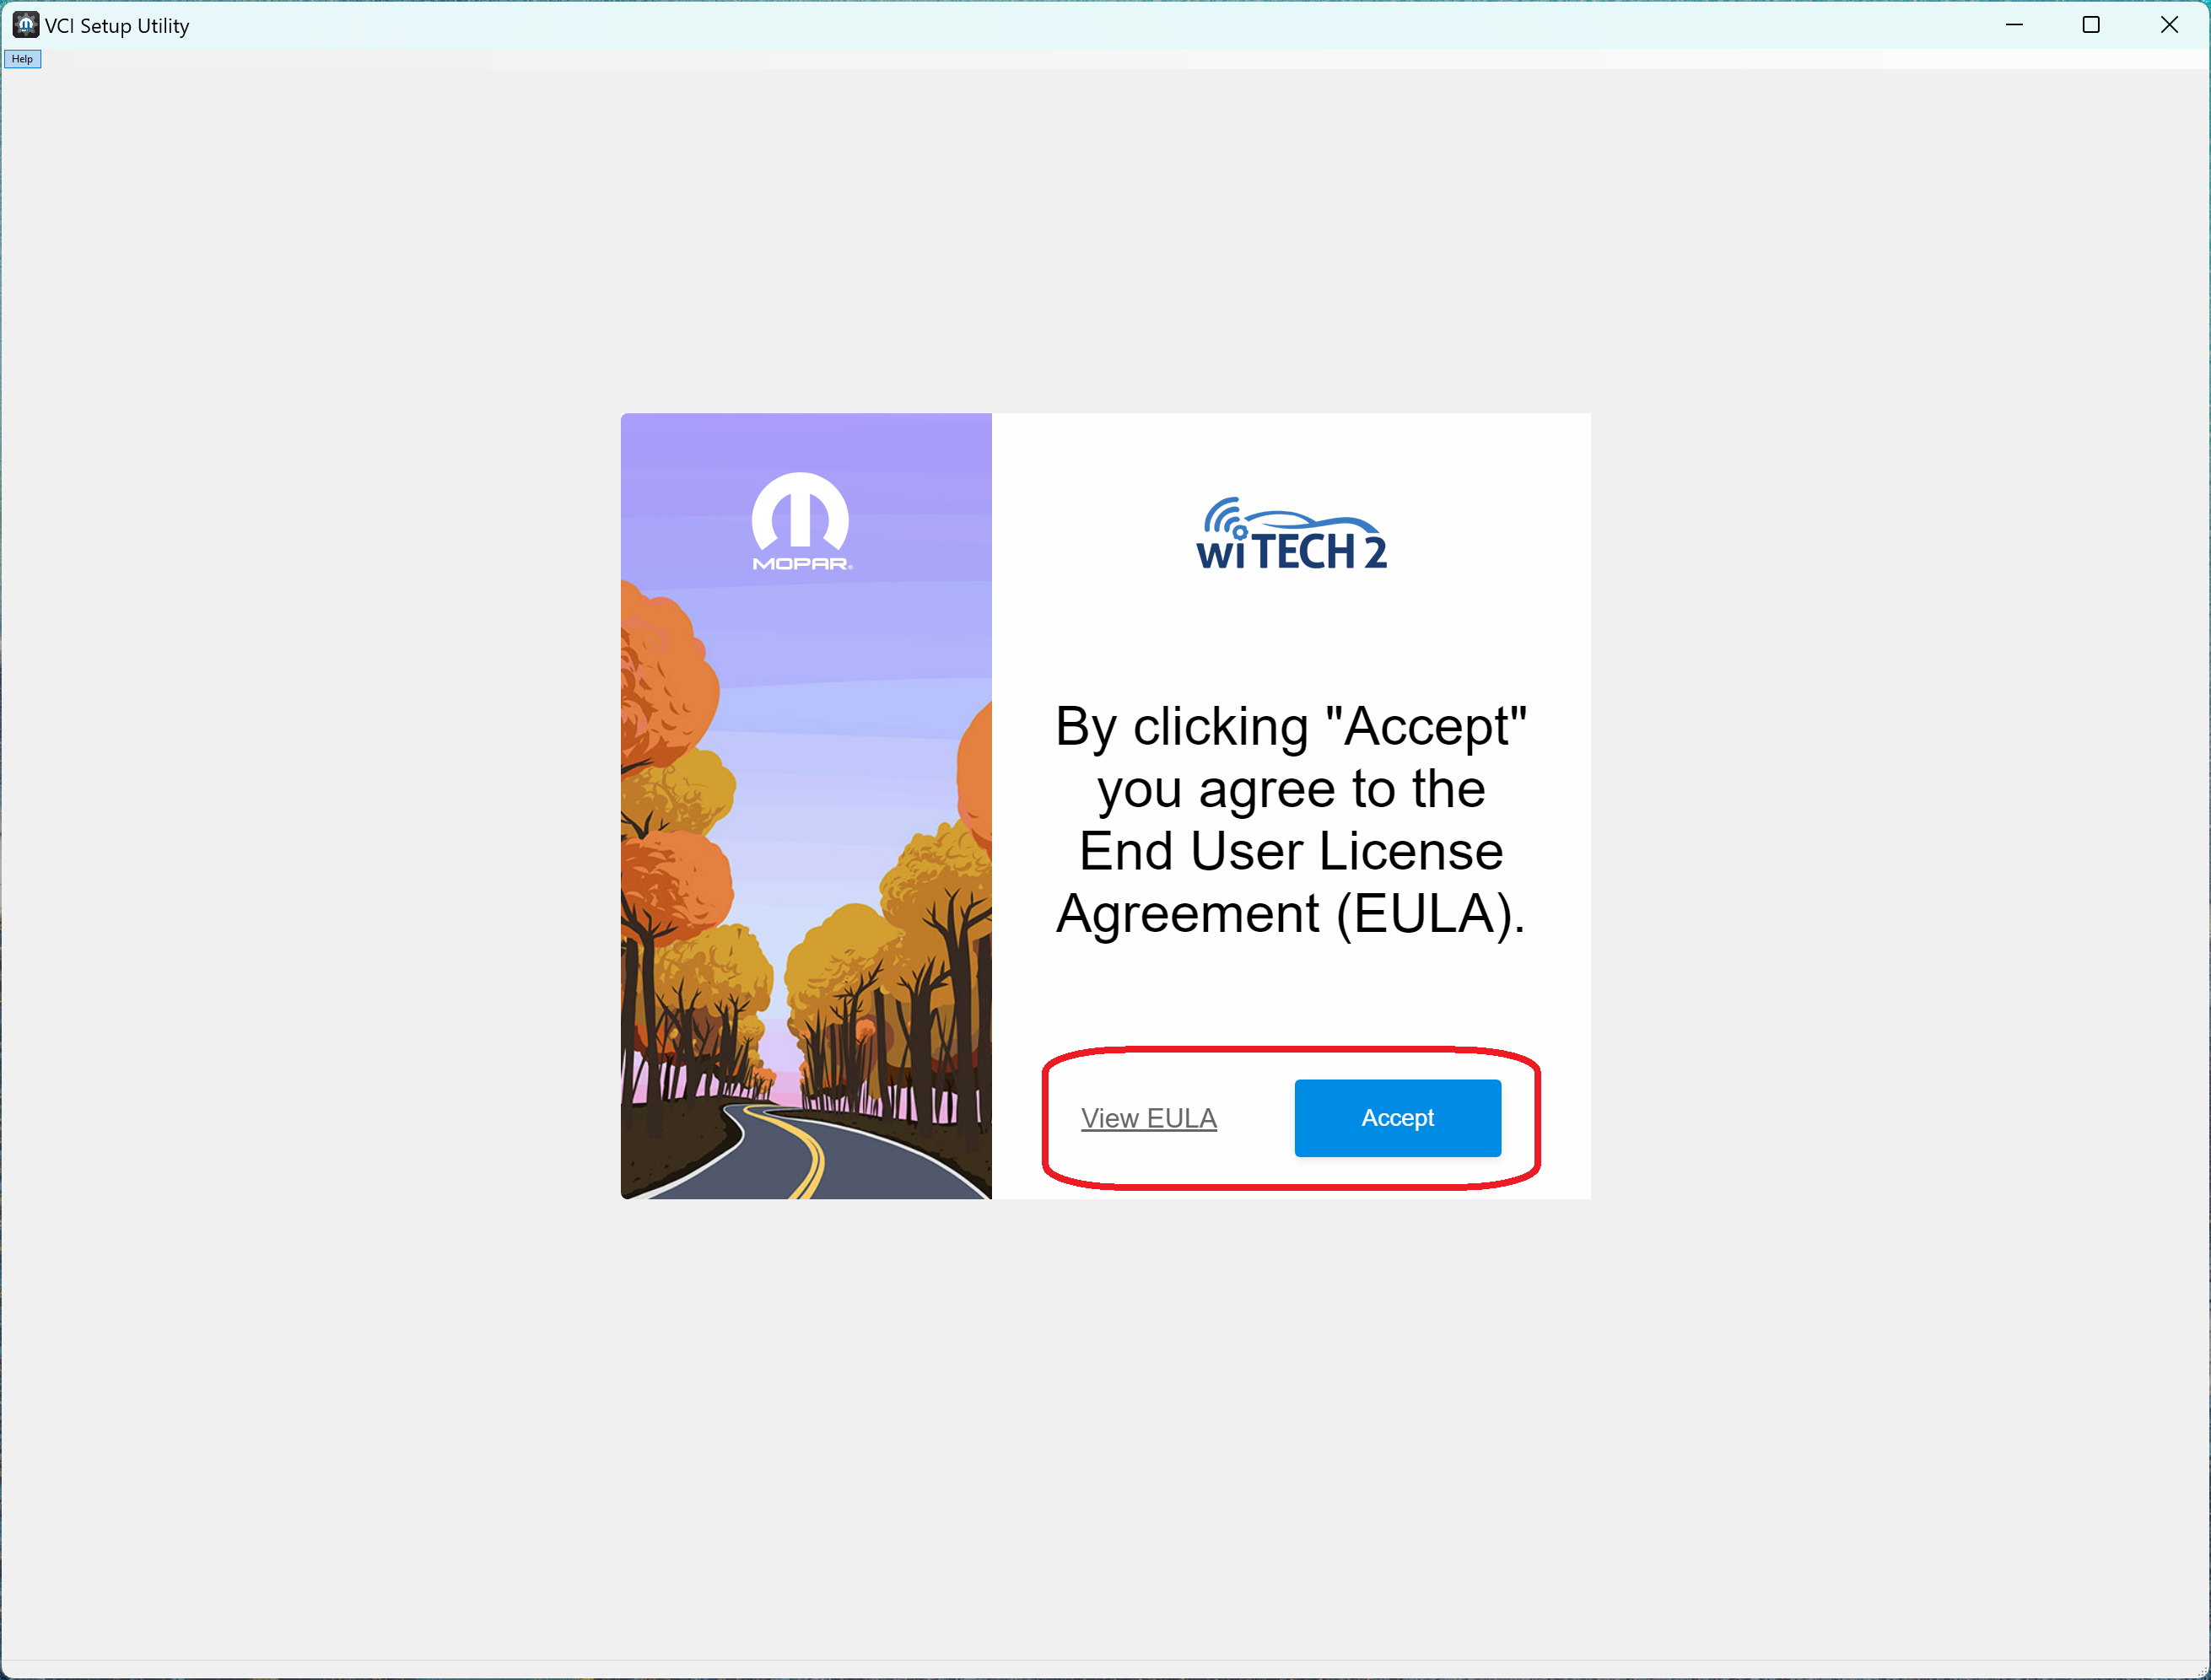
- If prompted, read and accept the wiTECH EULA.
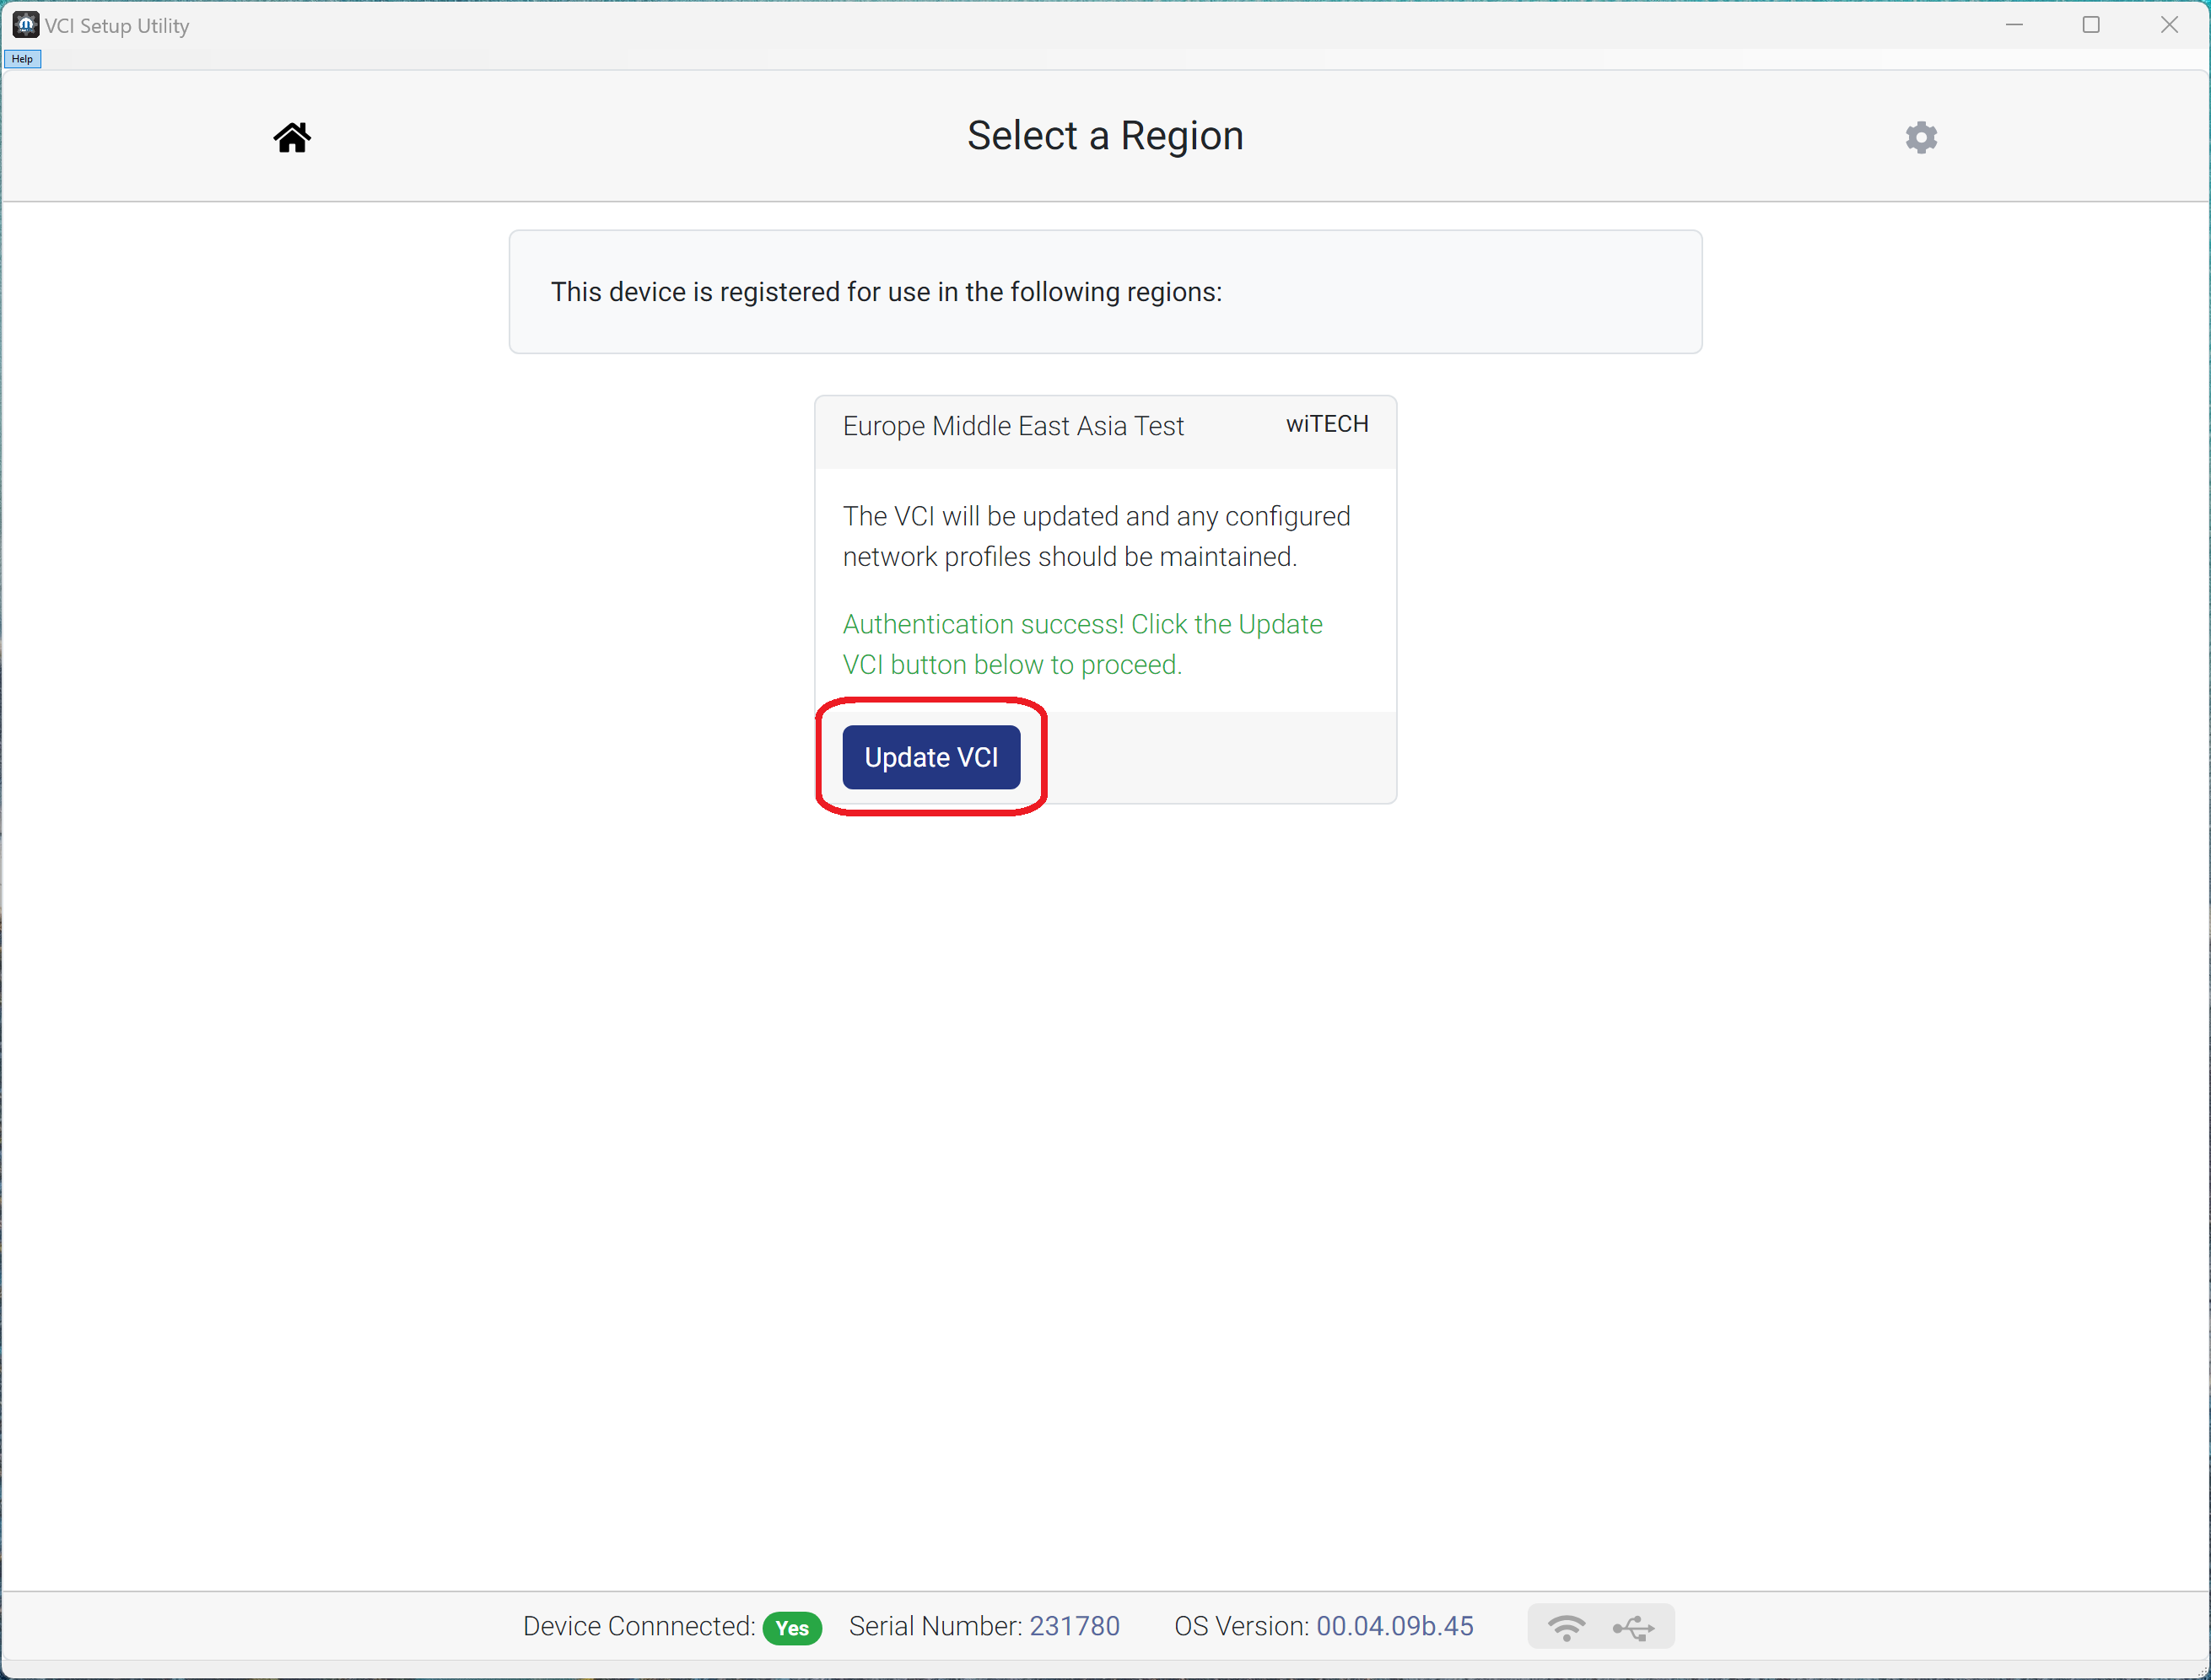
- The login is successful. Select "Update VCI".
- Read the prompts and select "Begin" to start the PSA Passthrough device configuration.
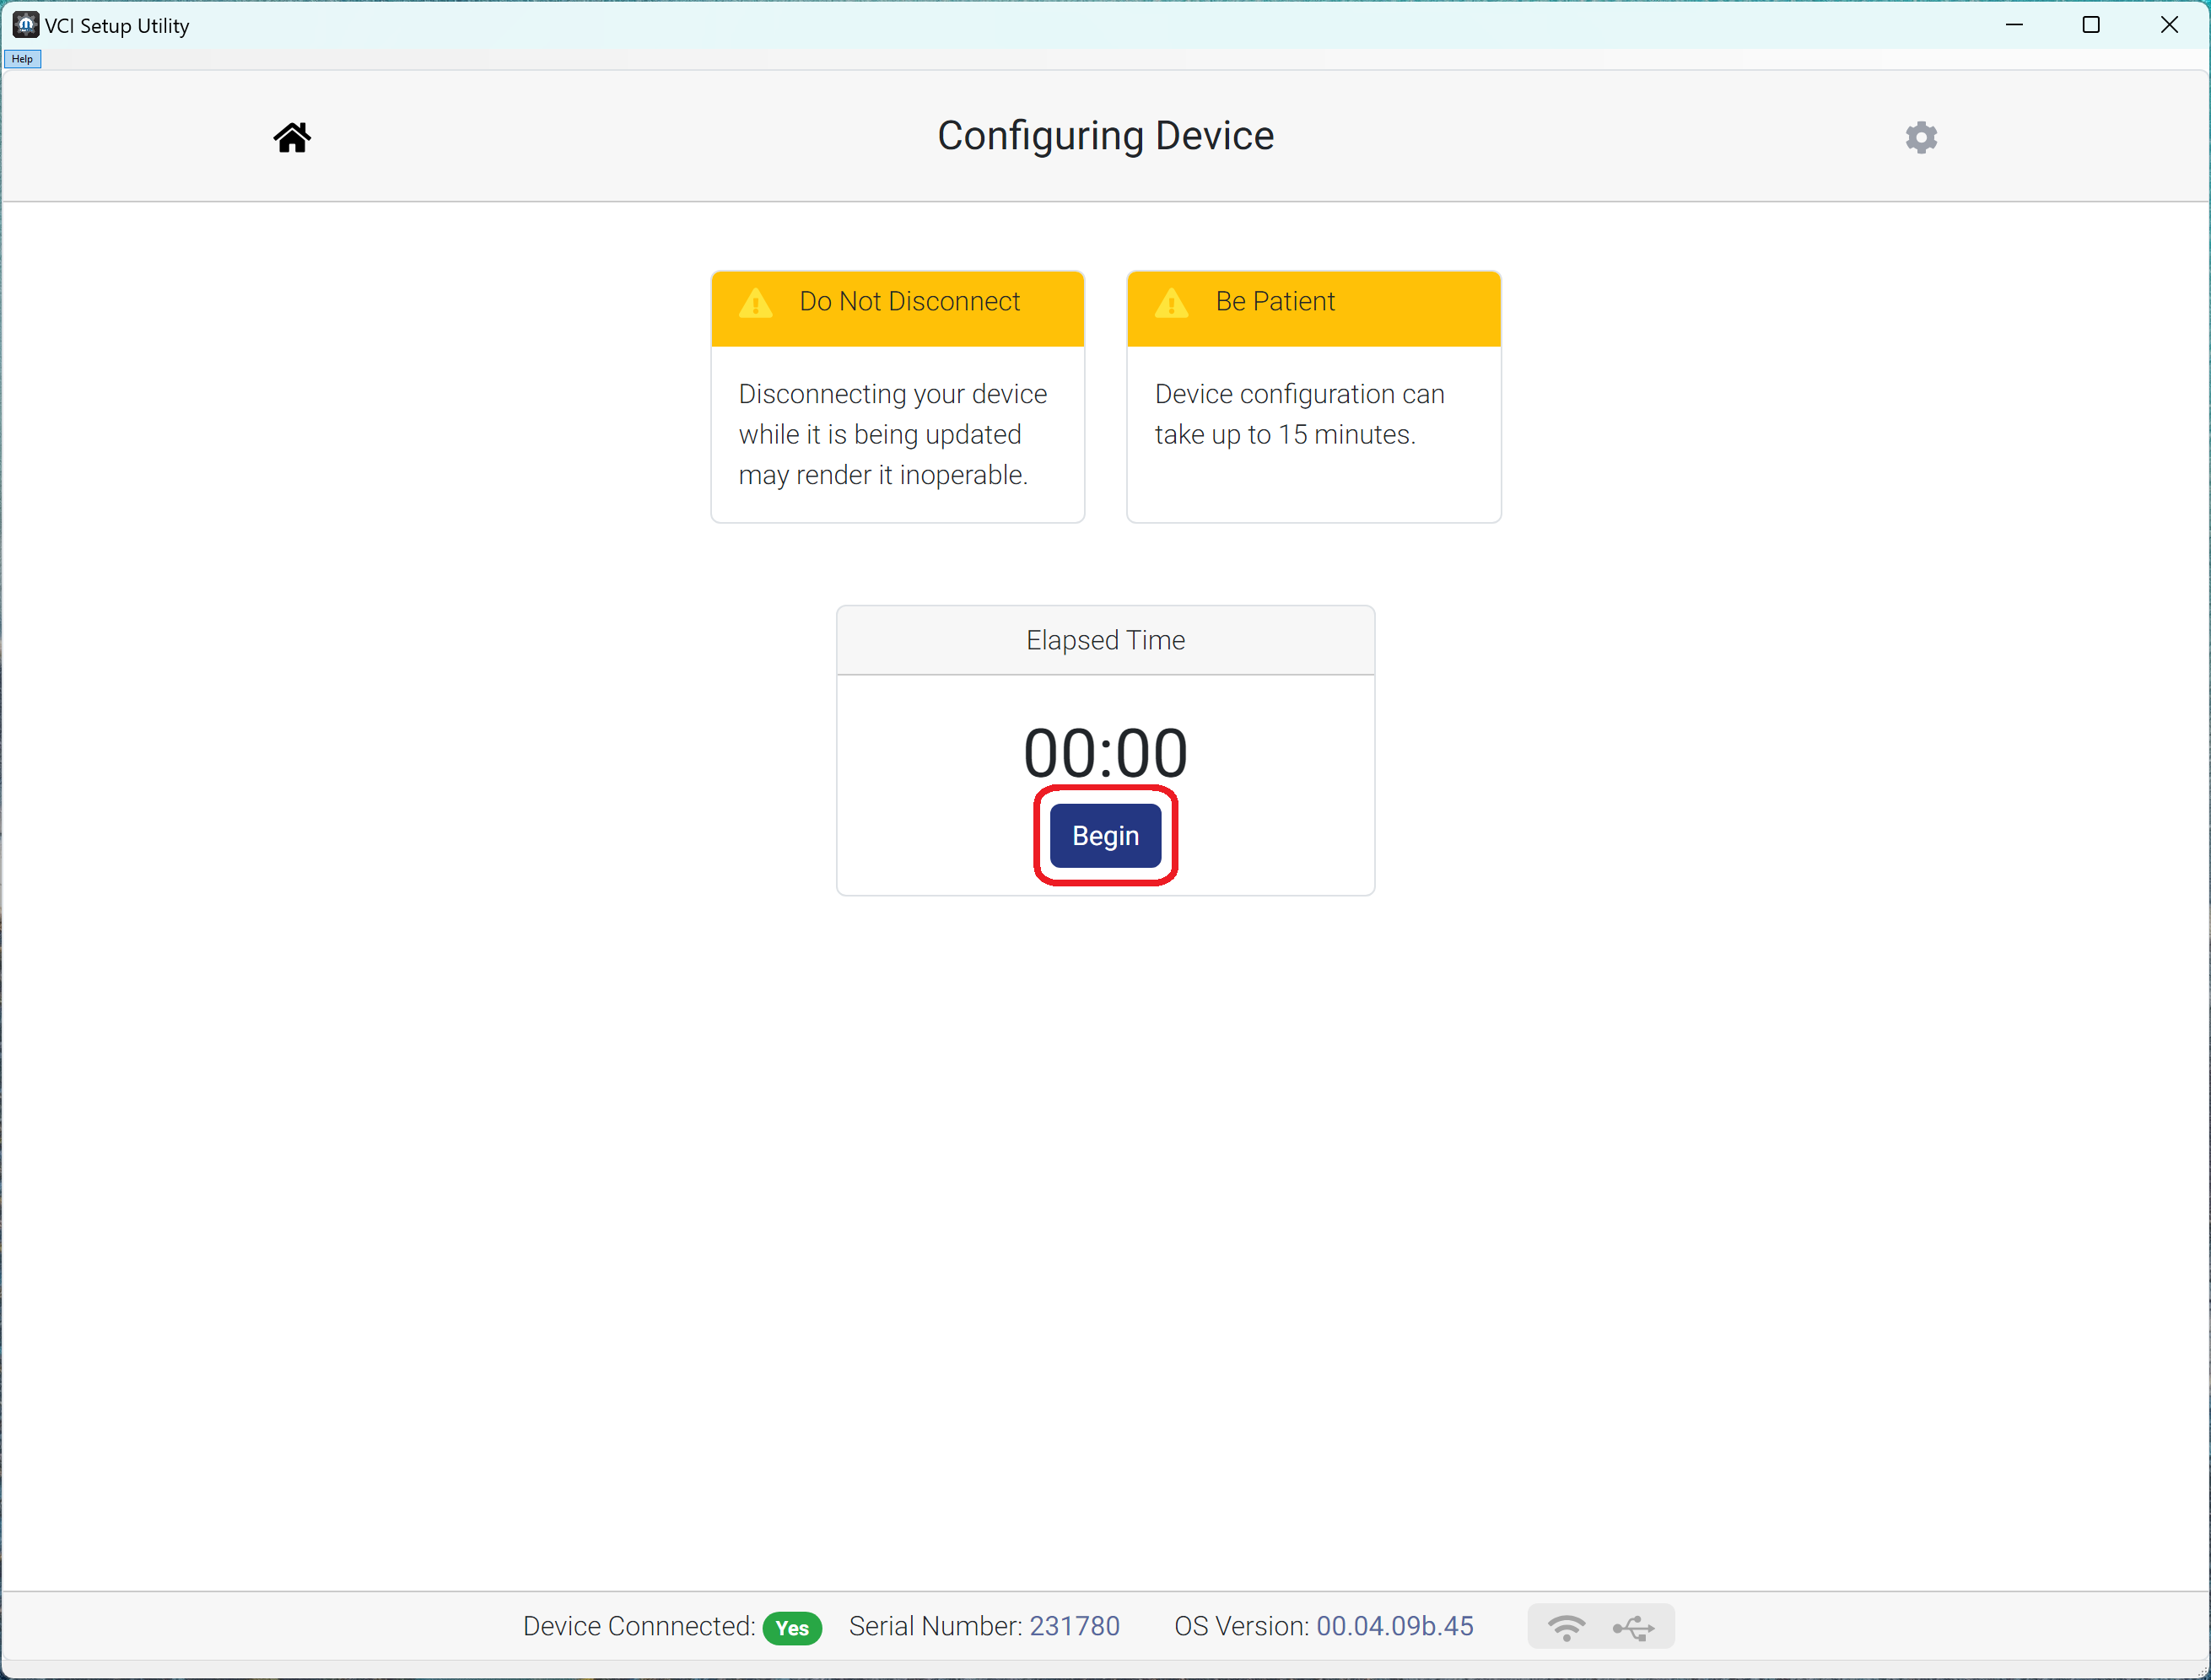
- The VCI Setup Utility starts configuring the device and the timer begins counting up.
NOTE: Ensure the device is not disconnected until the configuration is complete.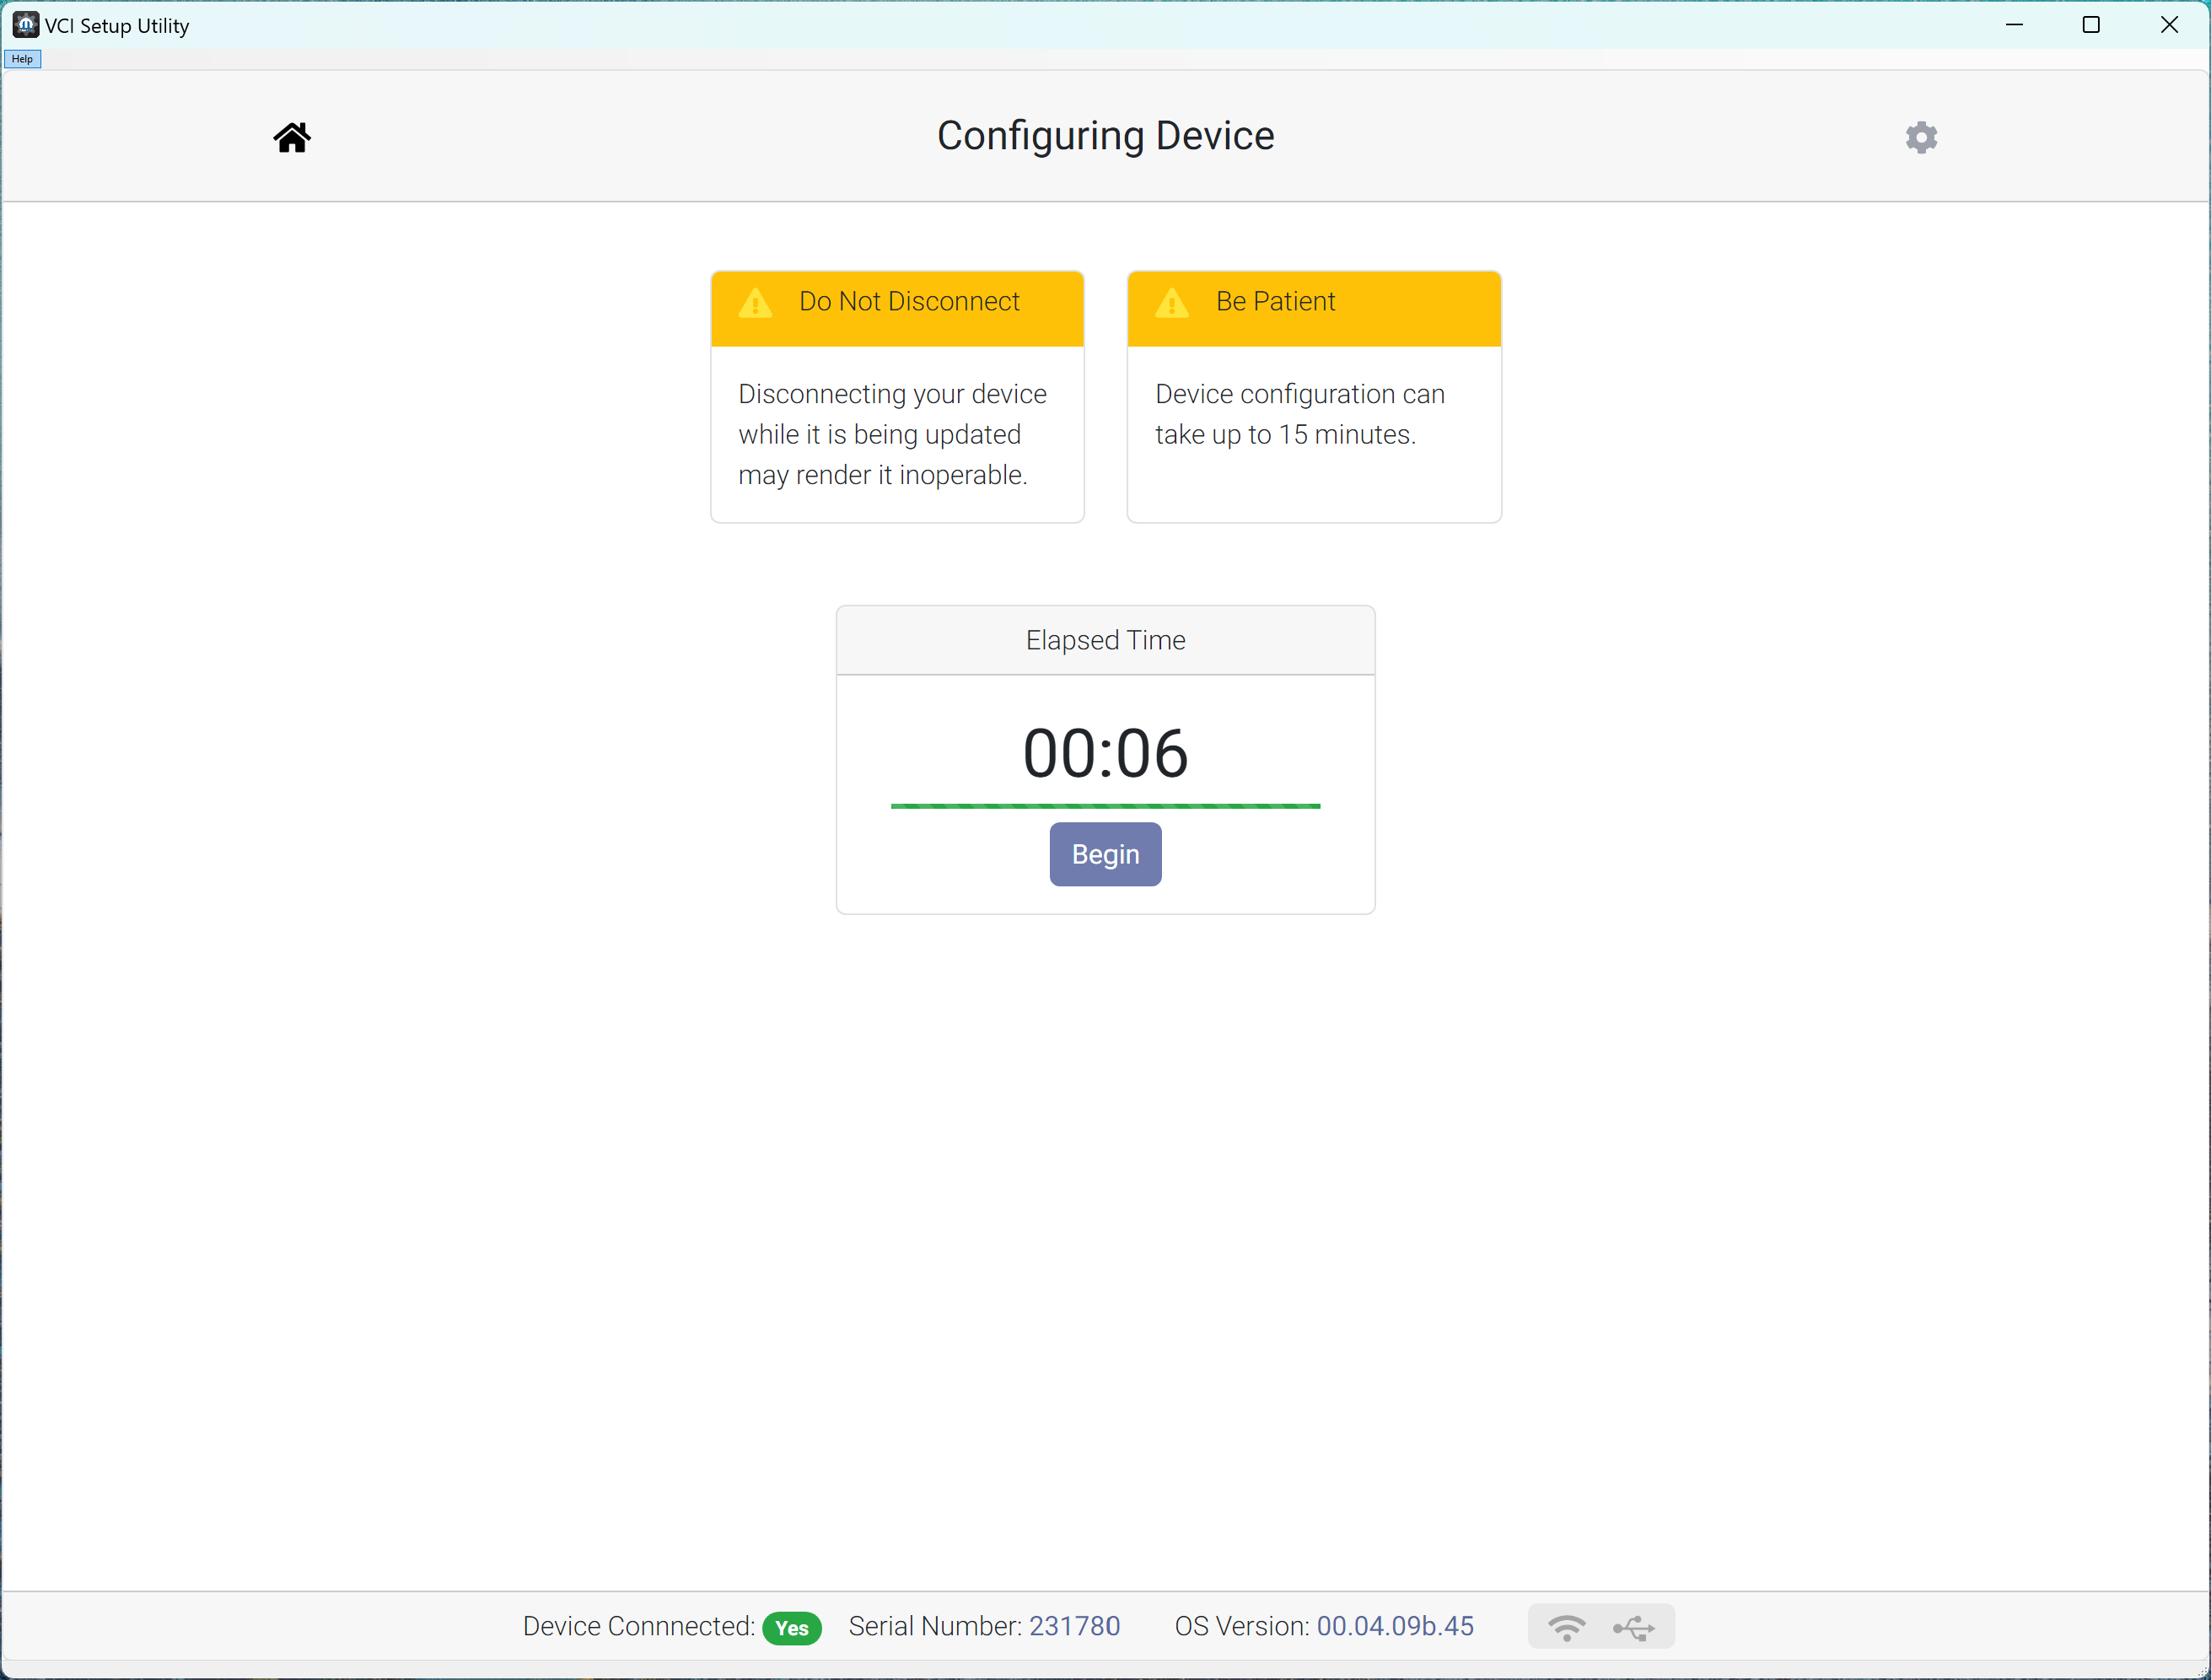
- The configuration is completed successfully. Select "Continue".
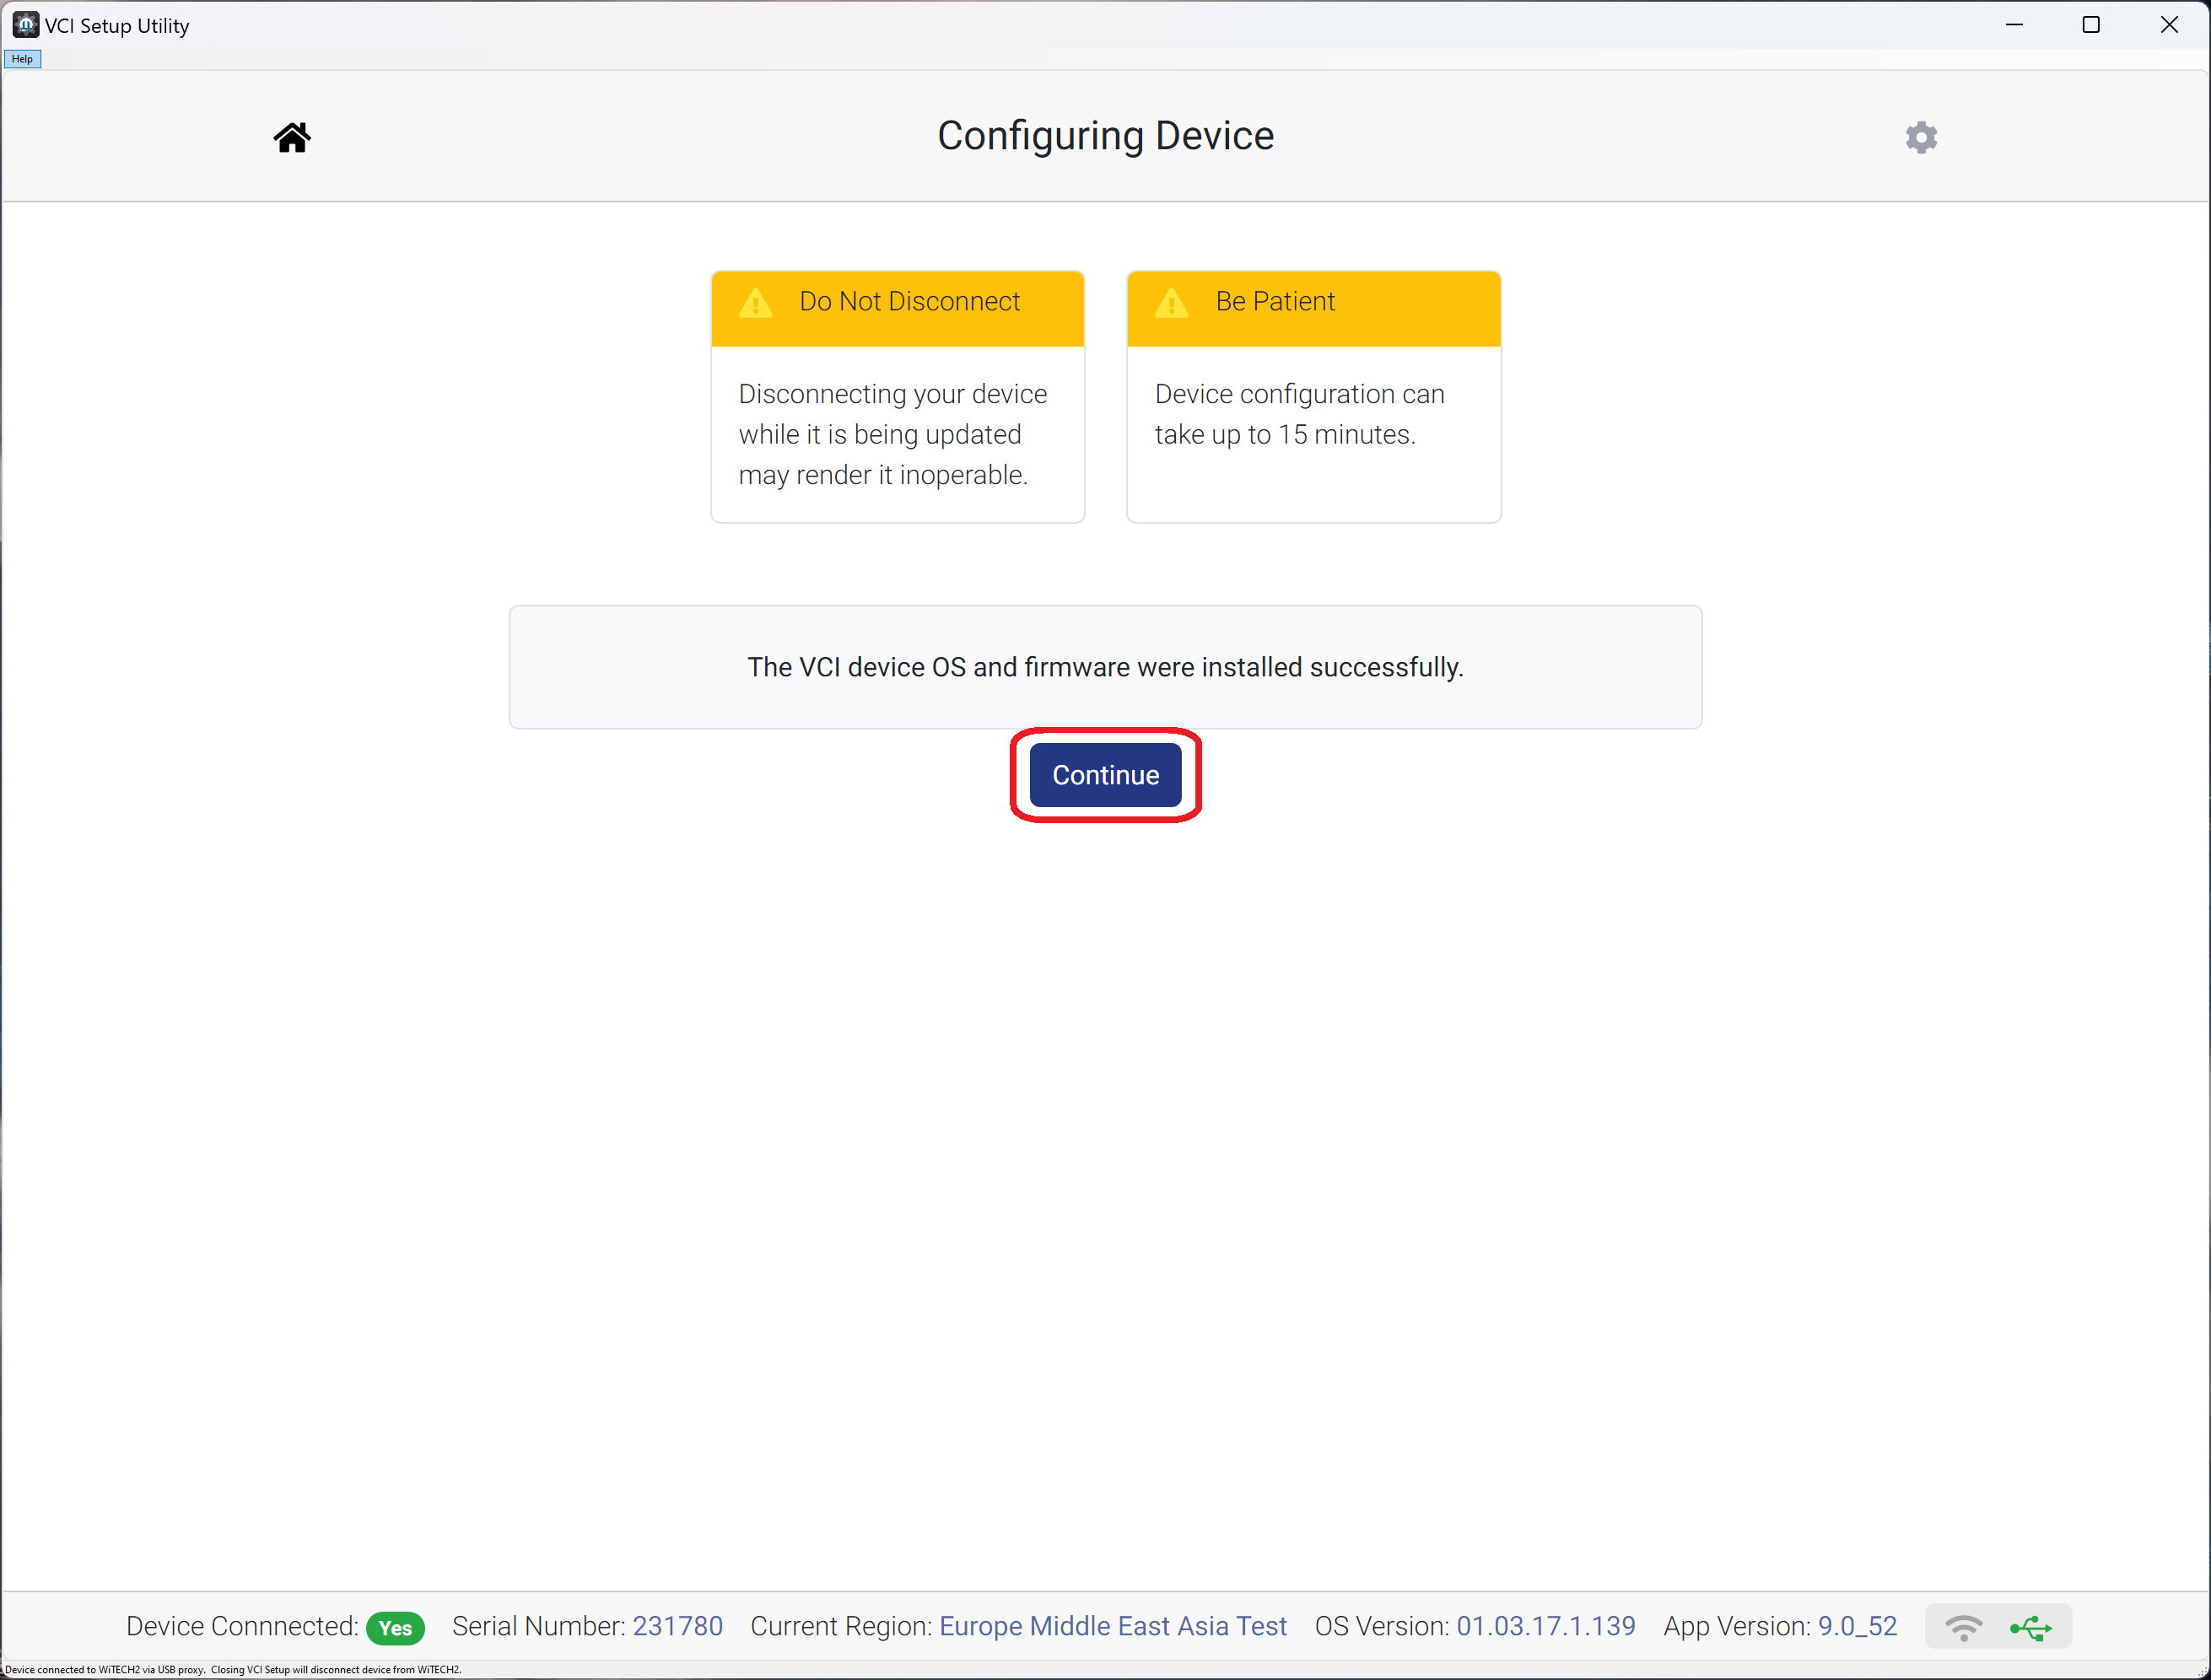
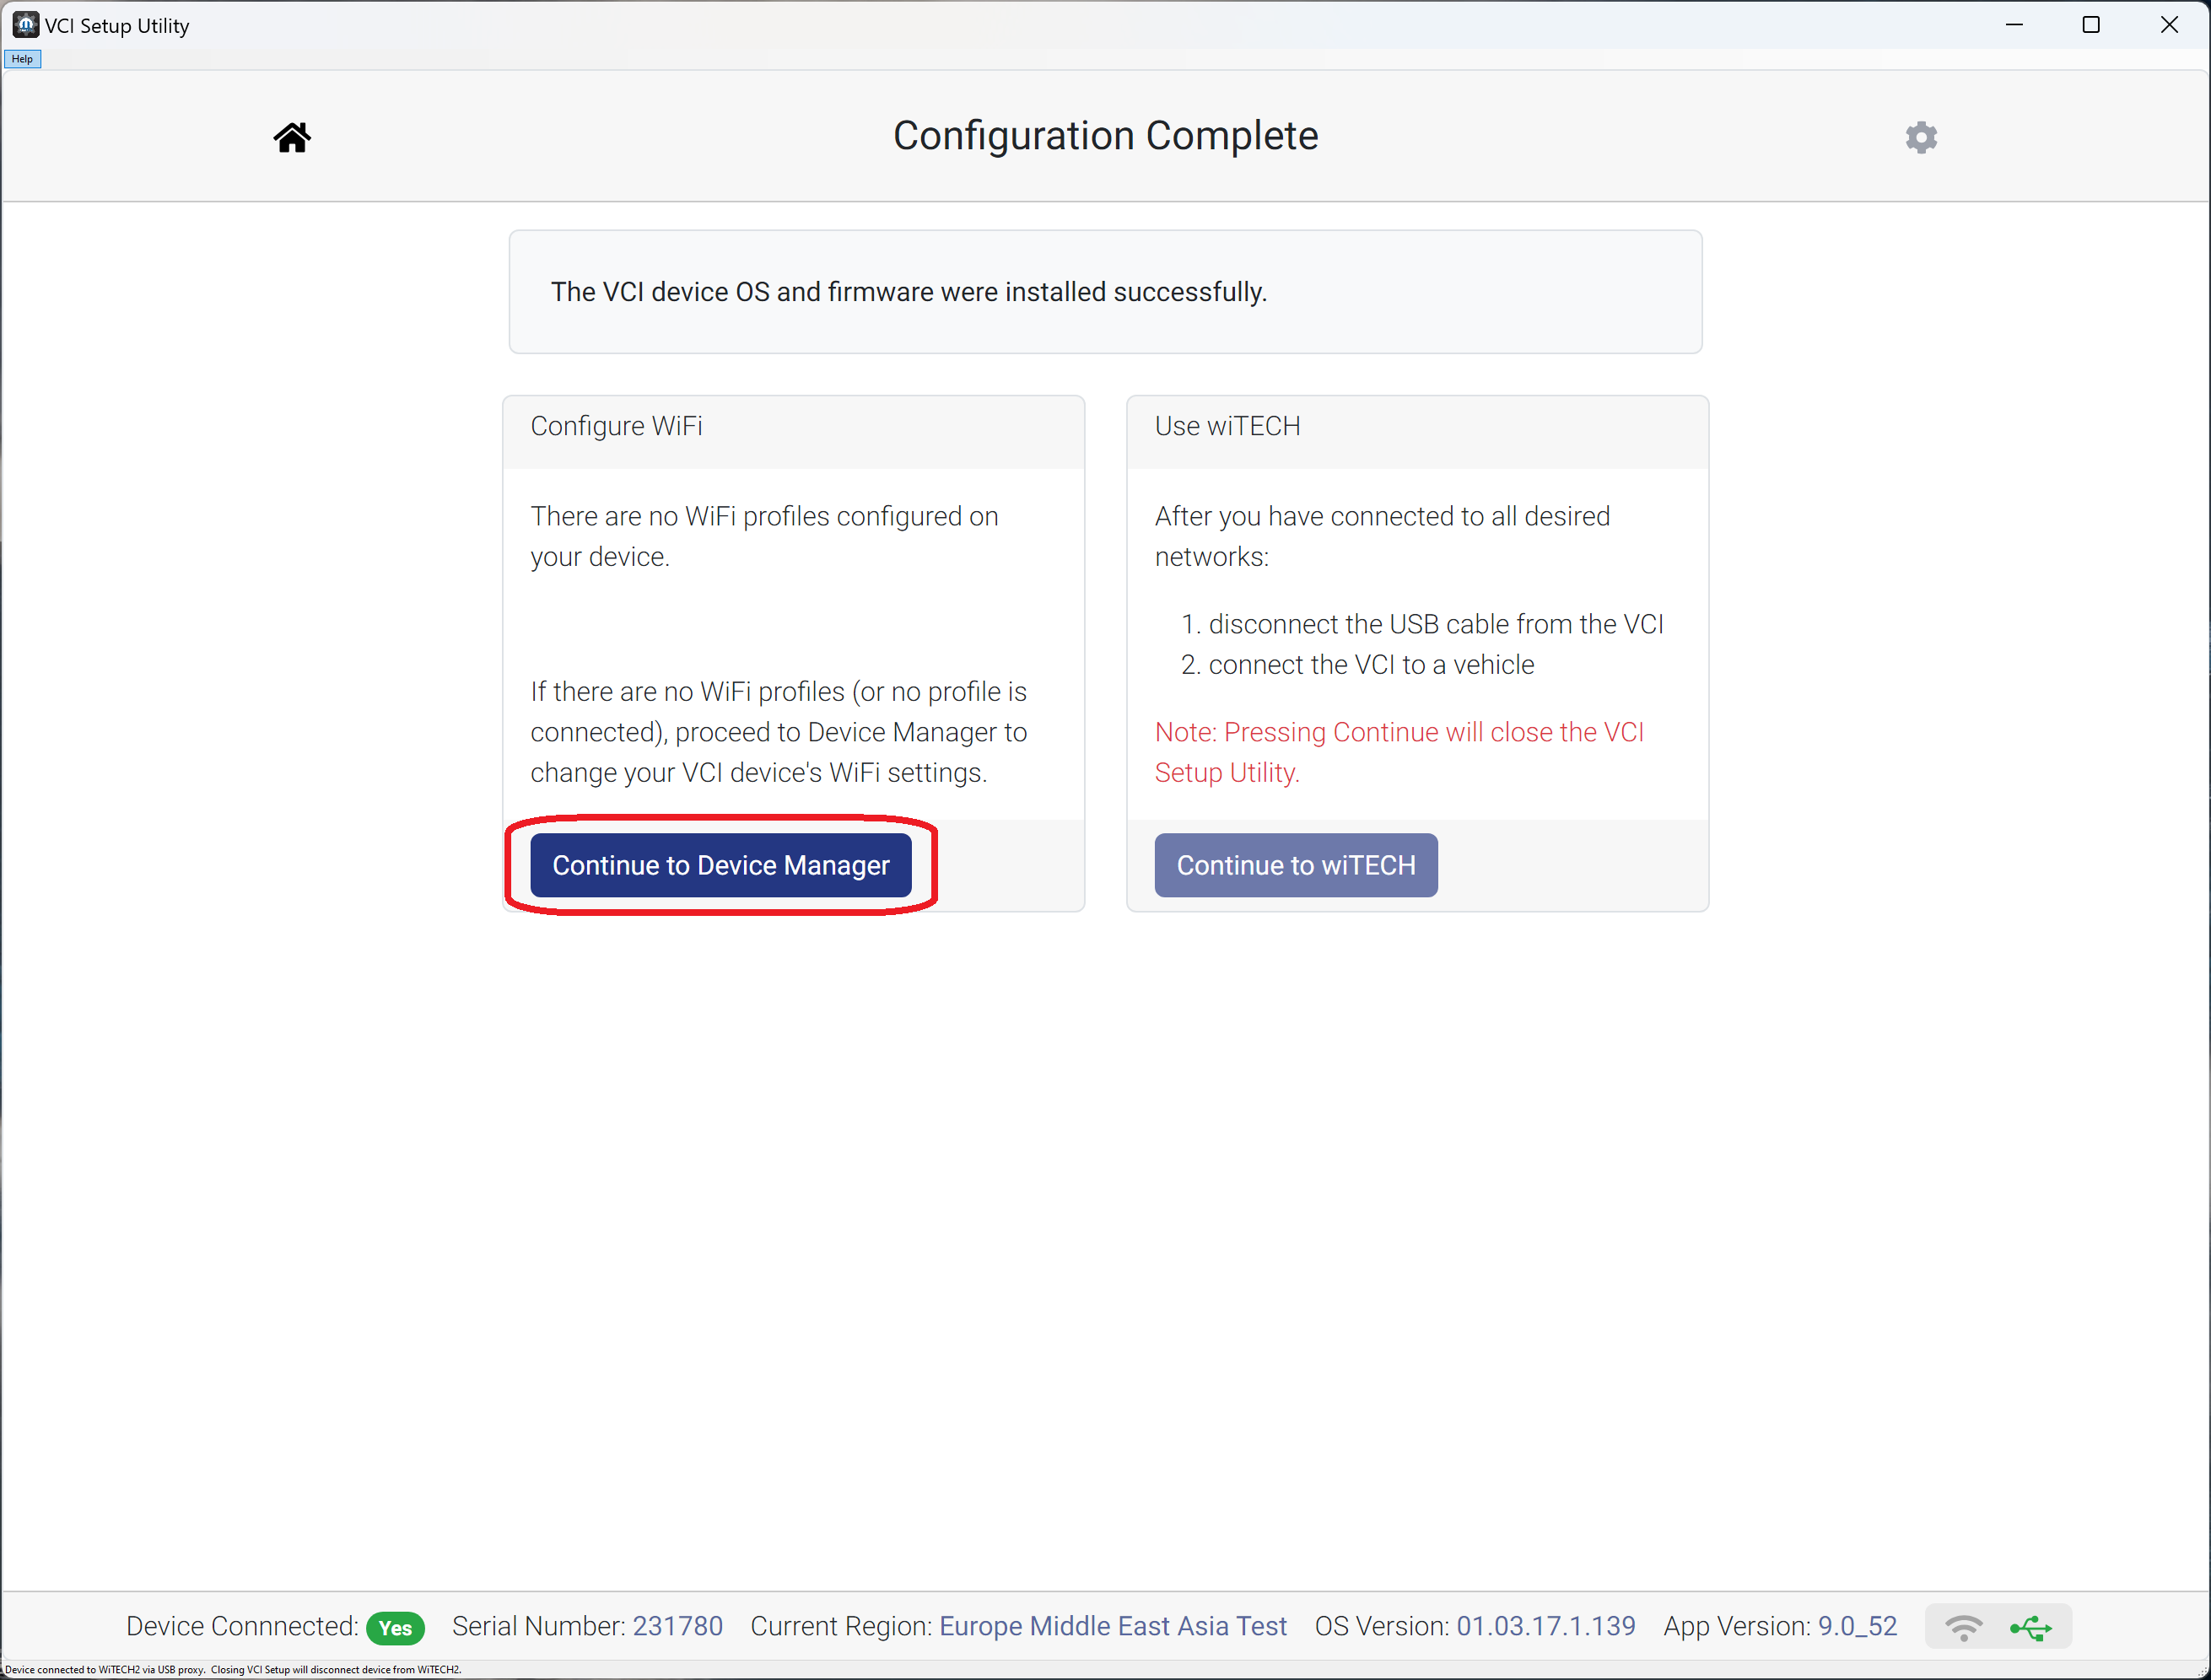
- To configure Wi-Fi on the PSA Interface device, select "Continue to Device Manager".
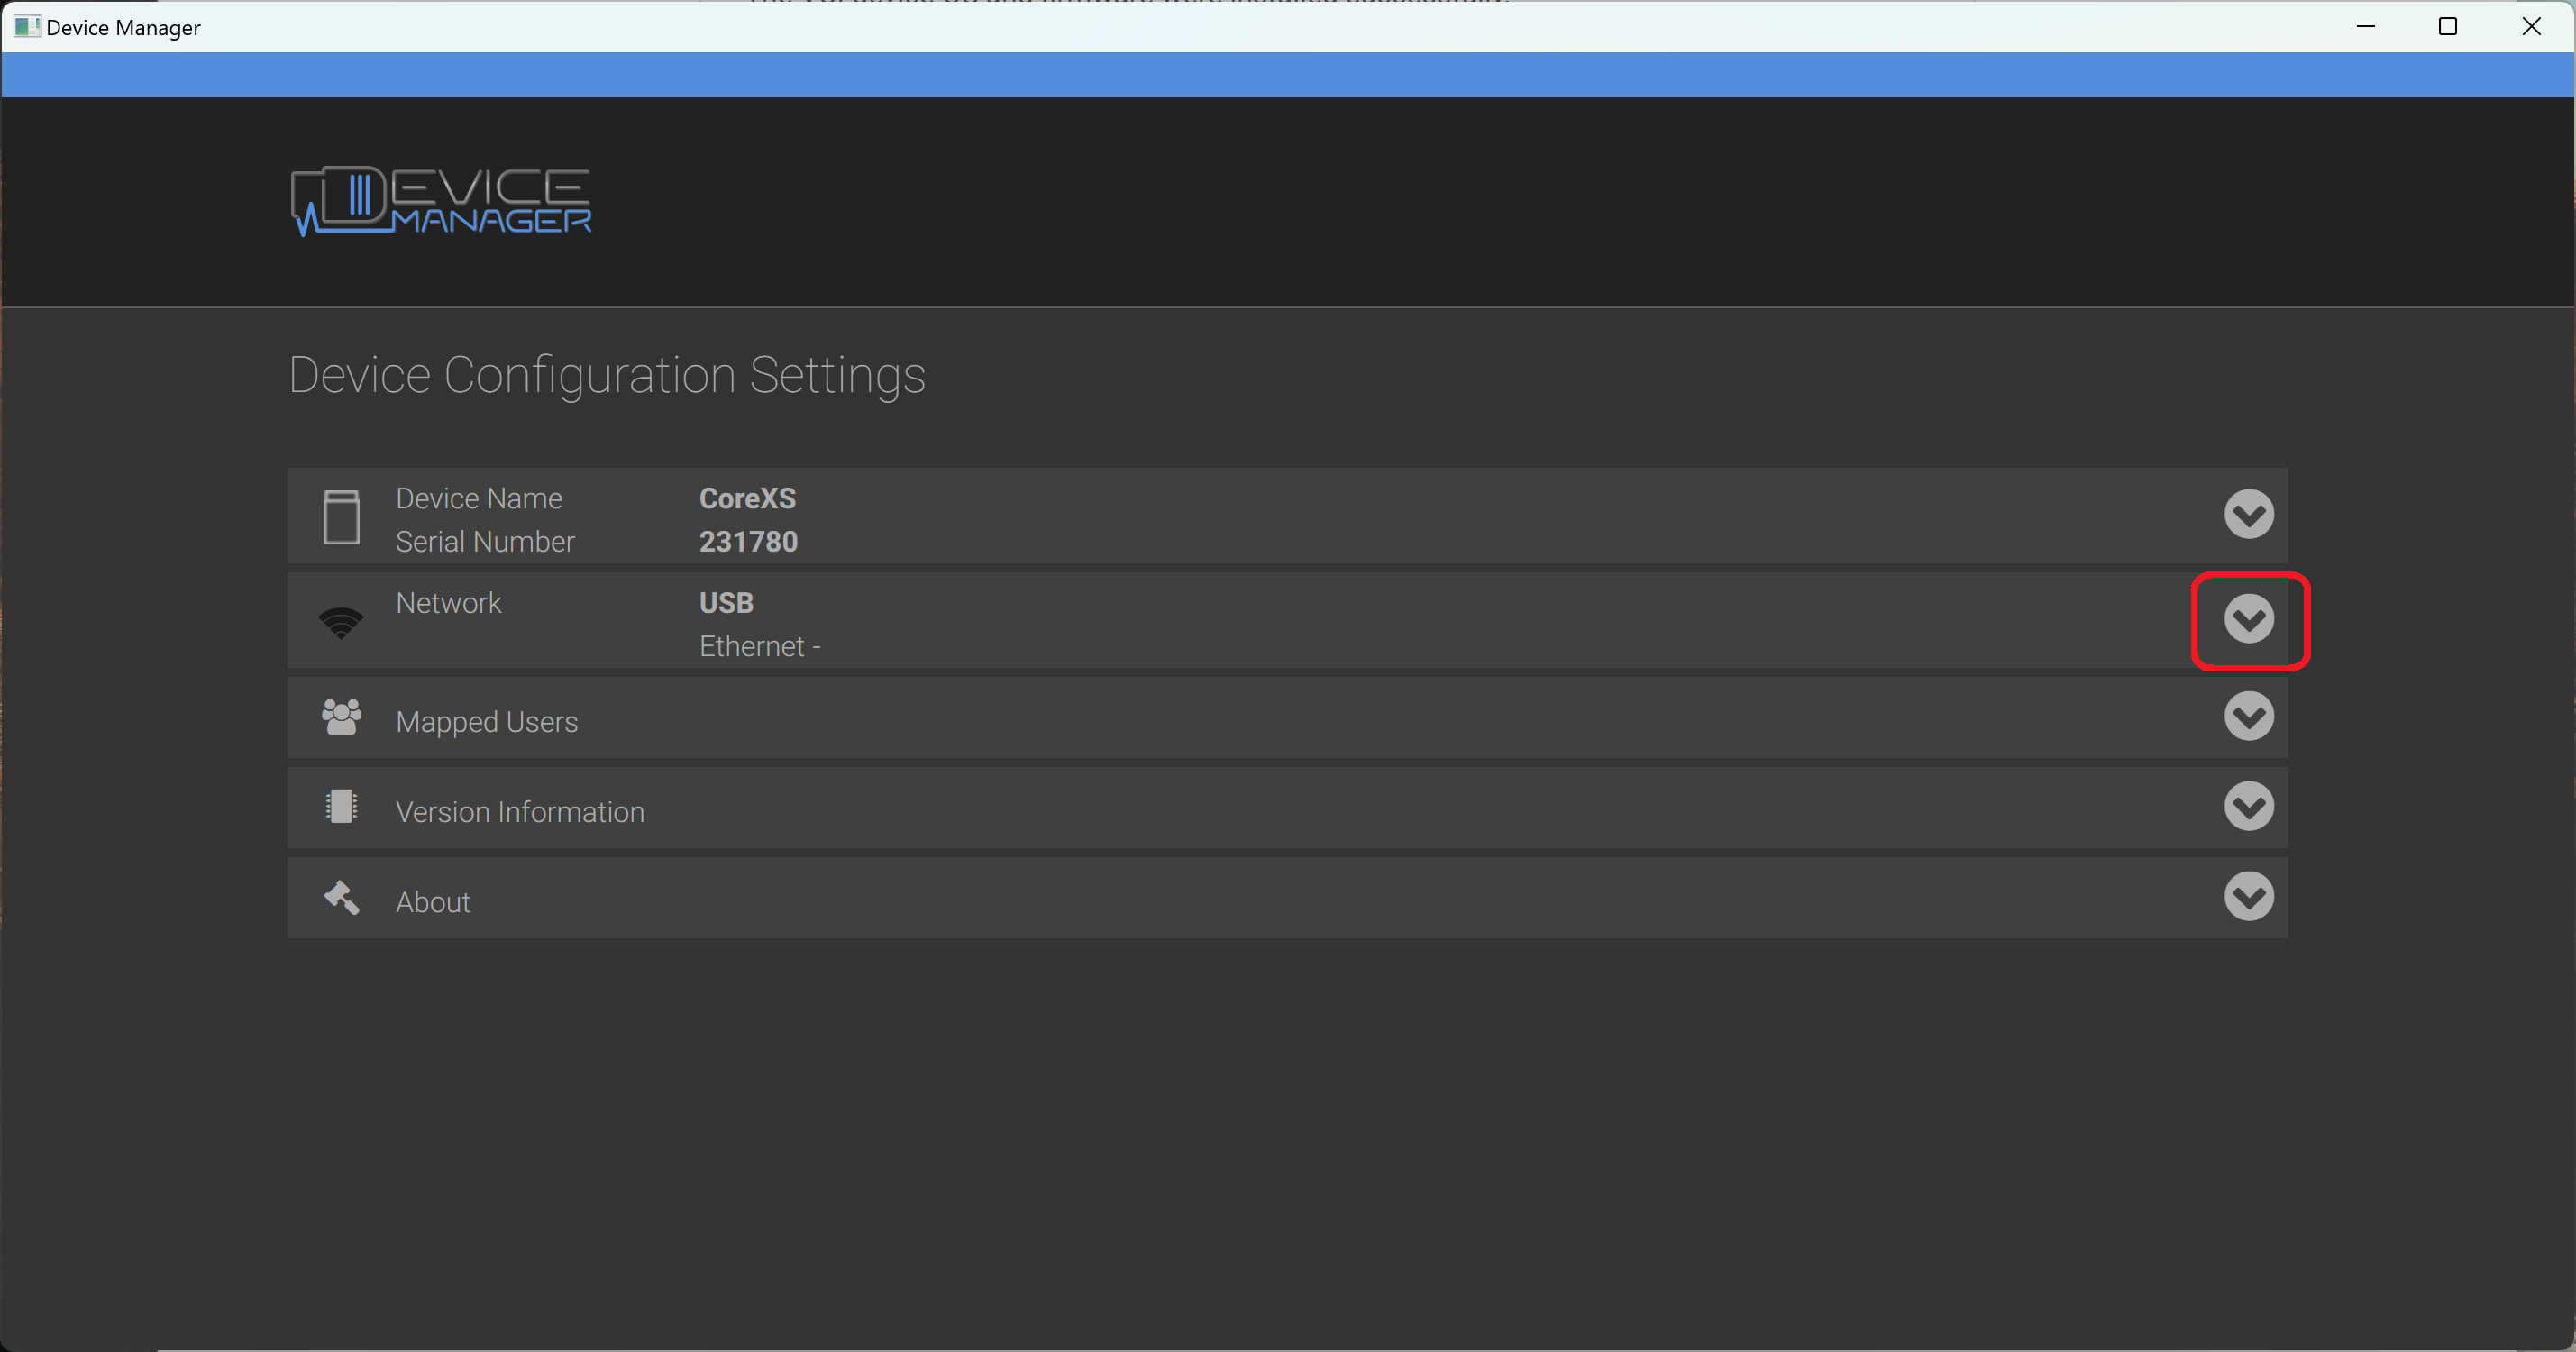
- The Device Manager window opens. Select the Network dropdown.
- Select the desired network to connect.
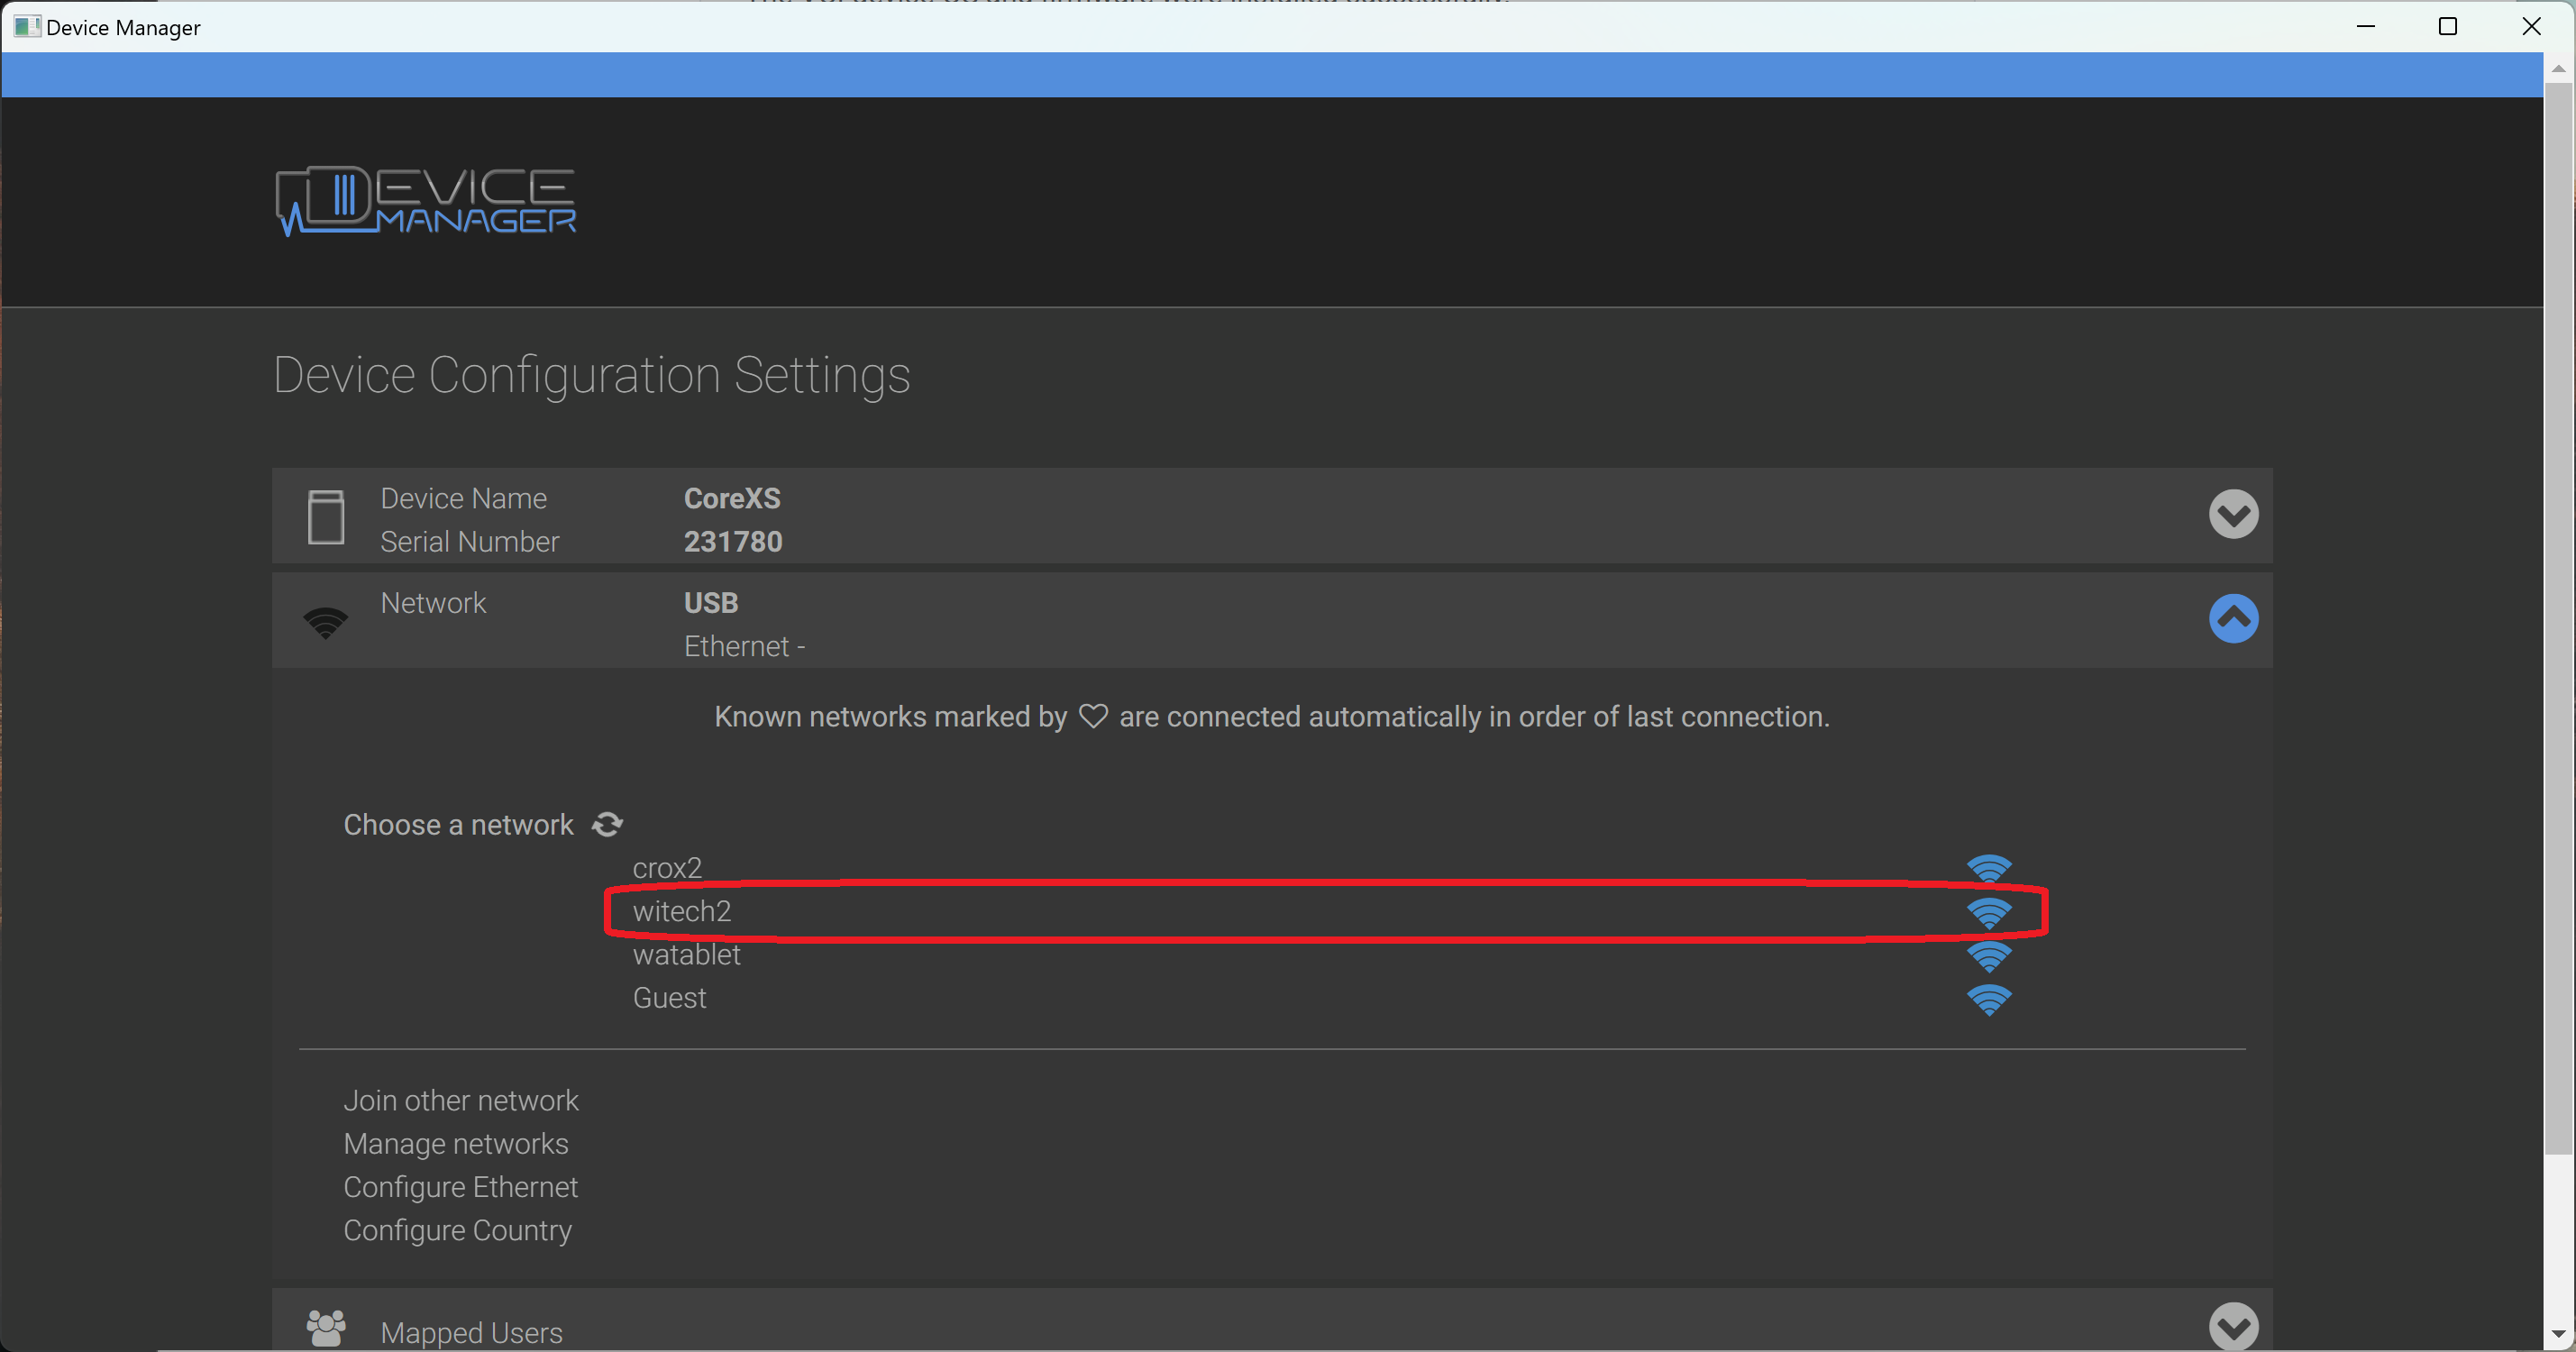
- Enter the network security credentials and select "Connect".
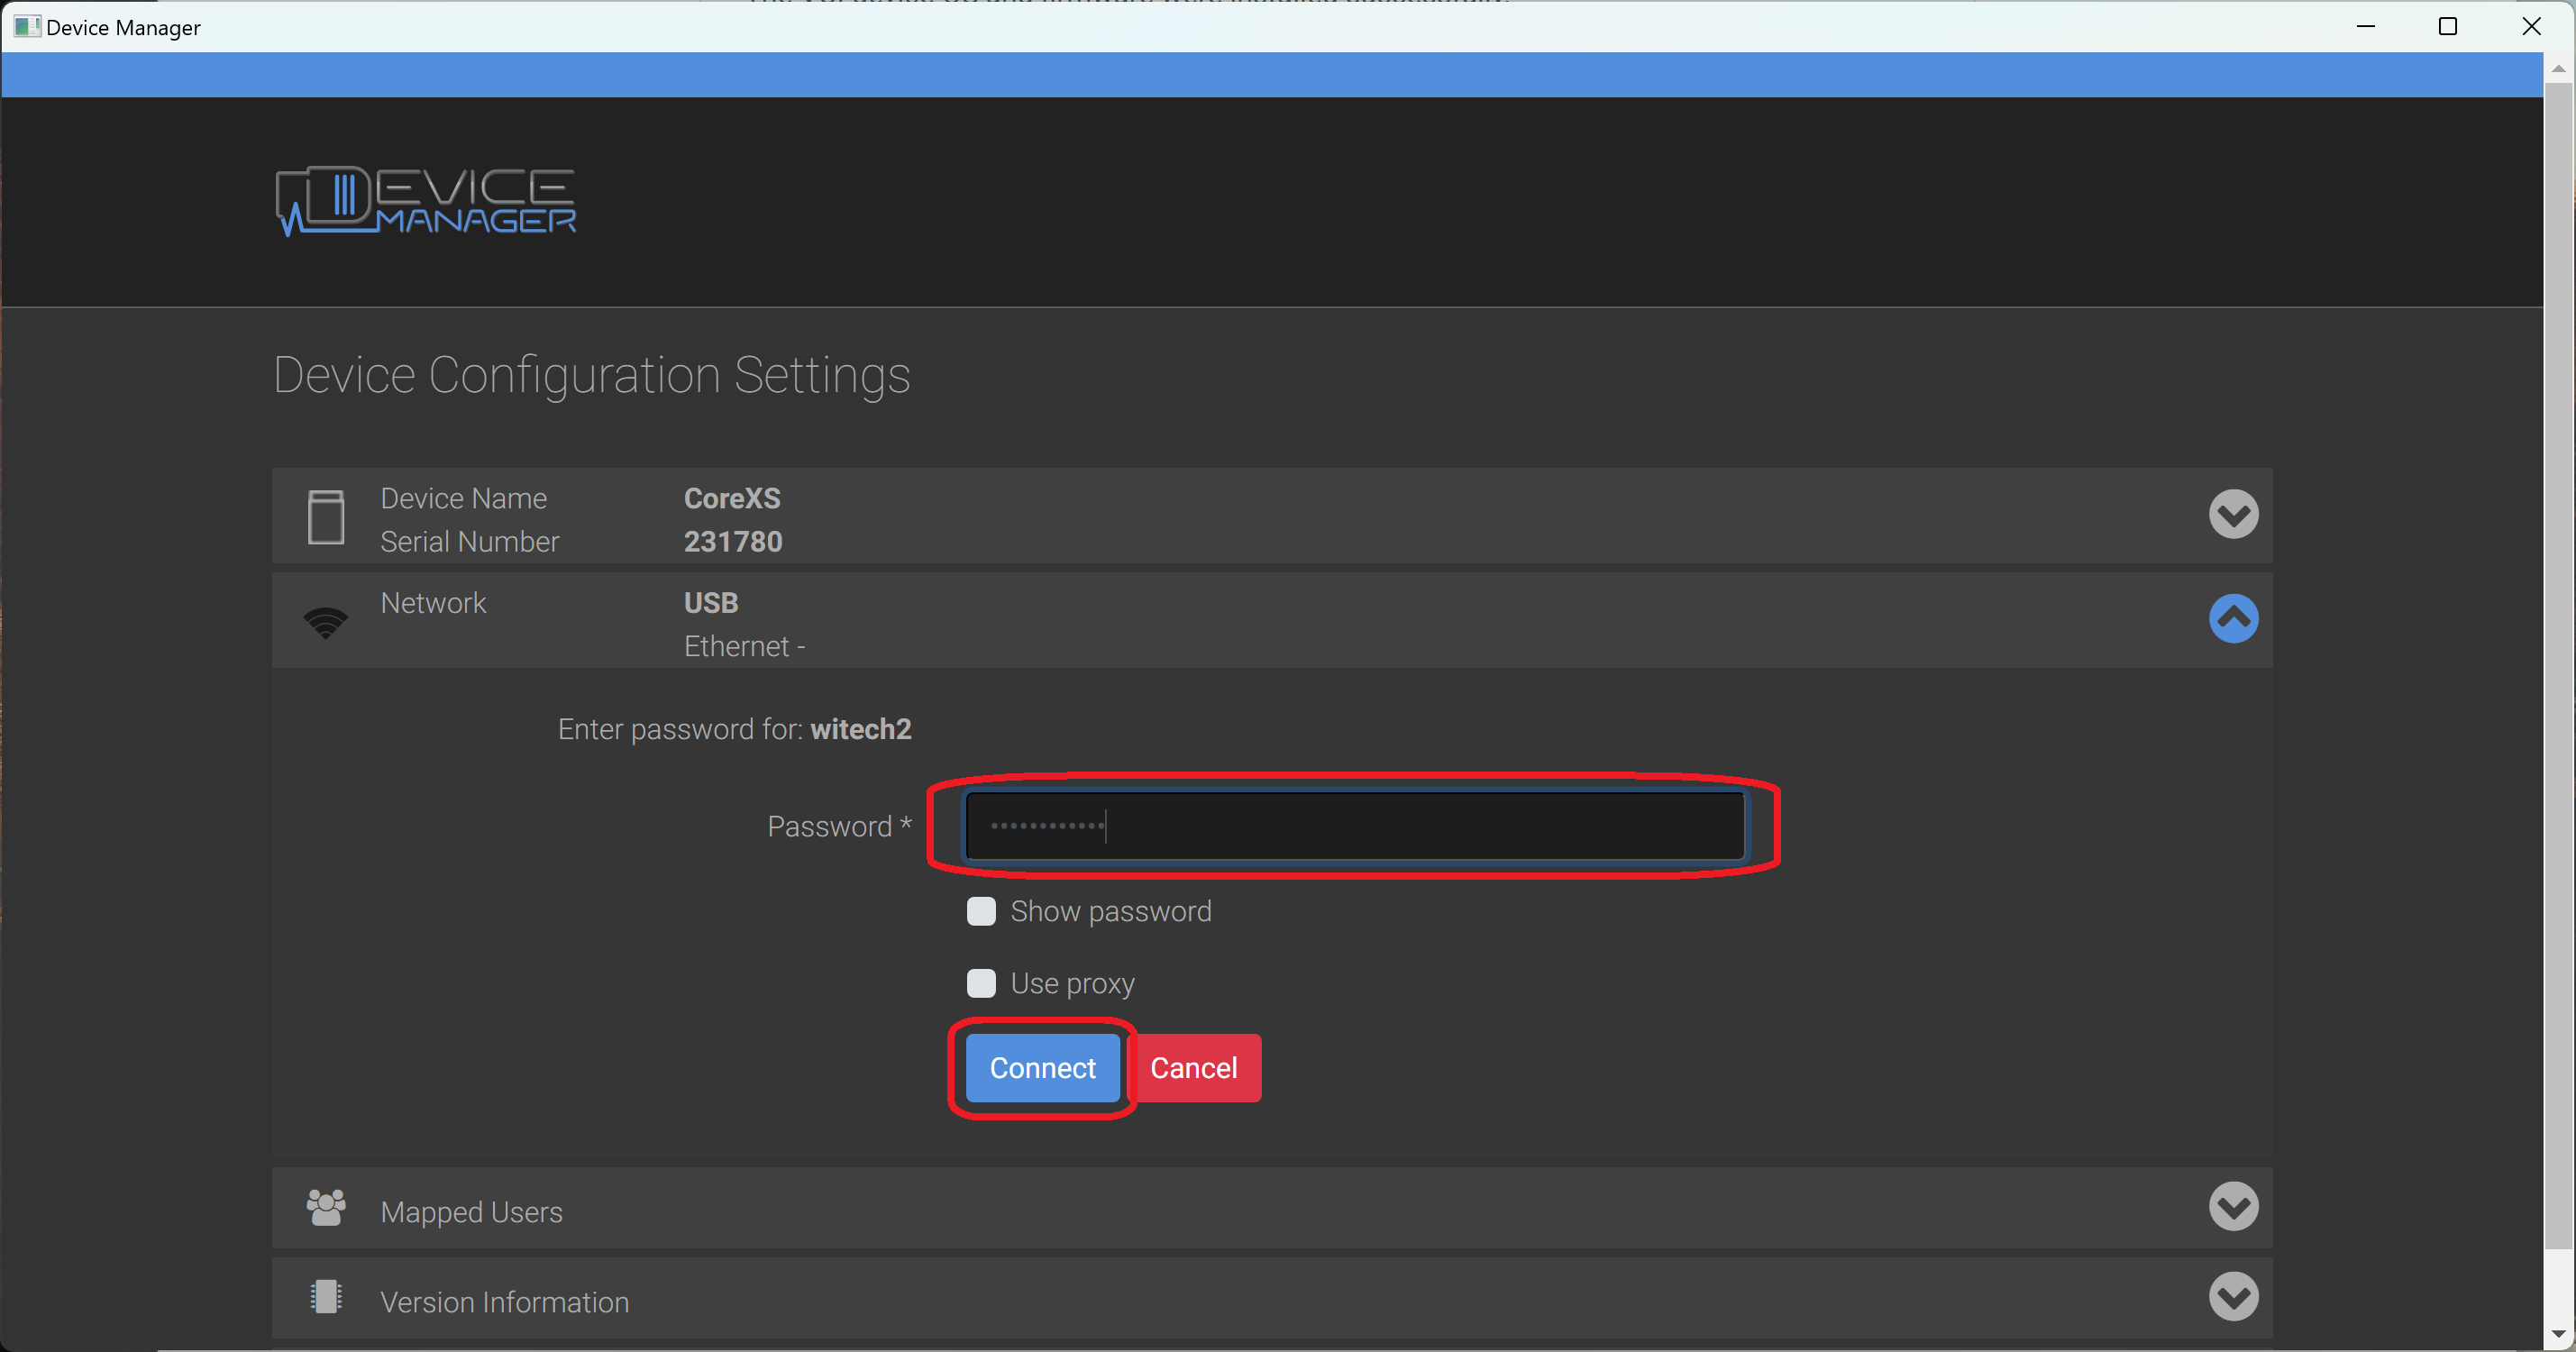
- Device Manager successfully connects to the Wi-Fi network and displays a checkmark next to the connected network.
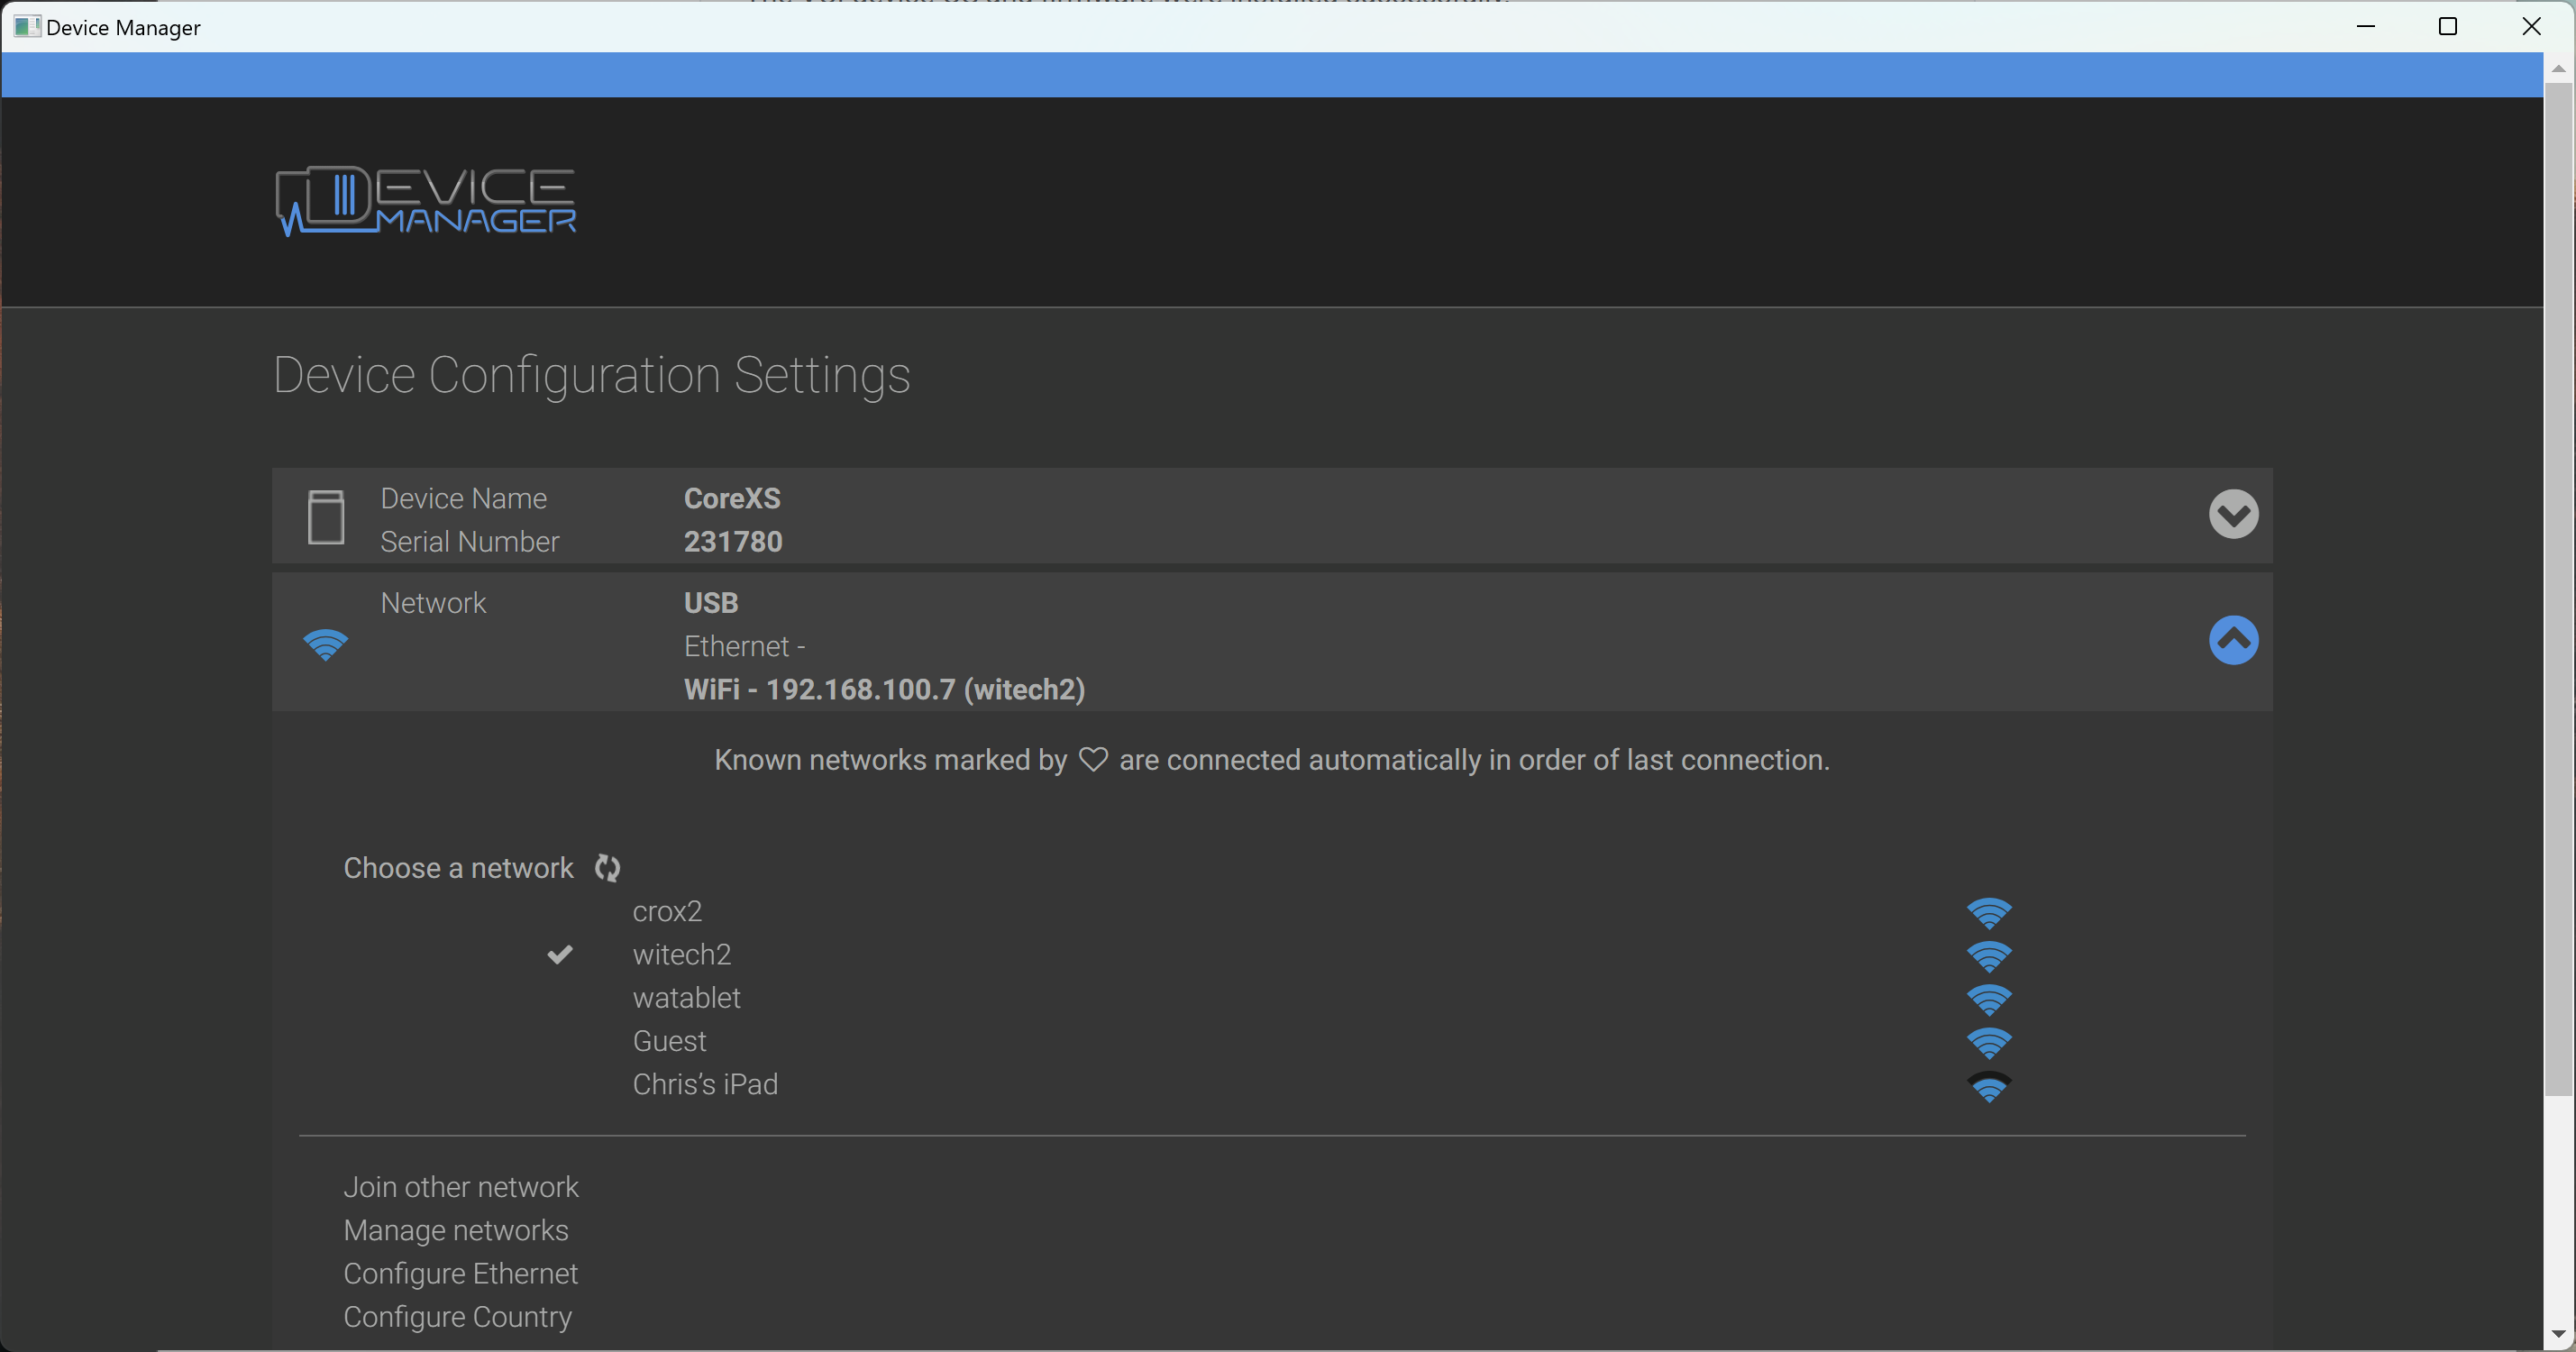
- Select and connect to any additional networks. Now is a good time to connect to a hotspot network to allow for road tests.
Notice the currently connected network displays a checkmark icon and any previously connected or saved network displays a heart icon.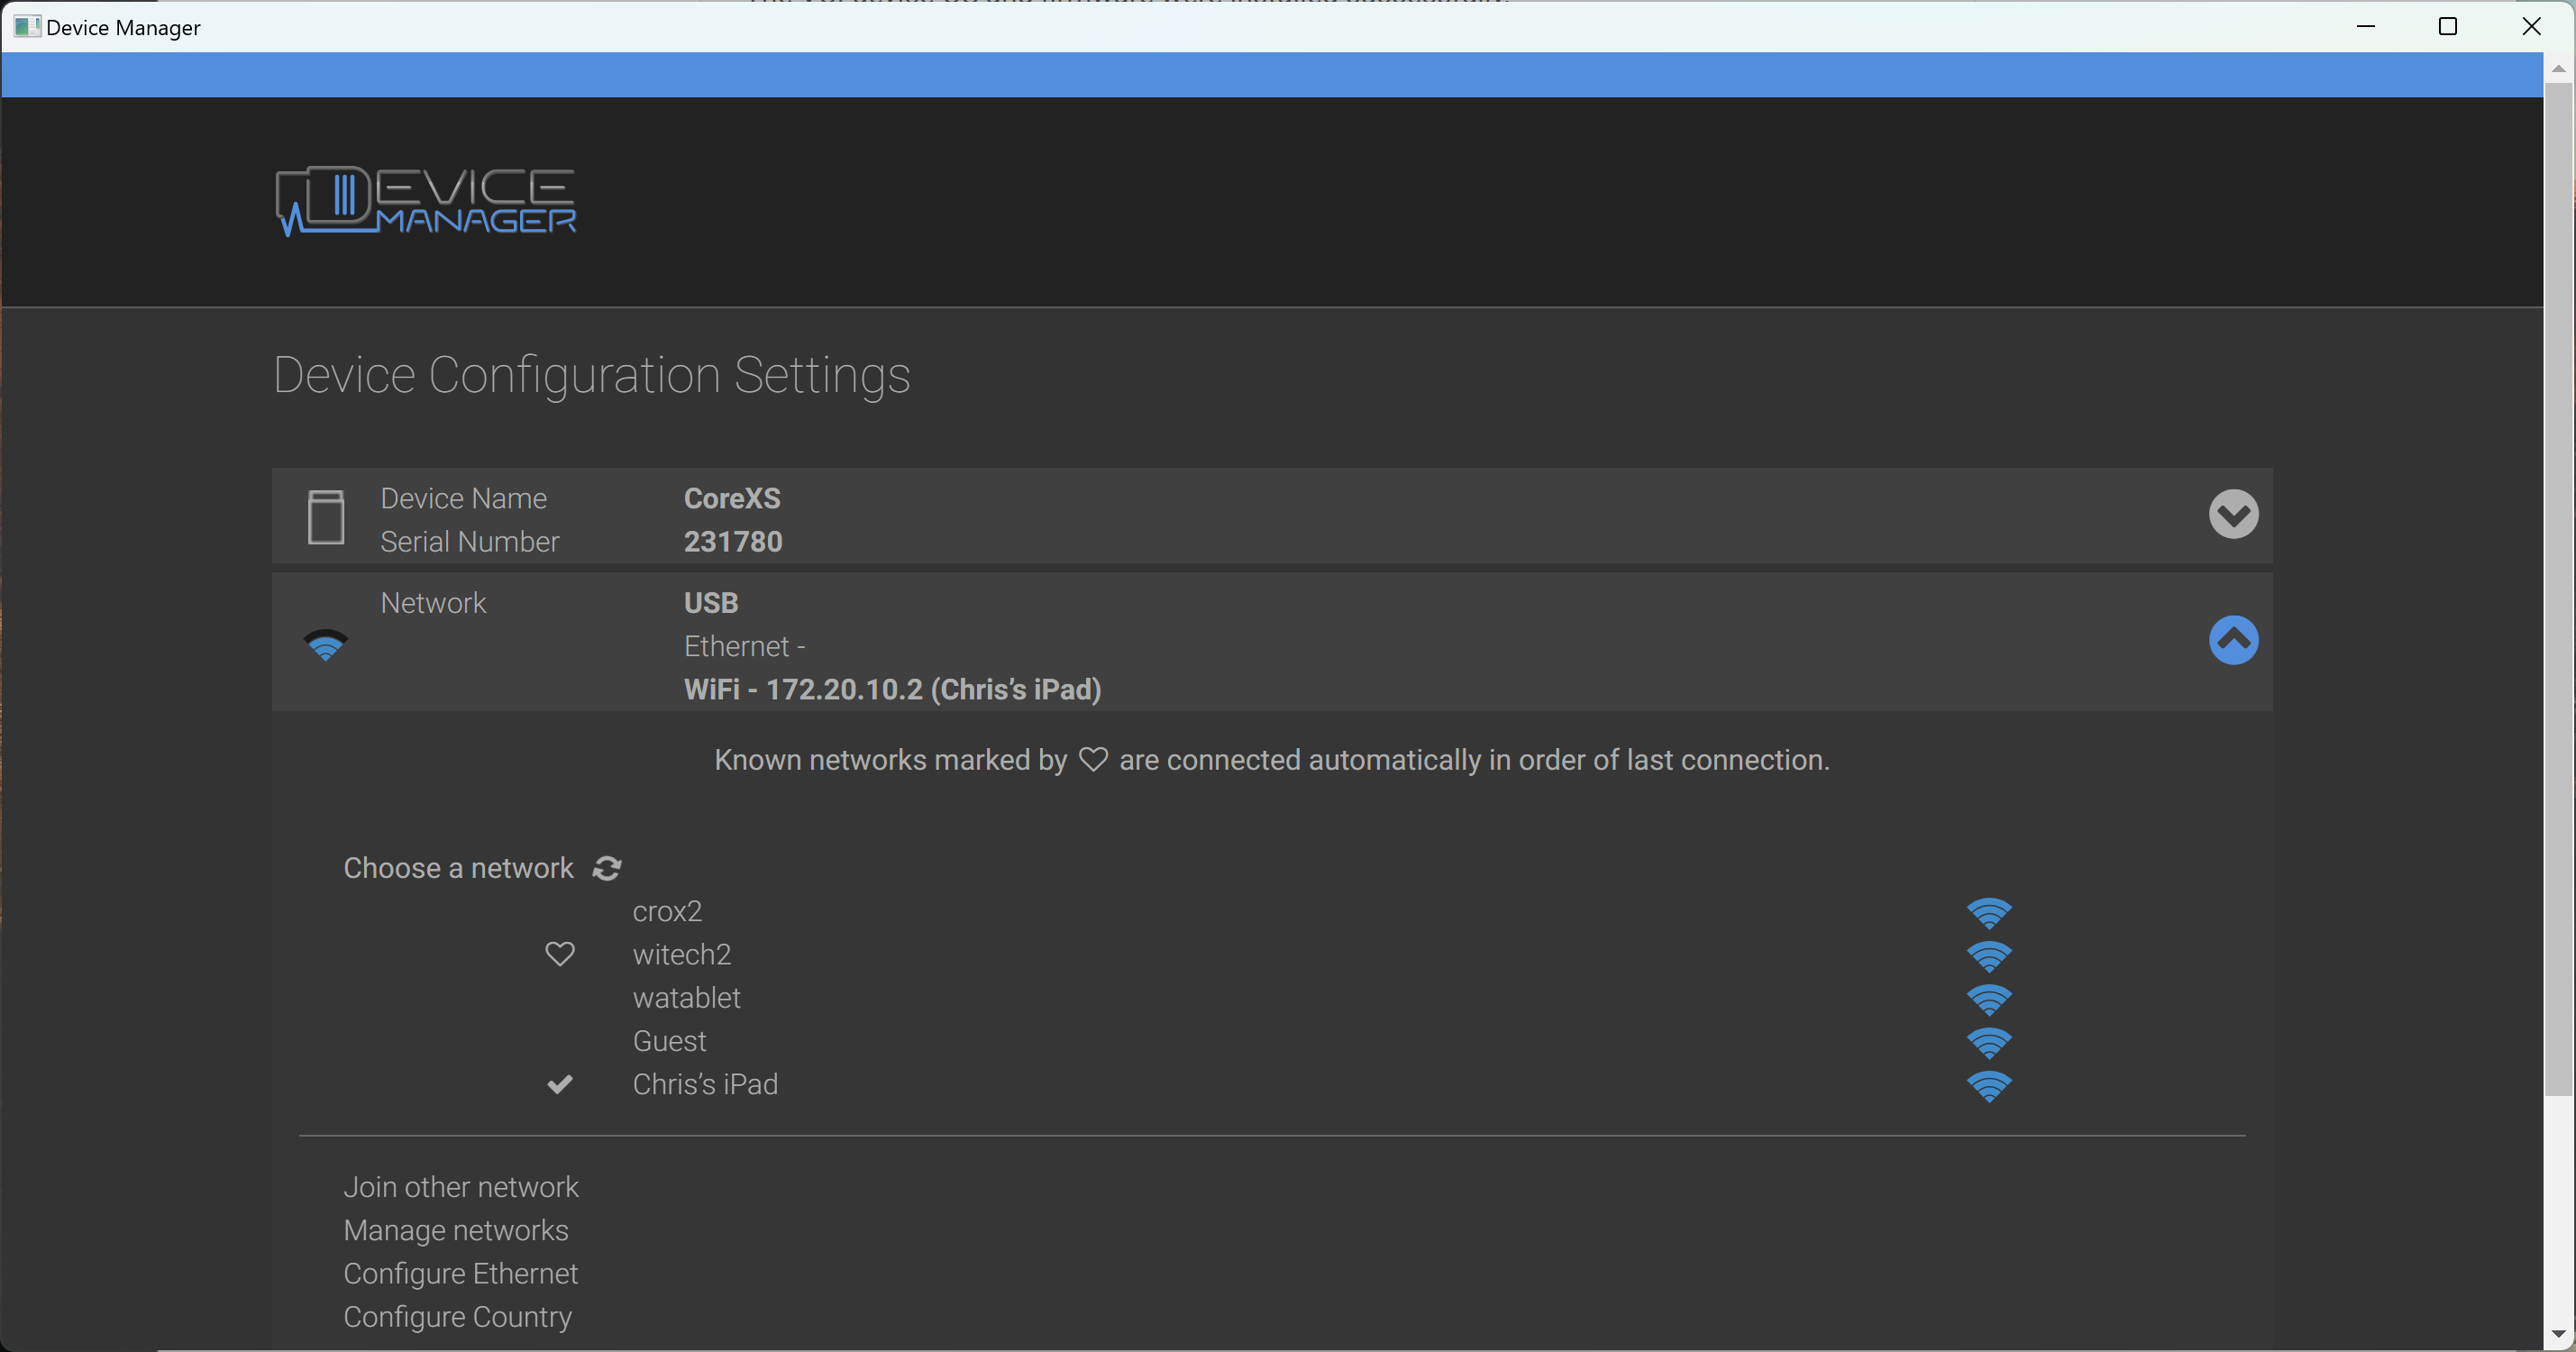
- When finished adding the desired networks, close the Device Manager window.
- The PSA Interface device is now configured and ready to use with wiTECH 2. Disconnect the USB cable, connect the PSA Interface to a vehicle, and select "Continue to wiTECH".
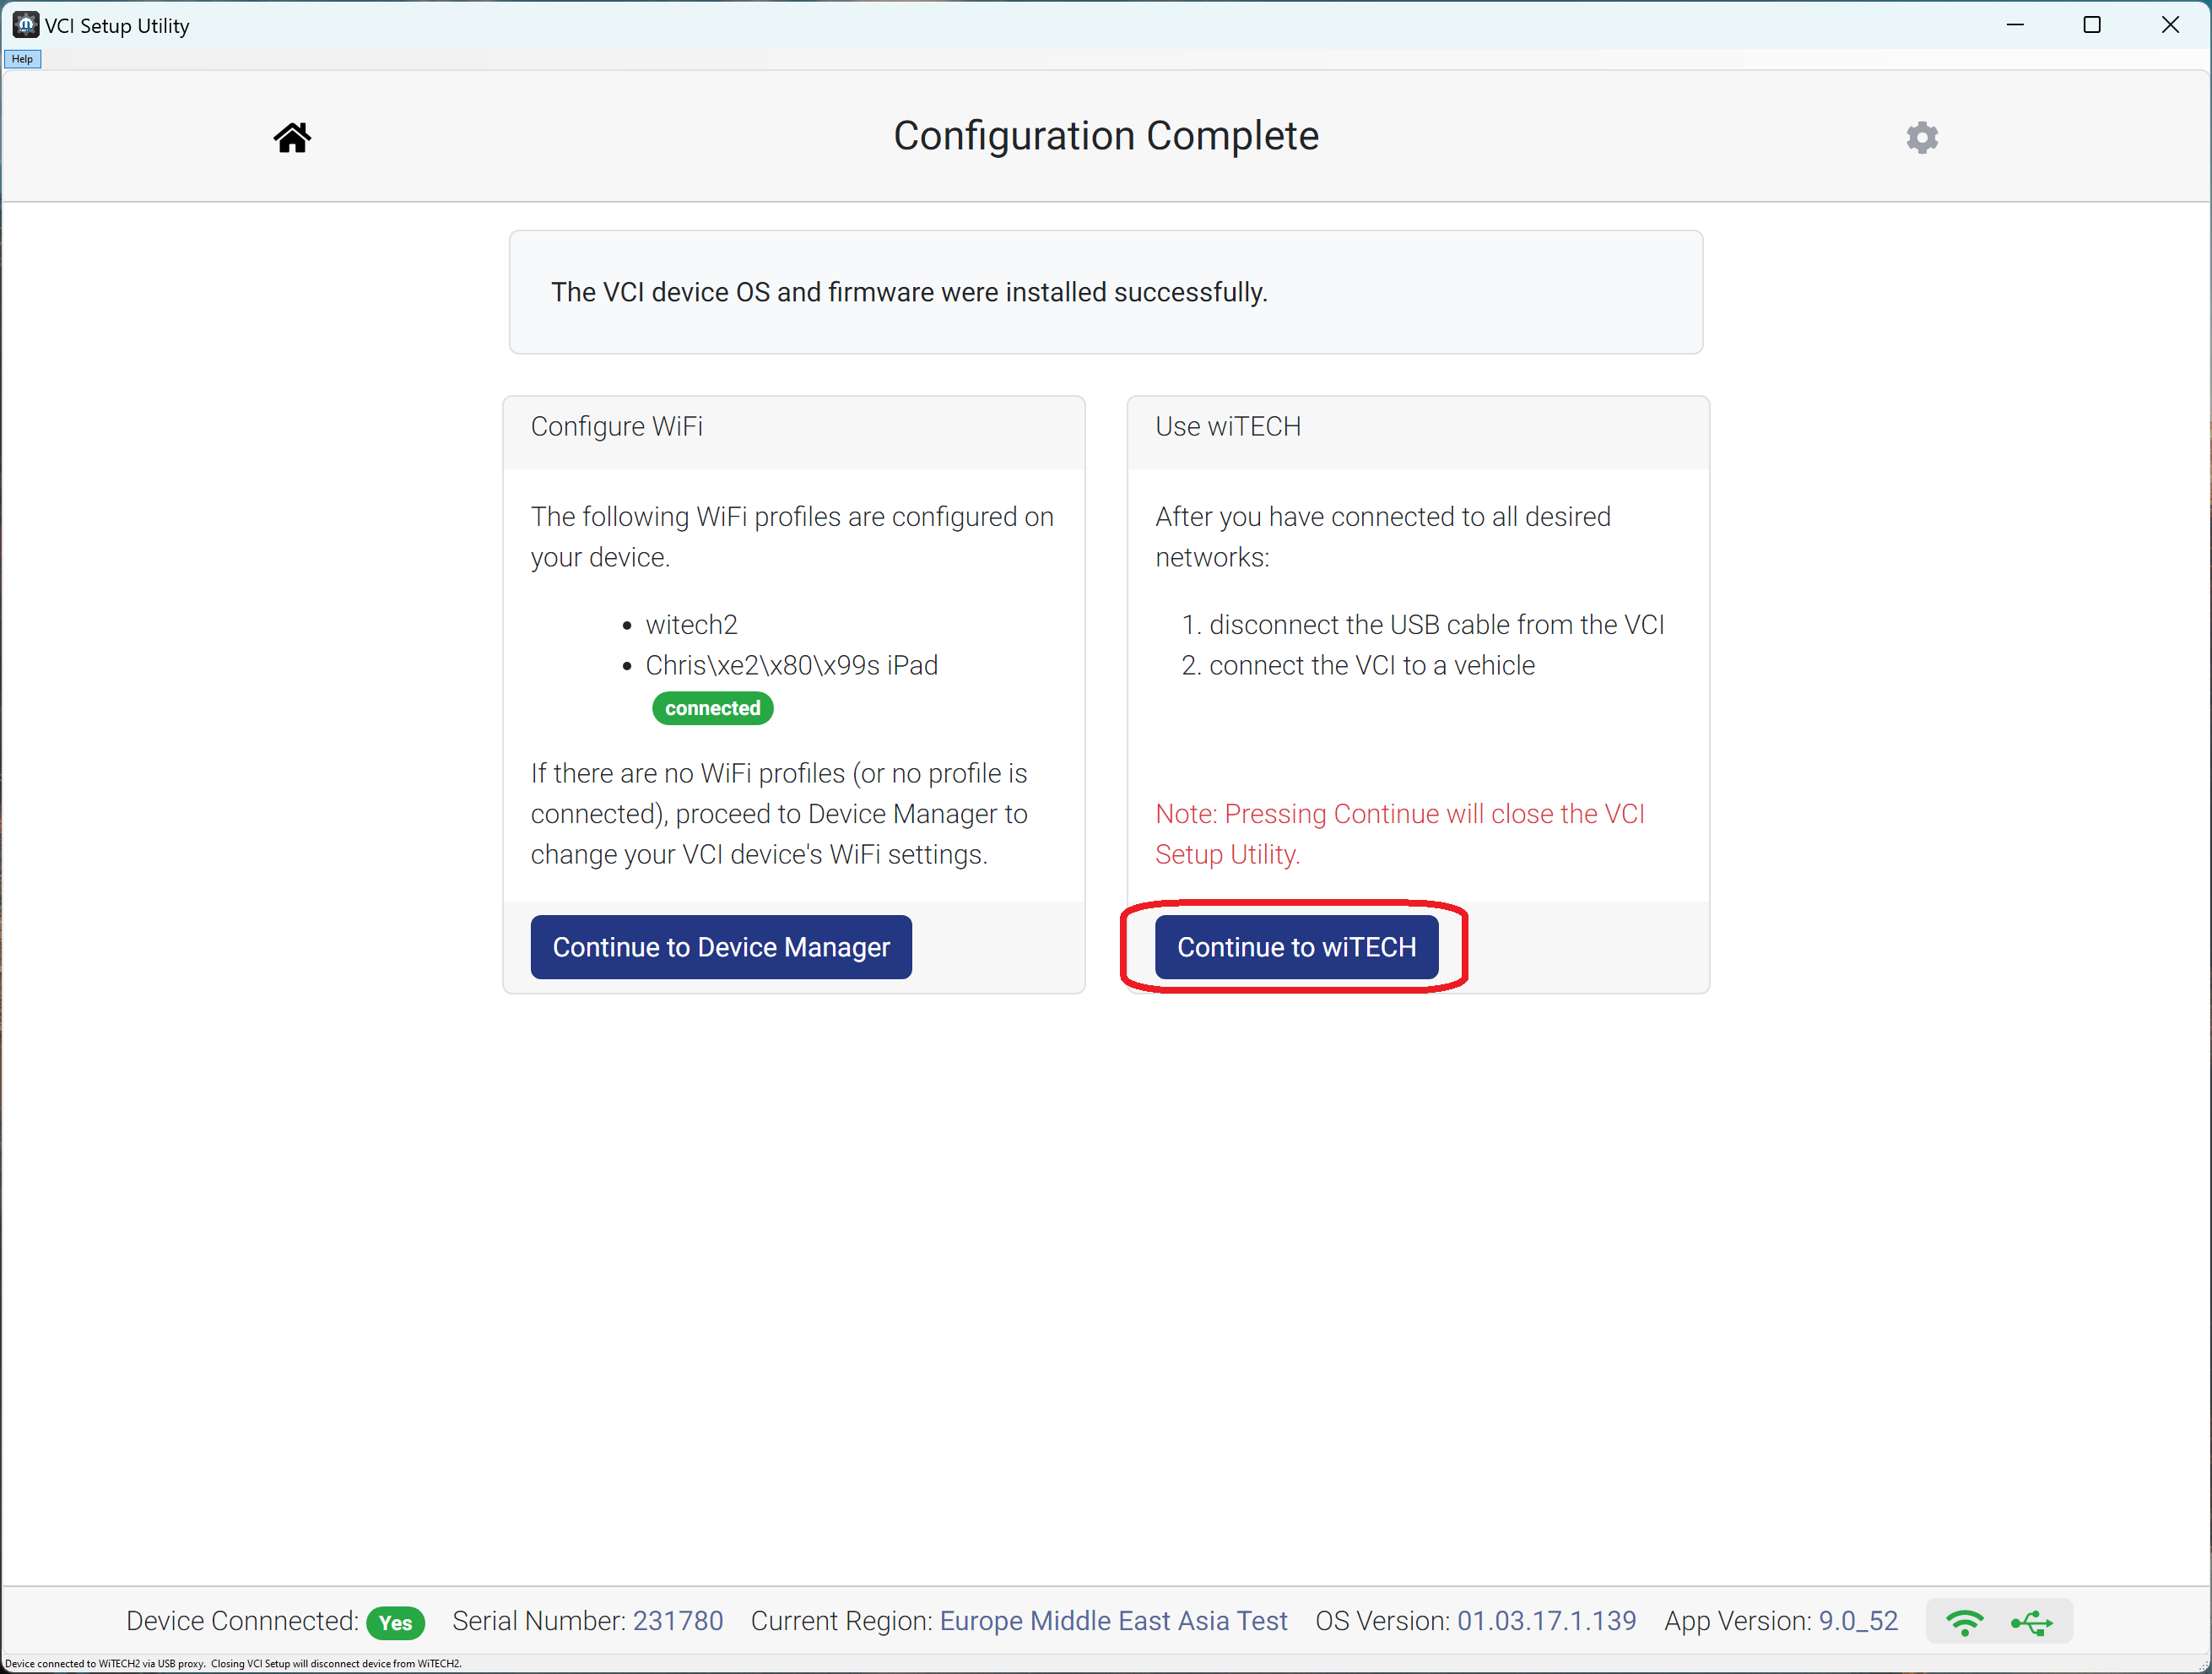
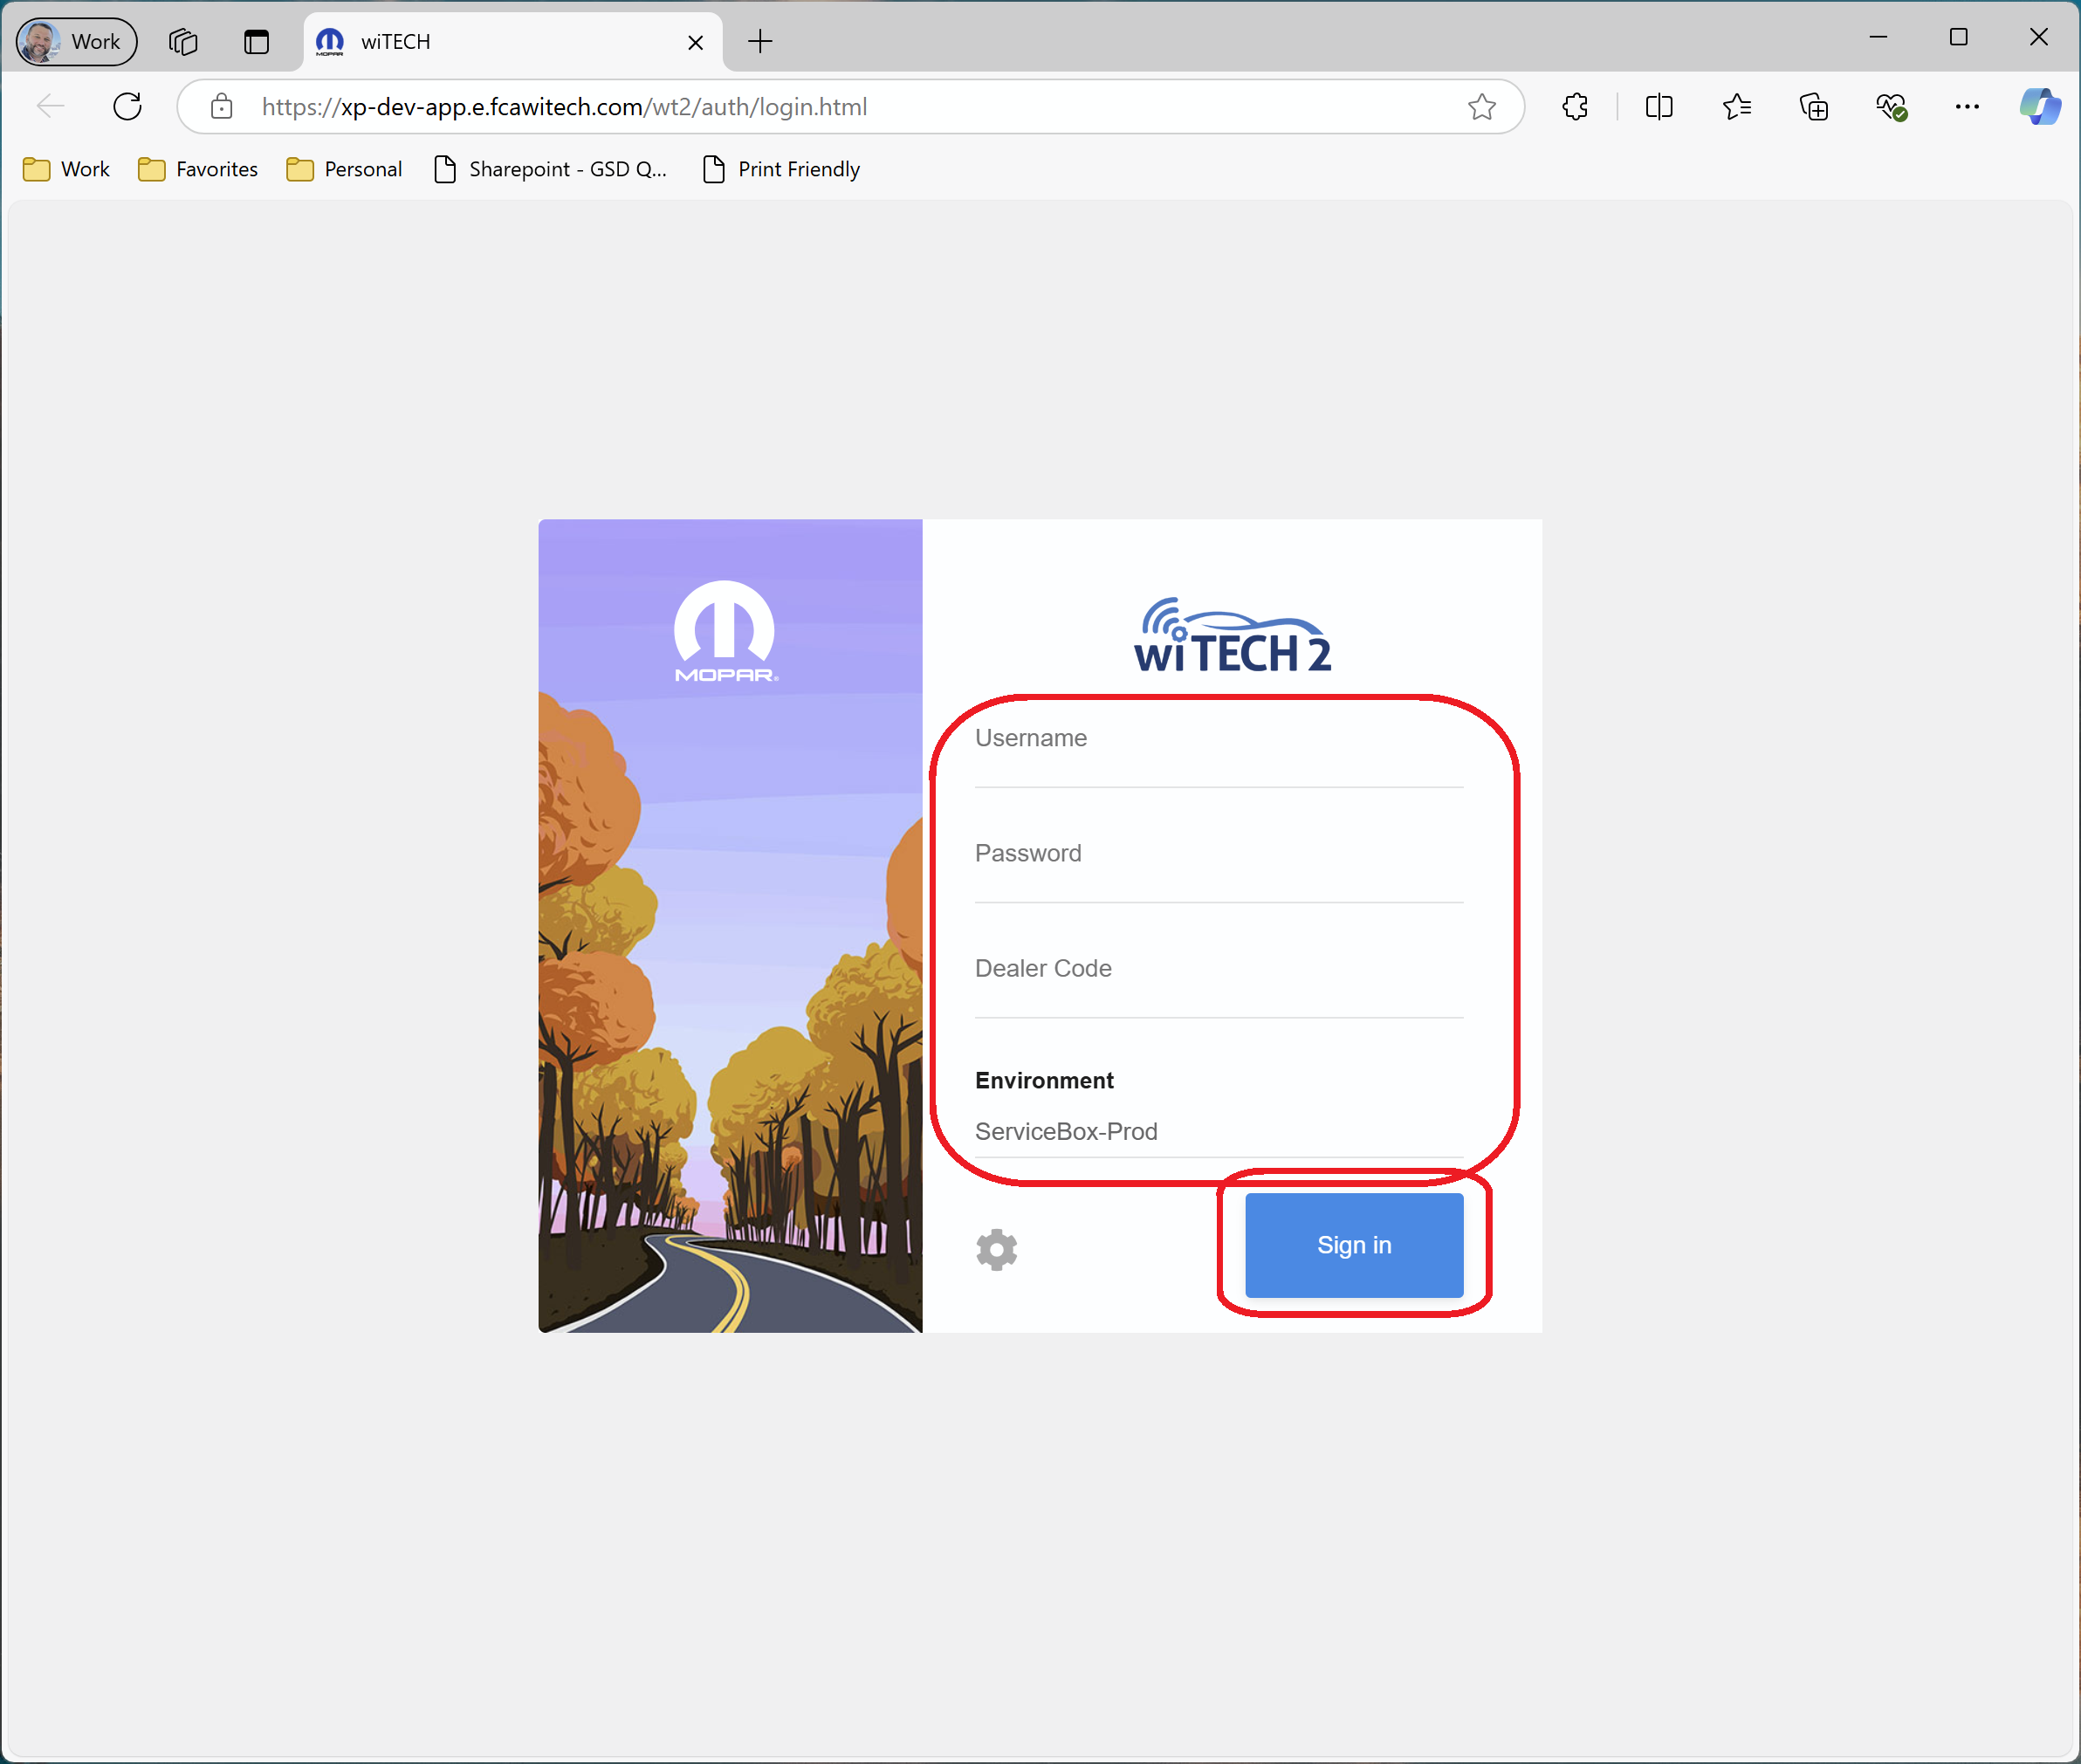
- The VCI Setup Utility closes and launches wiTECH in the default browser. Enter valid login credentials and select "Sign In".
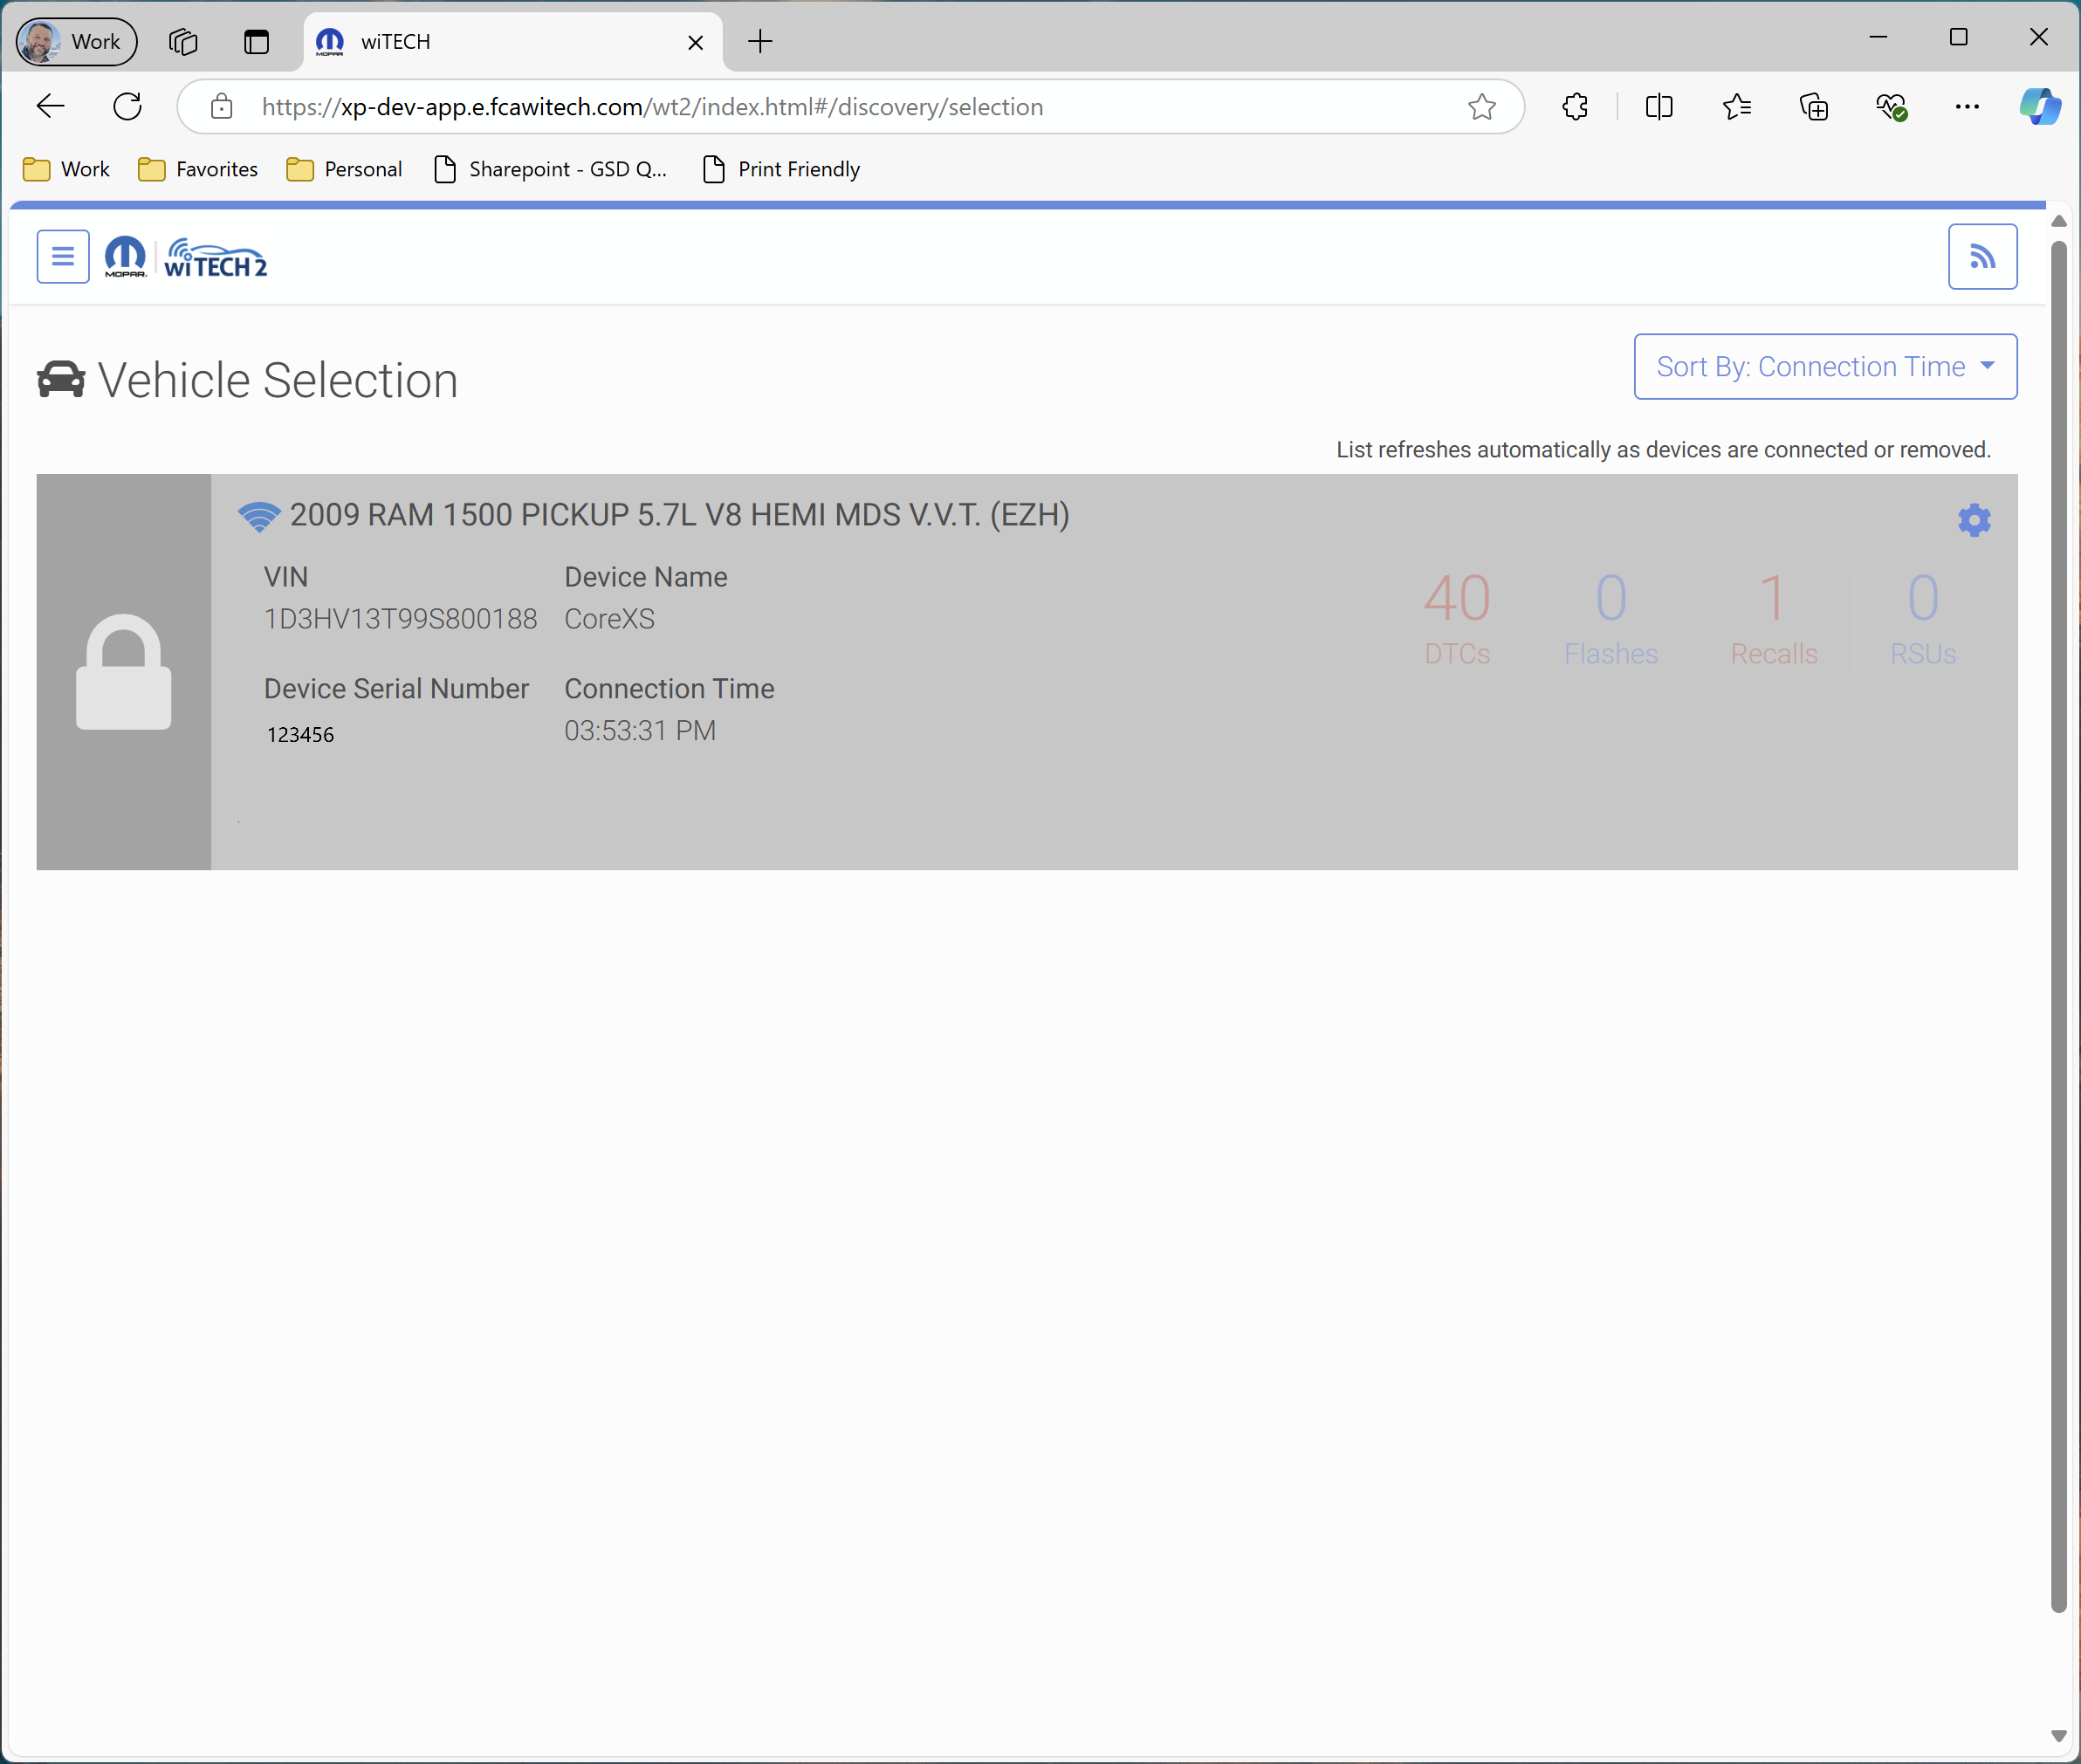
- Read and accept the EULA if needed. wiTECH loads to the Vehicle Selection page with the newly setup PSA Interface device is listed and ready to perform diagnostics on the connected vehicle.
To switch the PSA Interface device from wiTECH mode to DiagBox mode, and vice versa, perform the following:
- Connect the PSA Interface to the PC via USB.
- Connect the PSA Interface to a vehicle J1962 connector.
- Launch the "Link to PSA Interface USB" application from the desktop.

- Enter valid PSA Interface device login credentials and select "Sign In".
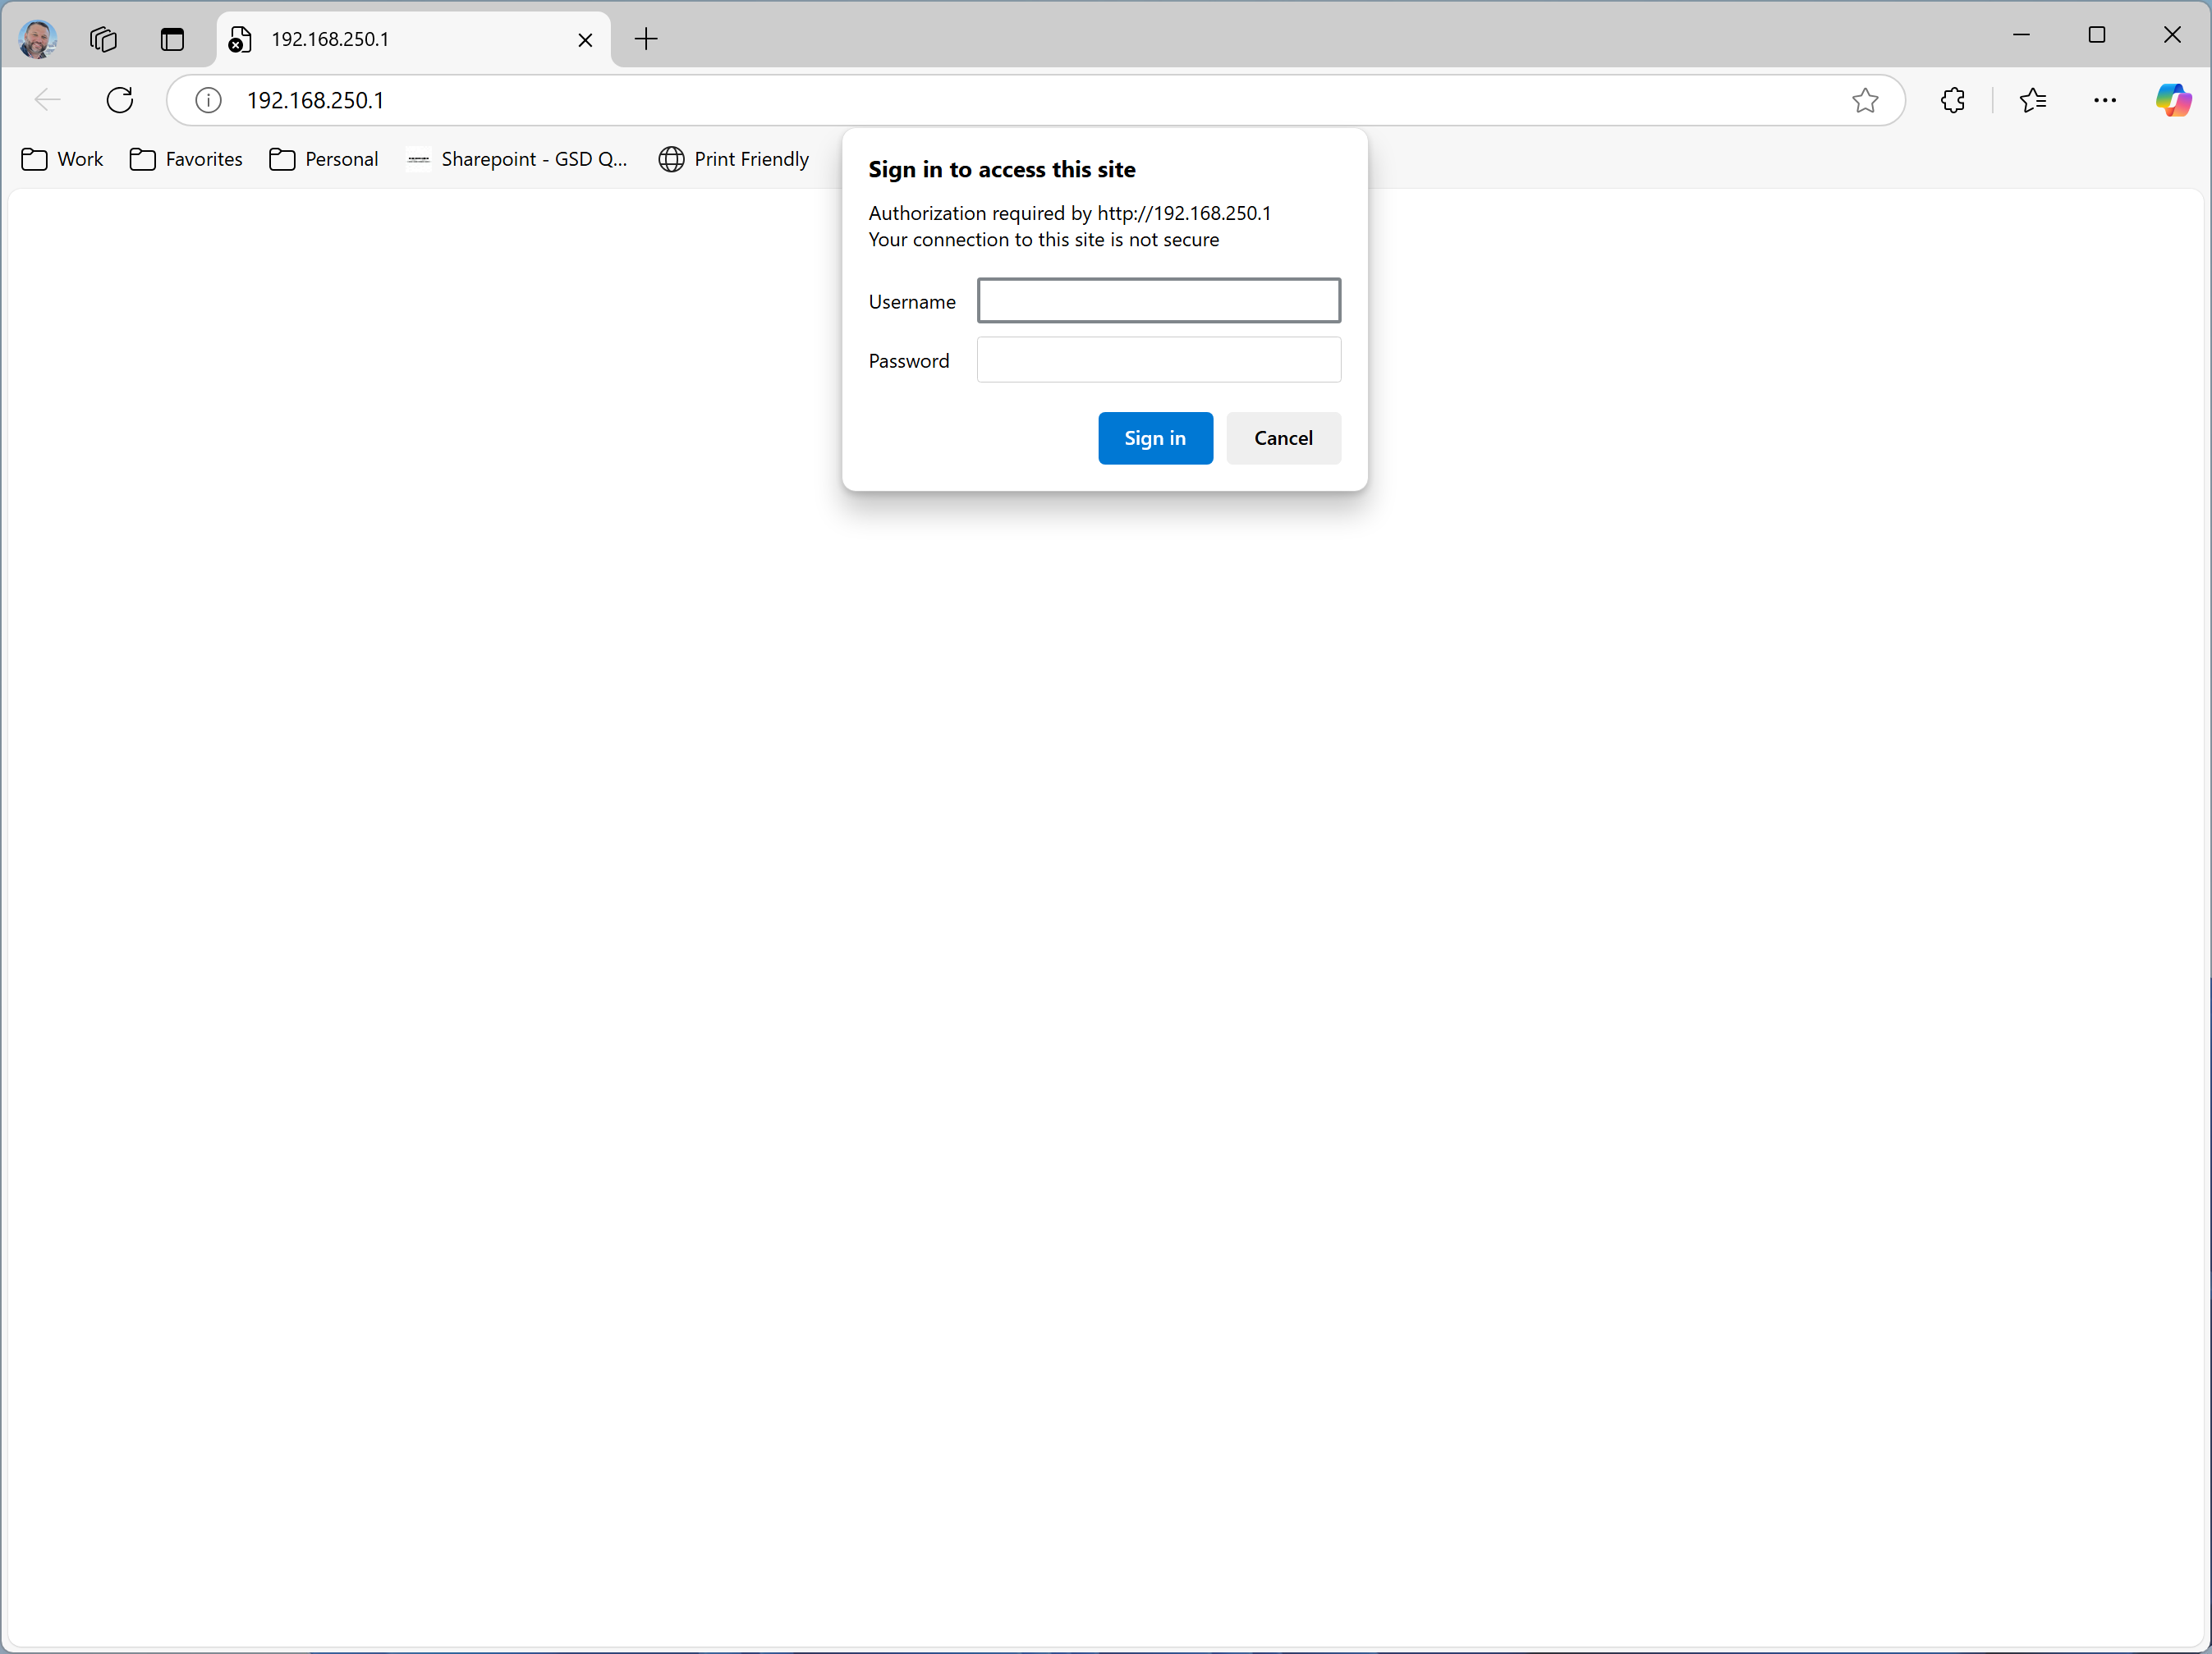
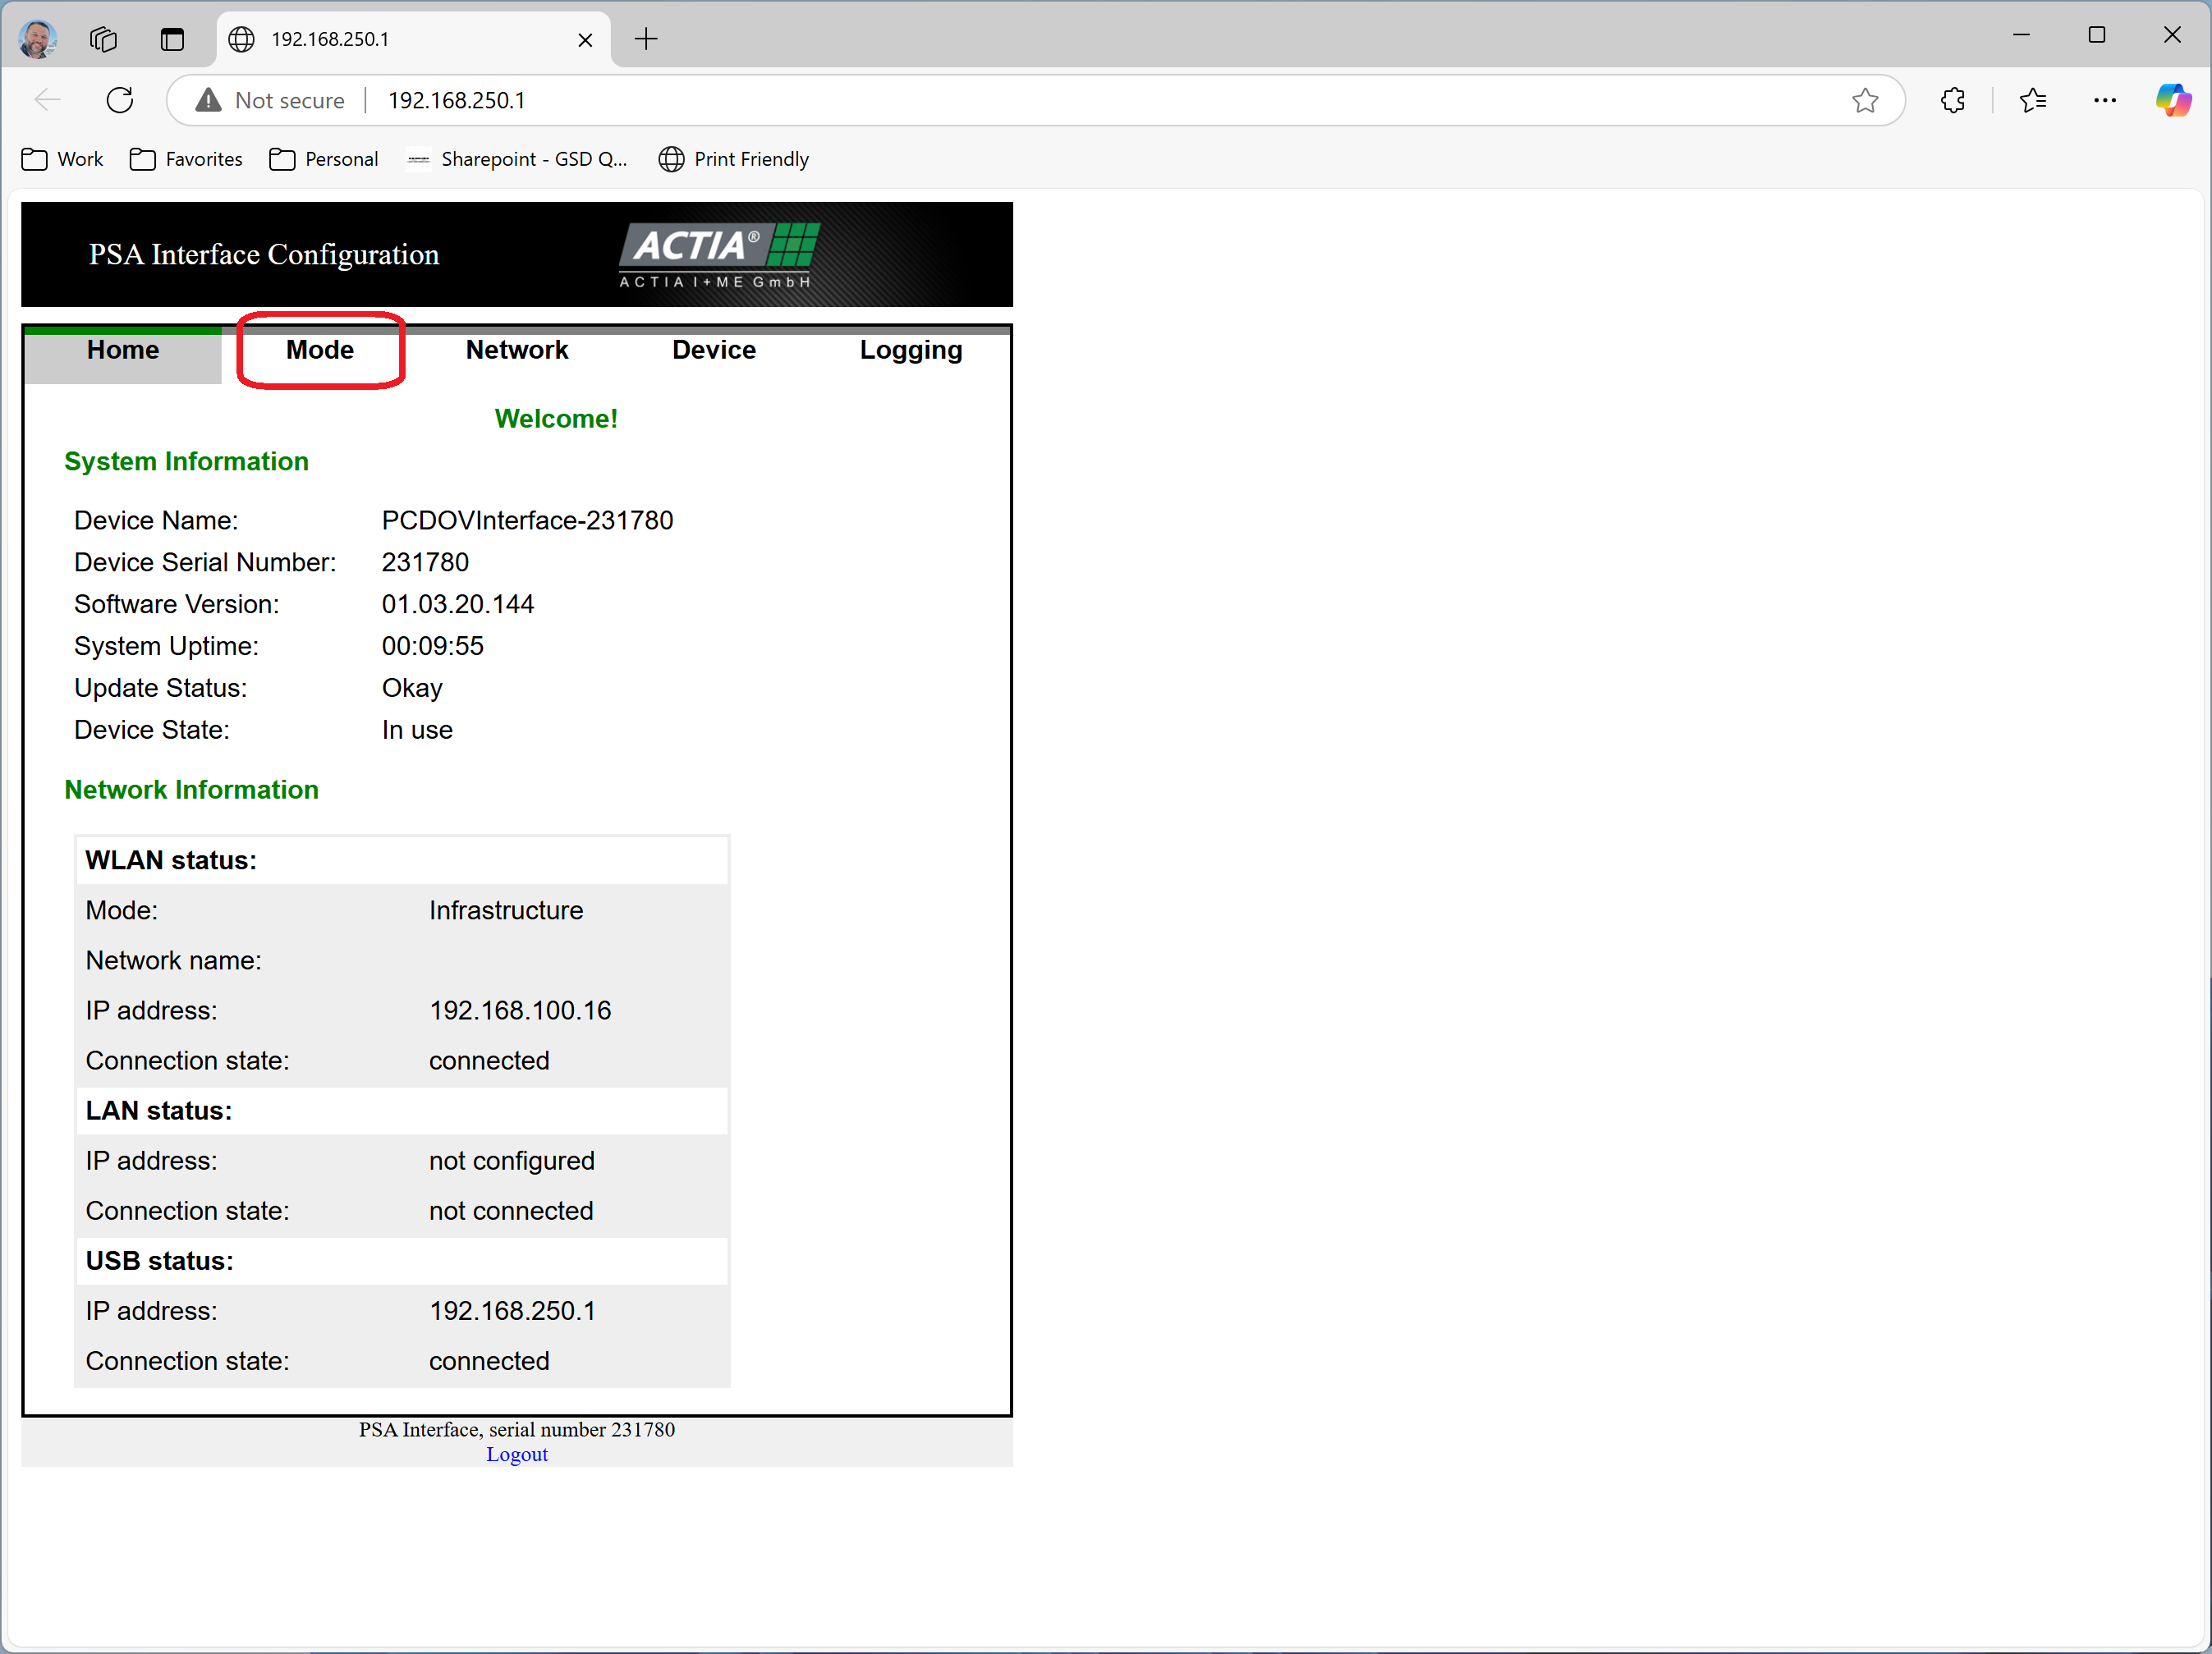
- The PSA Interface device page displays. Select the "Mode" tab.
- Select the desired mode, "wiTECH" or "DiagBox", then select "Save".
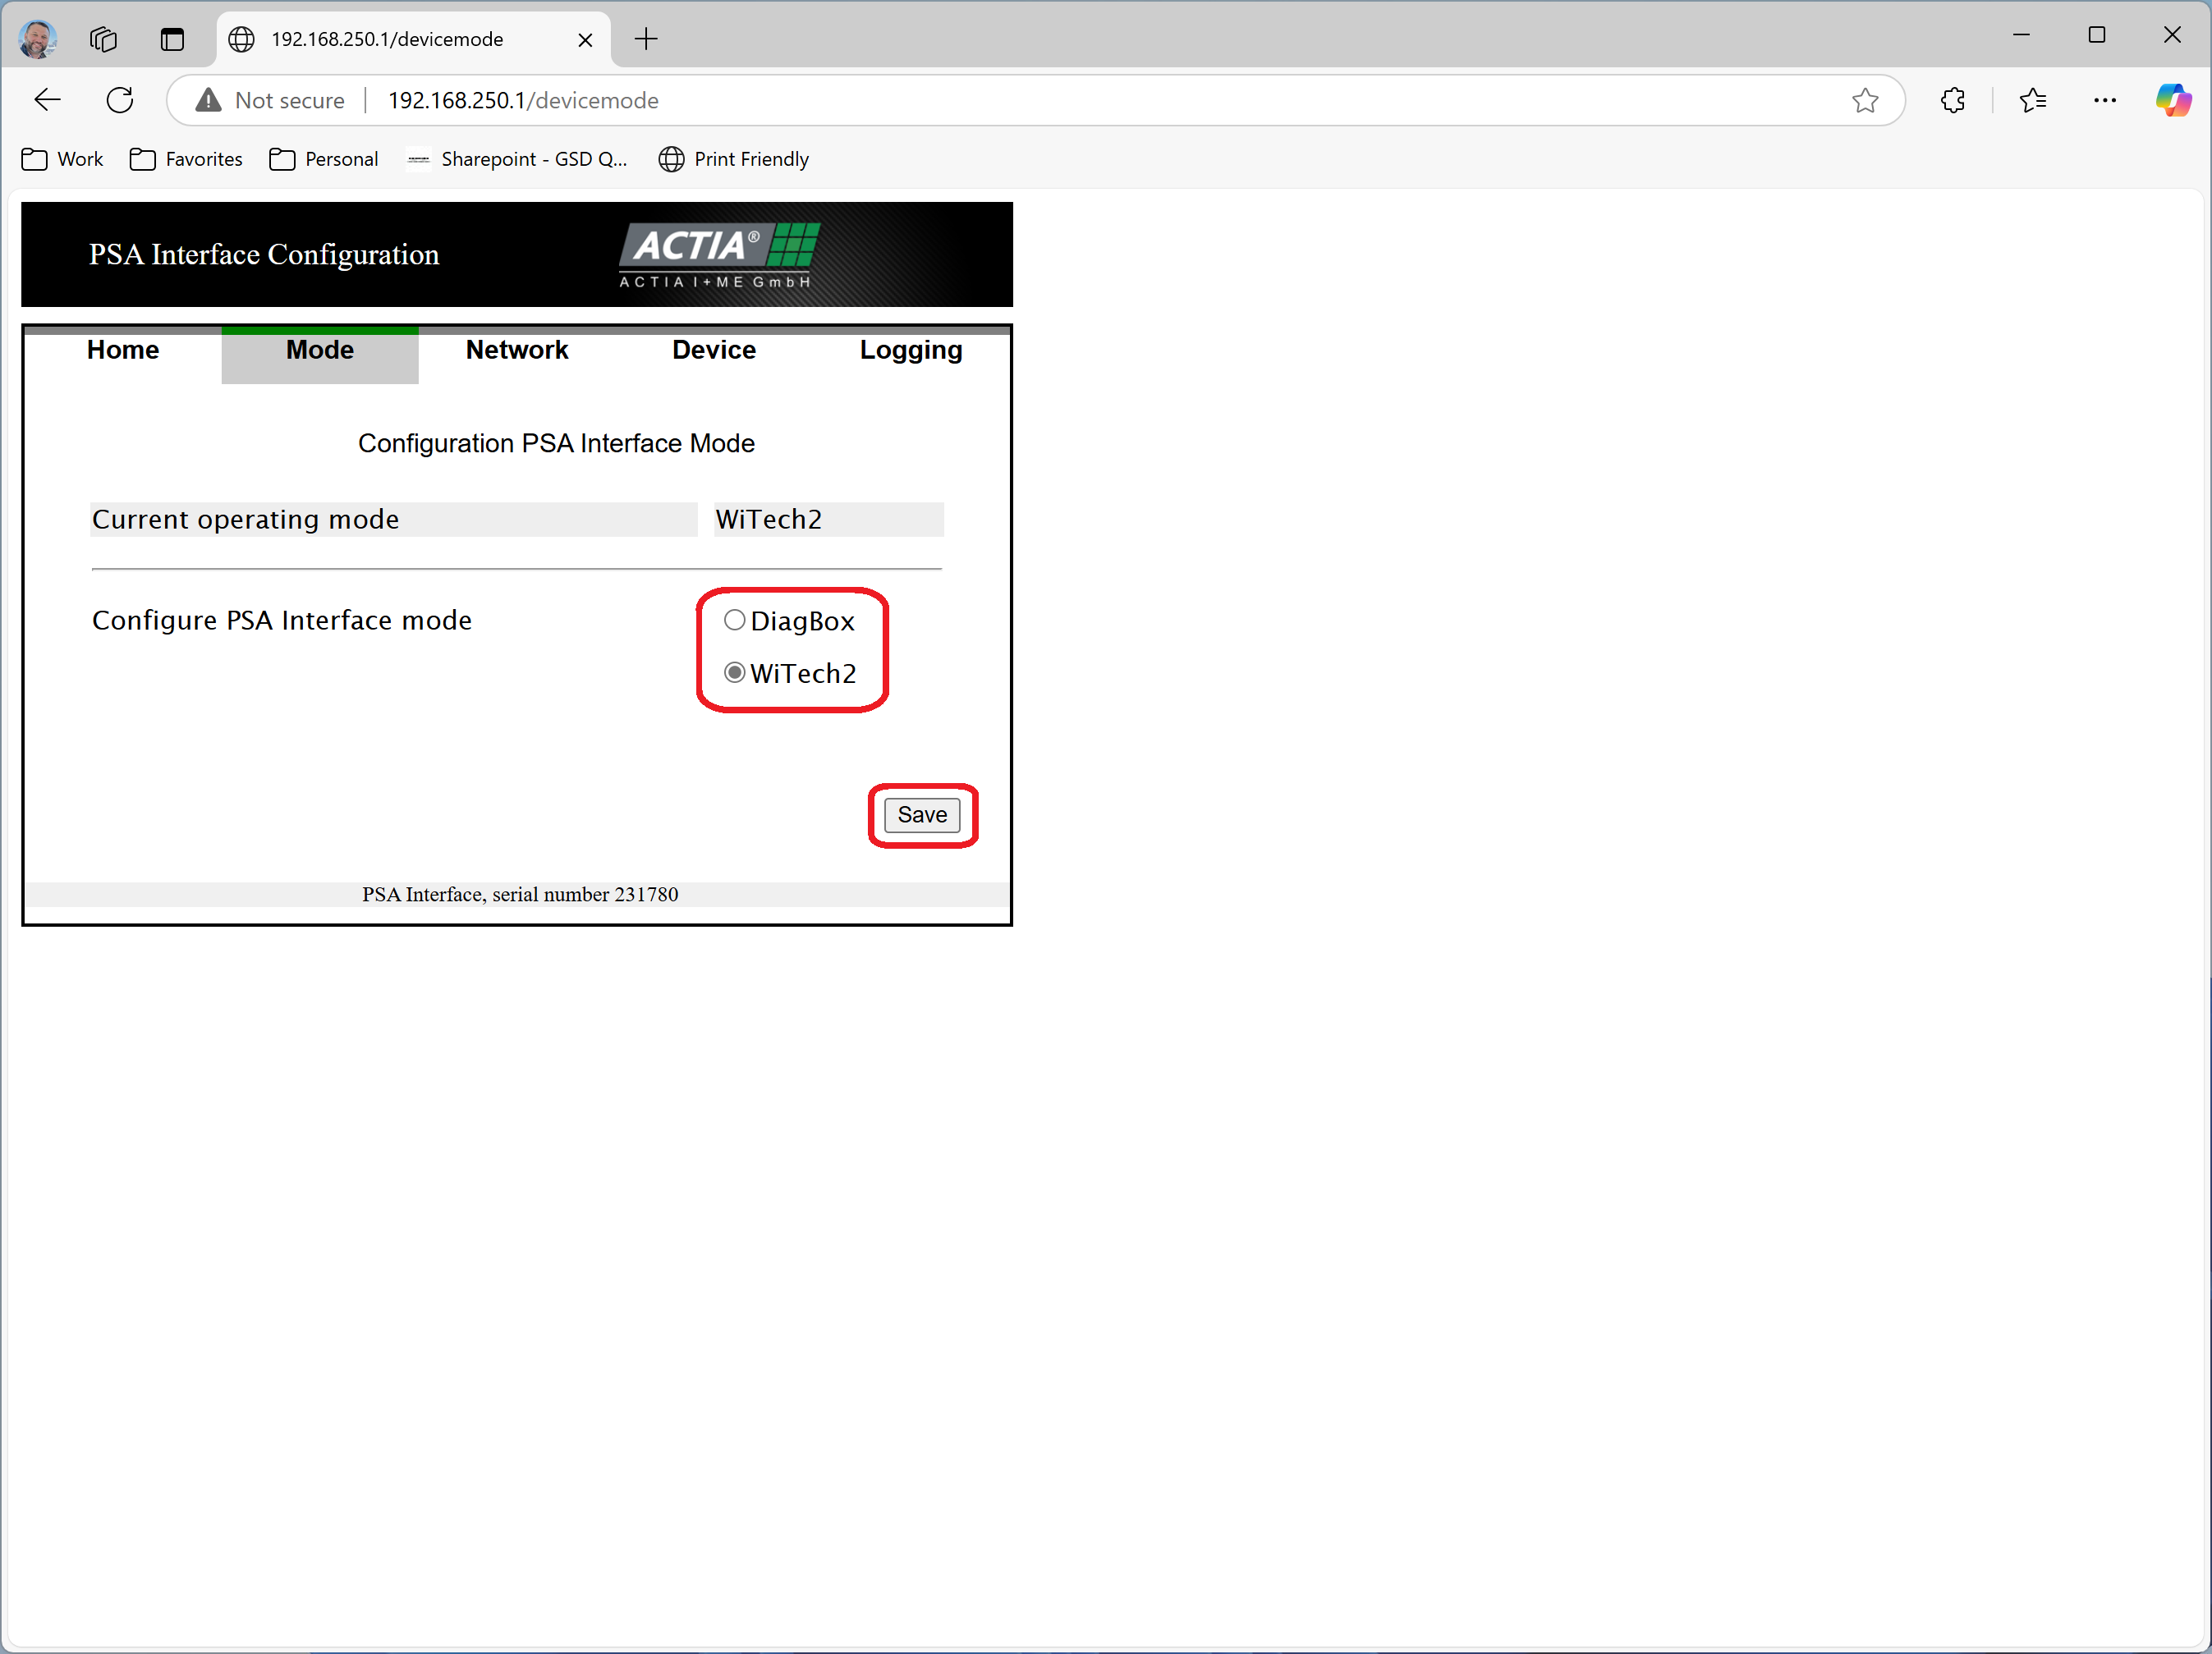
- For the new settings to take effect, disconnect and reconnect the PSA Interface from the vehicle J1962 connector.