3rd - Configure Wi-Fi on a VCI.
For North America Dealerships ONLY
NA Dealership VCI Setup Process:
For a video version of the North America Dealership wiTECH 2.0 setup process, please see Video - How-to Setup a new device for wiTECH 2.0 .
1st - Associate Service Technicians to VCI Devices
2nd - Setup a VCI for wiTECH 2
3rd - Configure Wi-Fi on a VCI. (this article)
How-to Configure Wi-Fi on a VCI
ATTENTION: Prior to configuring and updating your Vehicle Communication Interface (VCI) device, please follow Knowledge Base (KB) article: Associate Service Technicians to VCI Devices
Note: If this is a new VCI, or it has never been used with wiTECH 2.0, you will have to run the VCI Setup Utility. This KB article will show you how to do that: Setup a VCI for wiTECH 2
Note: If you are looking to connect your VCI to a Proxy Server instead of a standard wireless connection you will want to follow the steps listed in the following article: Configure a VCI to a Proxy Server
1. On the PC, open the VCI Setup Utility and leave the VCI Setup Utility running in the background . Only open the VCI Setup Utility, do not select Continue in the Utility. (the VCI Setup Utility allows the VCI to communicate with the wiTECH 2 servers through the PC's internet connection)
2. If the VCI Setup Utility requires an update, please go ahead and allow the update and then relaunch the utility.
3. Connect the VCI to your computer via the USB cable you were provided.
4. Using an internet browser, login to your wiTECH 2 account at https://login.n.fcawitech.com
5. If required, complete software updates to the VCI device.
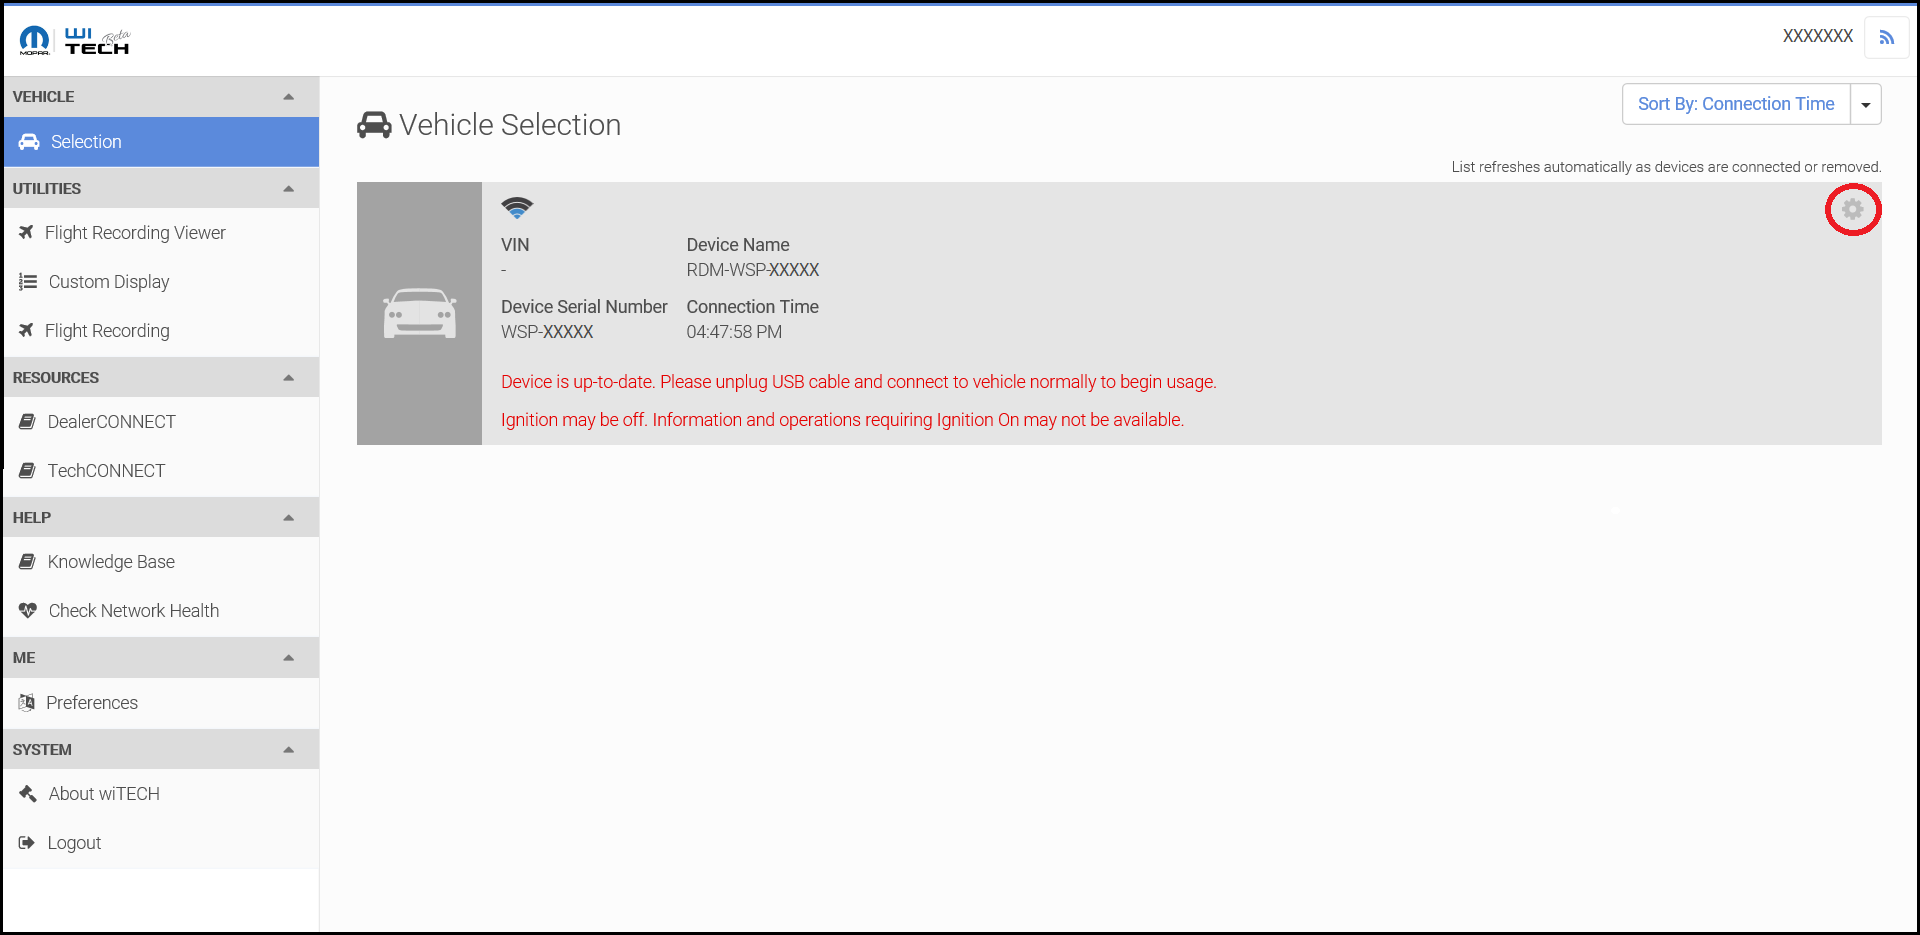
6. Click on the gear in the vehicle selection screen.
7. Click on the downward facing arrow on the row for Network.
Reminder: Your VCI will continuously look for a network. 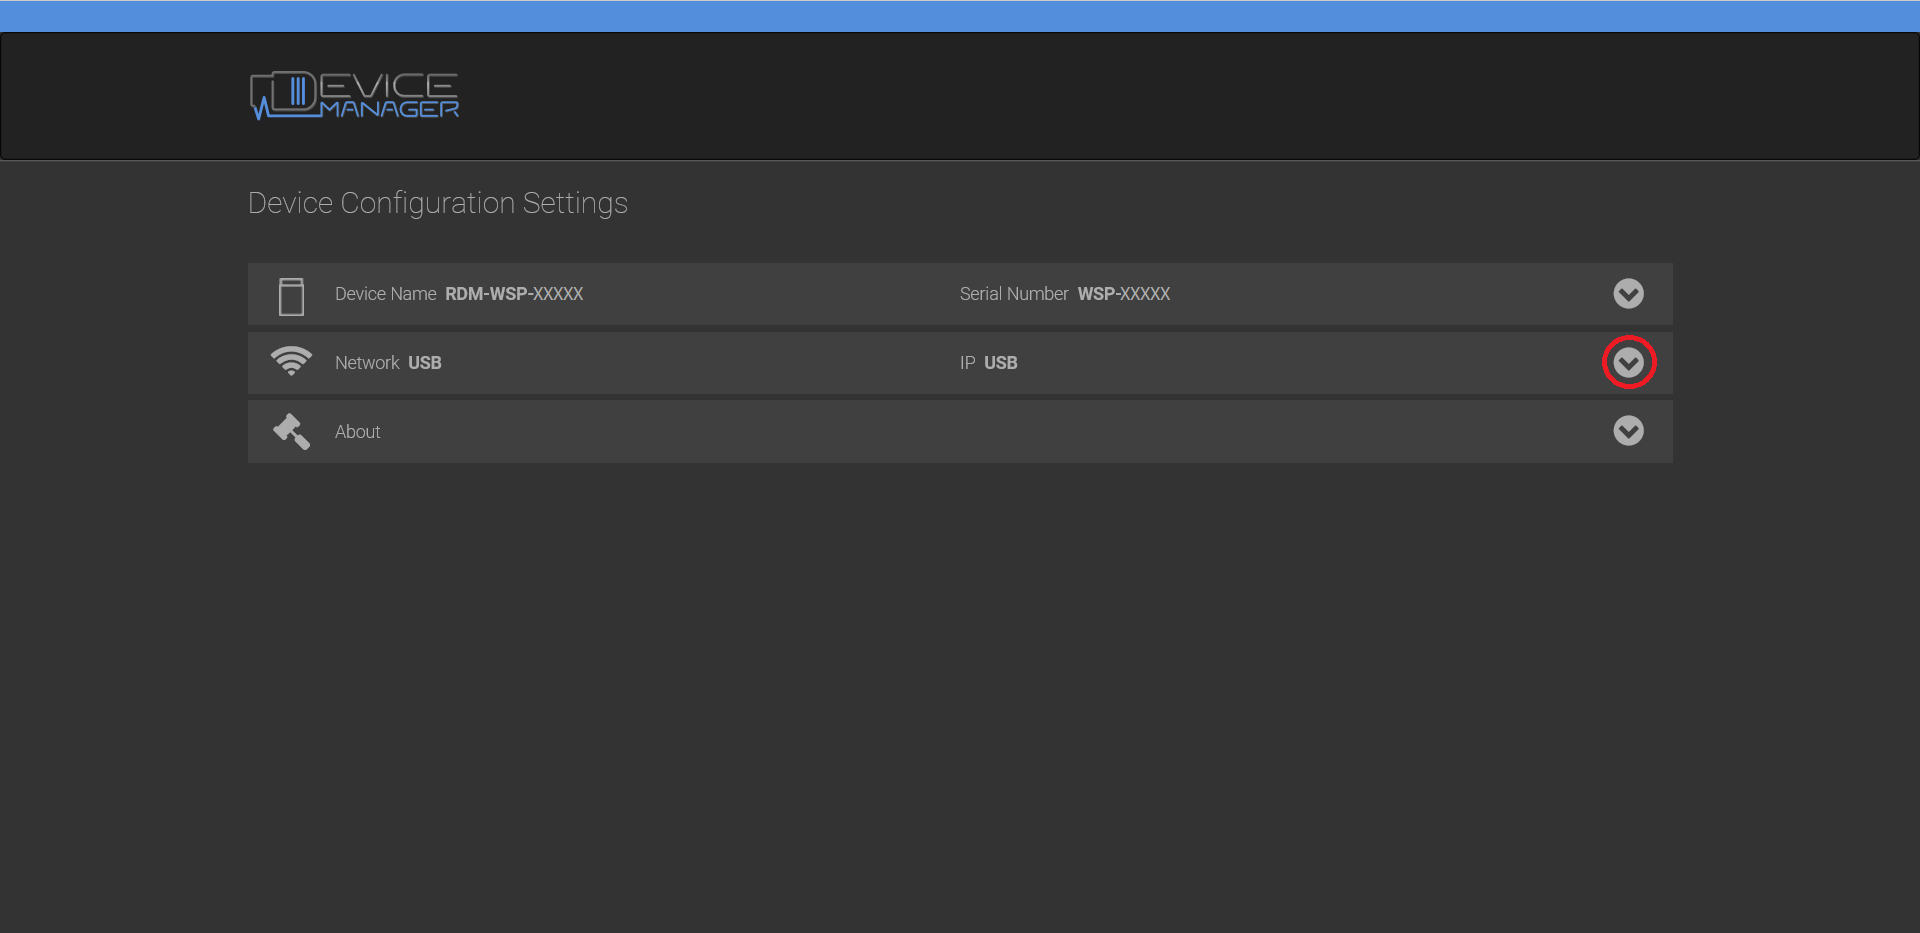
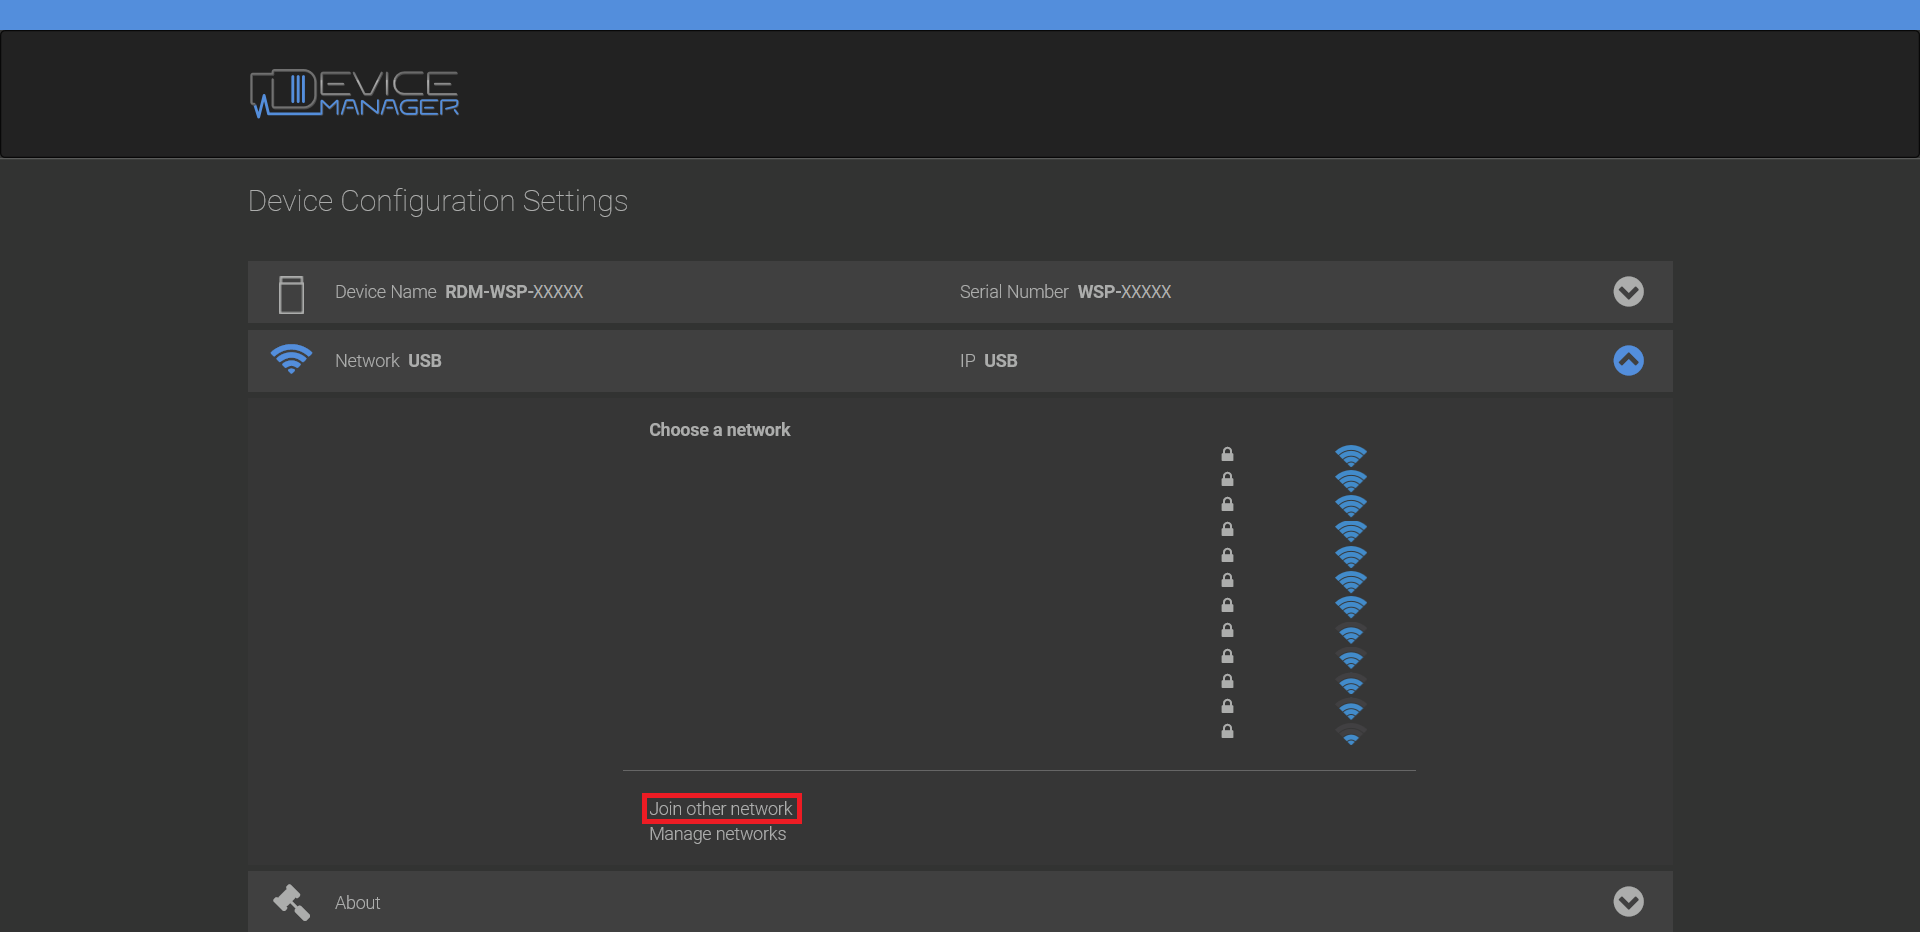
8. Click on the SSID of the network you would like your VCI to be connected to.
9. If you would like to connect to a hidden network or a network that is not displayed, then you can click on "Join other network" to manually enter your SSID.
NOTE: Use of Wi-Fi networks with hidden SSIDs is not recommended.
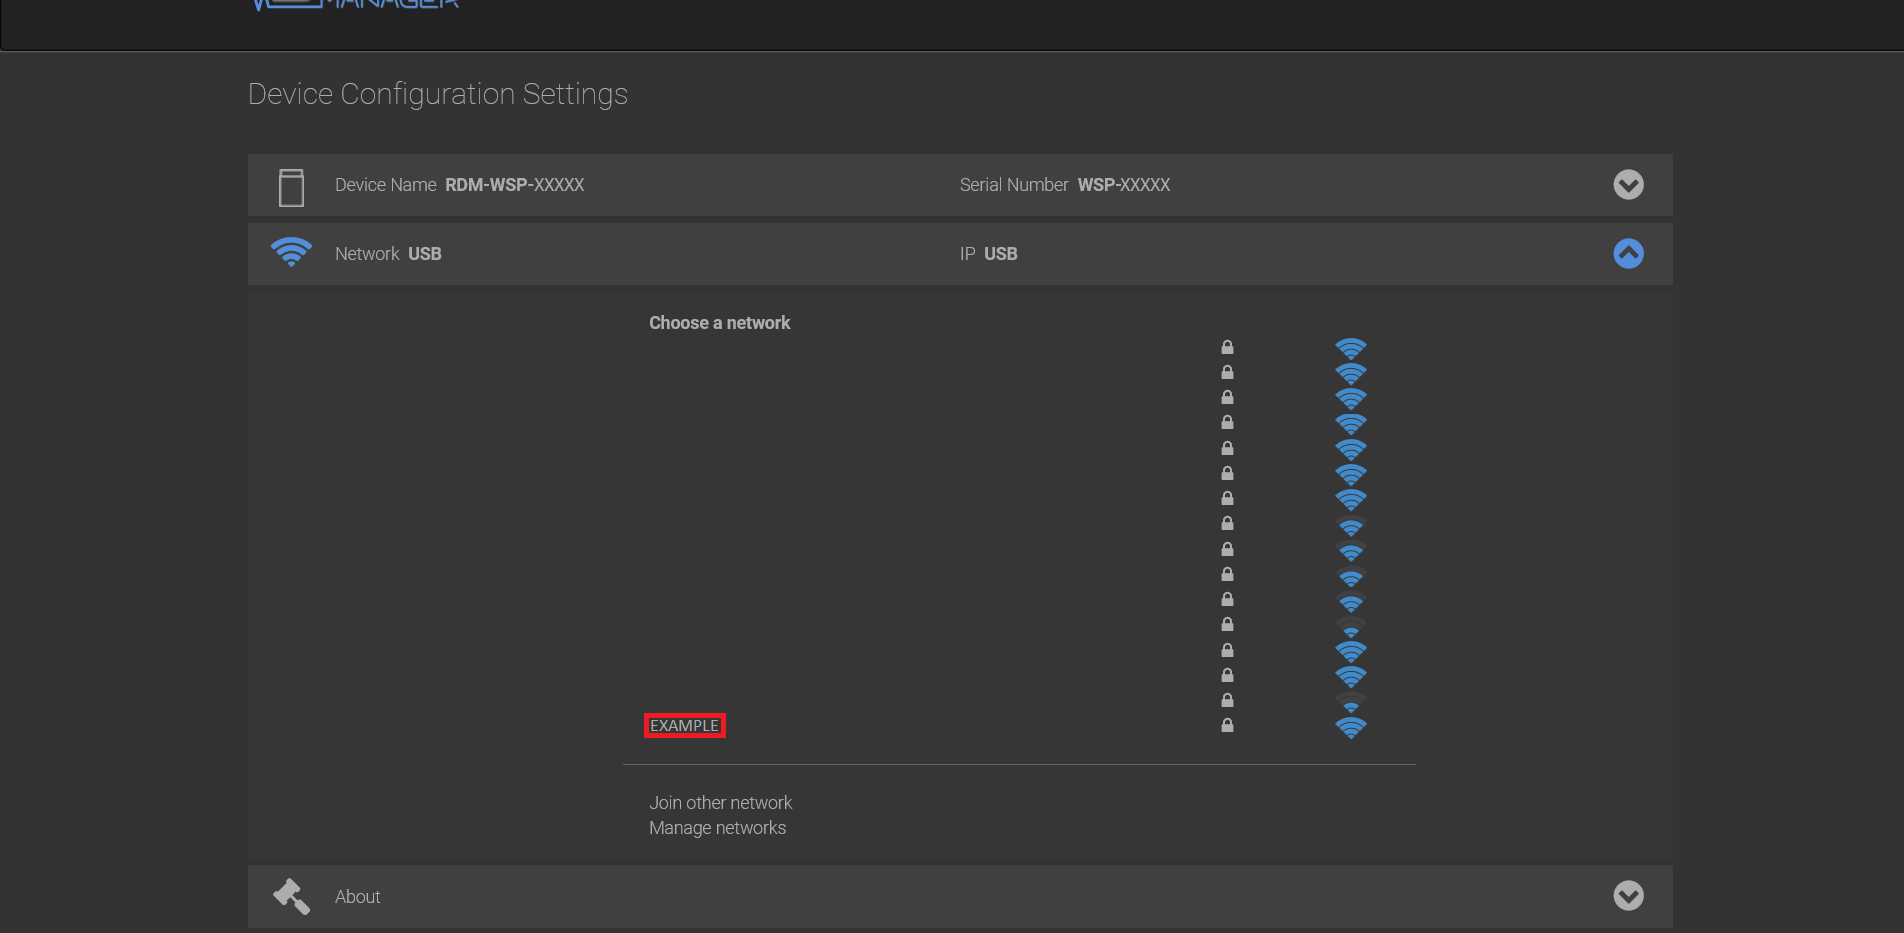
10. Enter your network’s password.
11. Click the “Connect” button to complete the process or click “Cancel” to exit without saving.
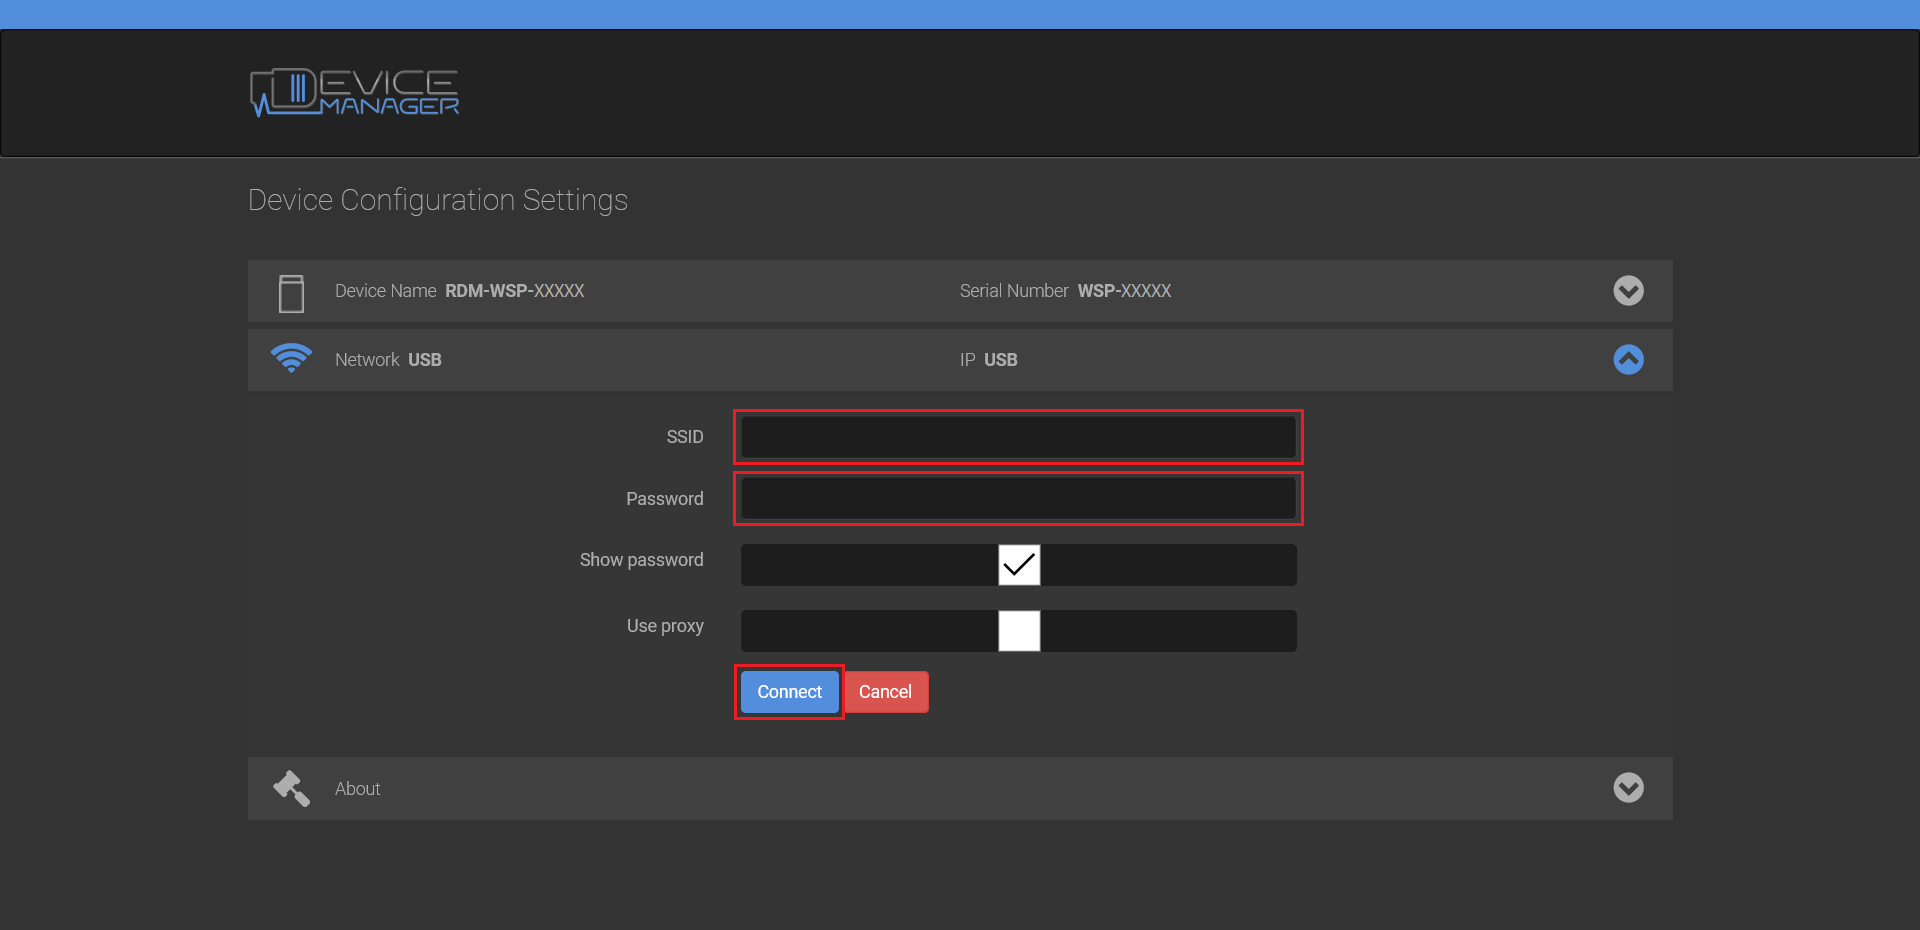
12. Once you have done this the VCI will attempt to connect to the network.

13. If your VCI is correctly connected to your network then you will see a check-mark next your network's SSID.
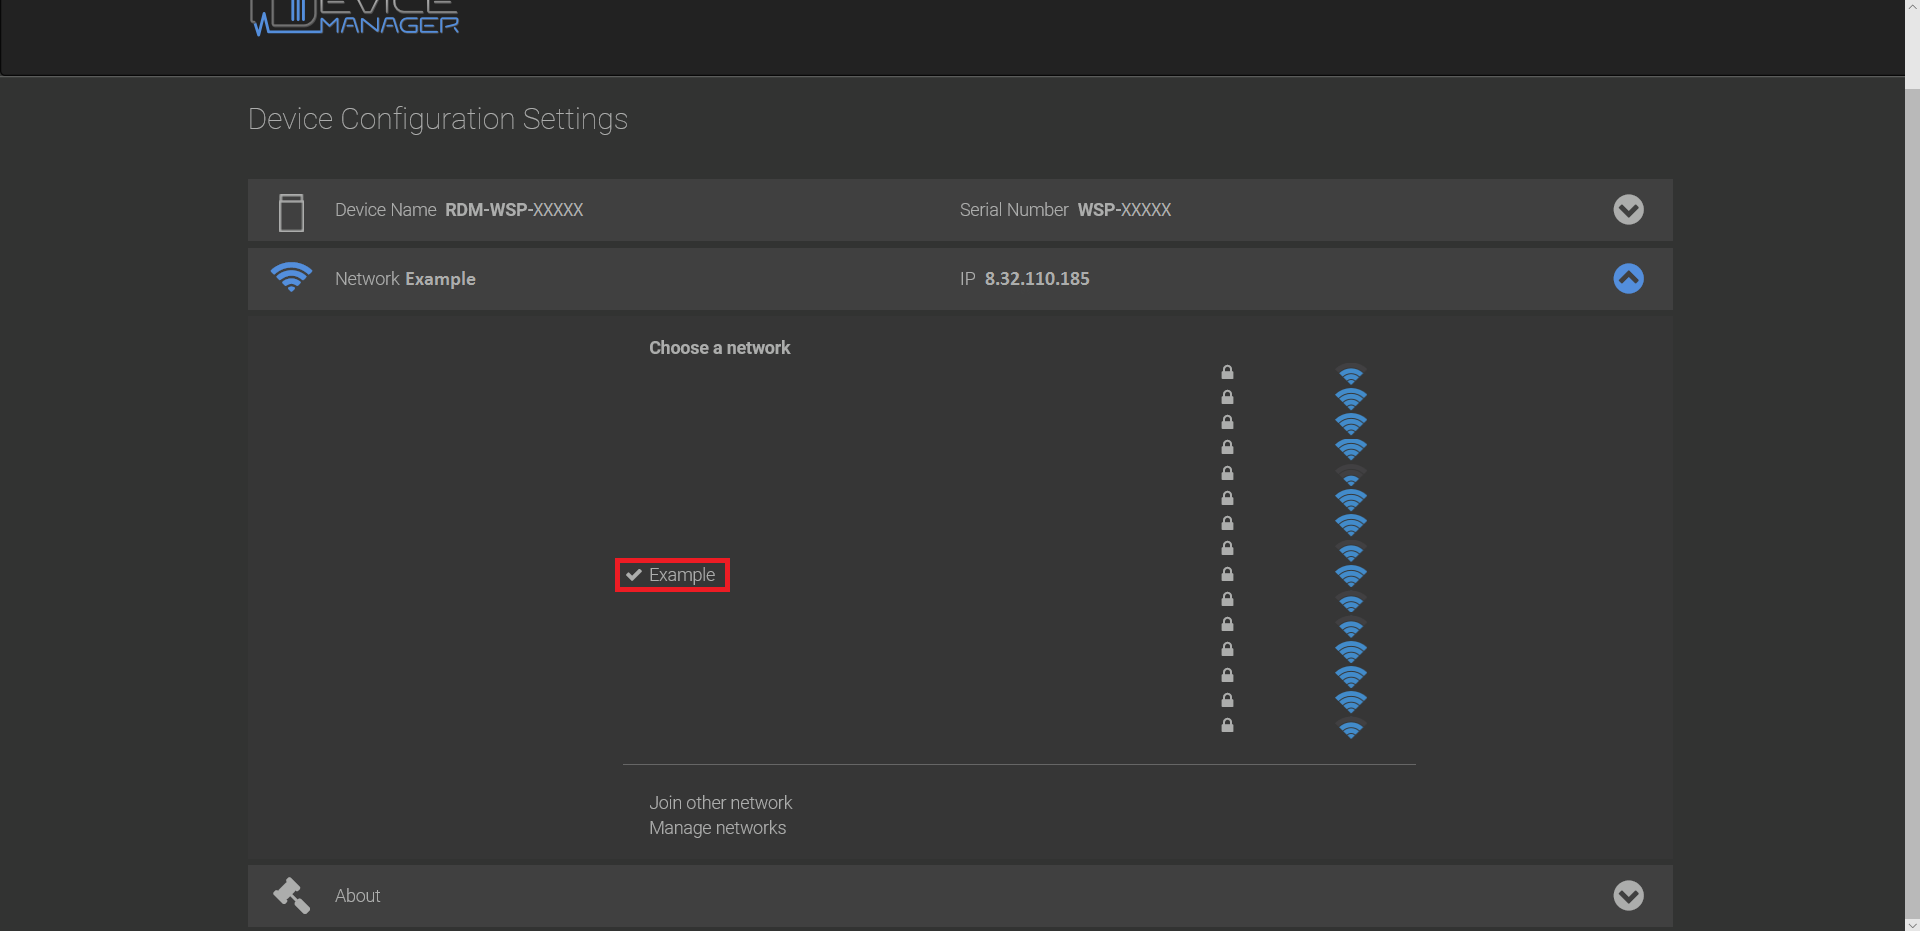
14. The VCI device is now connected to Wi-Fi. Close the Device Configuration Settings tab and the VCI Setup Utility.